Digital Design Methods
The official site of
Digital Design Methods
RhinoCam Tutorial
Content
Jump to the topic you are looking for
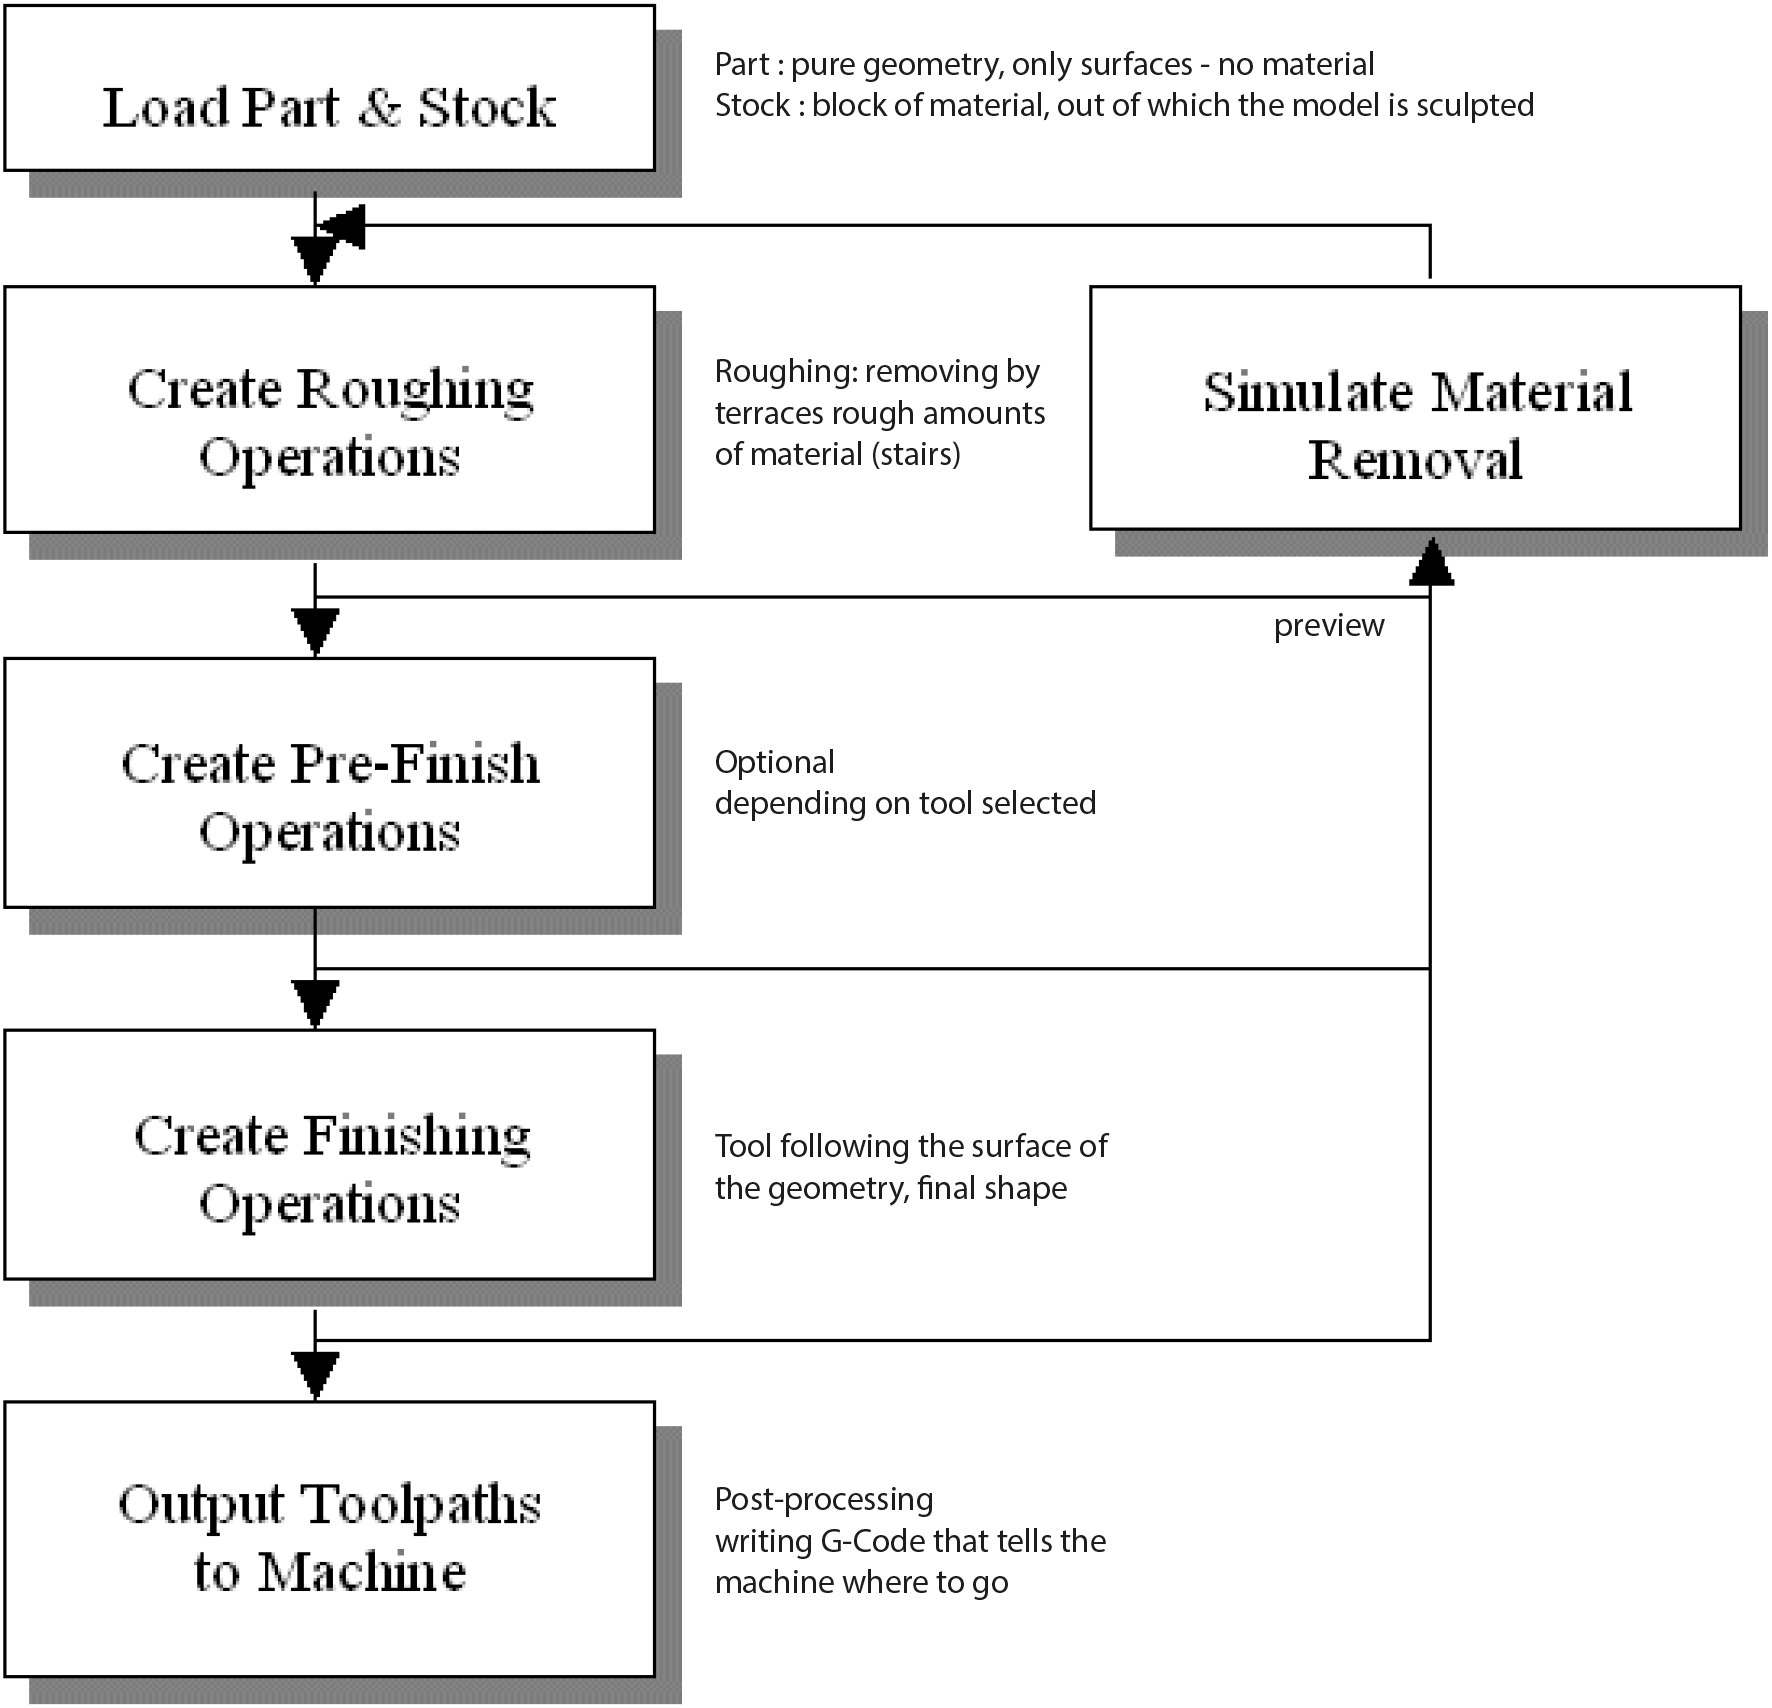
RhinoCam Workflow
Setup
Setup Document:
- Verify Units: go to Options > Units: make sure the document-units are set to millimeters When you create a new document: select Small Objects - Millimeters

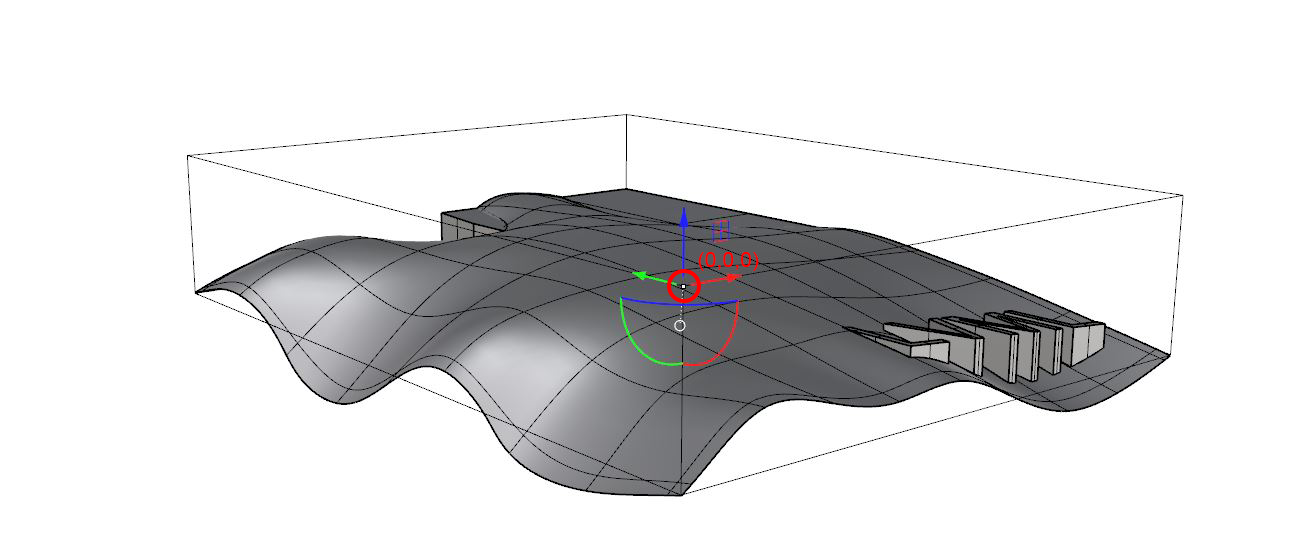
Locate Geometry:
draw a box representing your material to check that everything fits inside
make sure, that all your geometry is positioned in positive X, positive Y and negative Z Origin(0,0,0) at the top-upper-left corner of the box
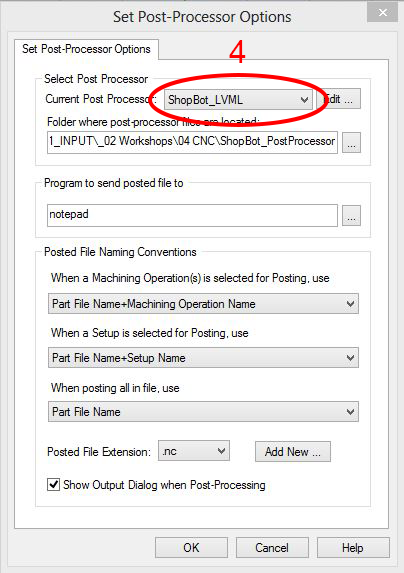
Setup Post-Options: select ShopBot-LVML as Current PostProcessor and .nc as Posted File Extension. You find the right PostProcessor under the following path on the server: \01_DesignStudio\01_INPUT_02 Workshops\04 CNC
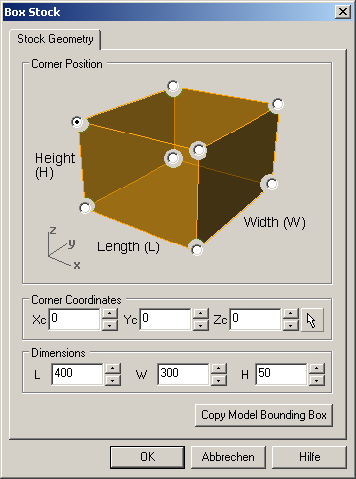
left-click on Stock > Box Stock
define the top-lower-left corner = (0,0,0)
Tools
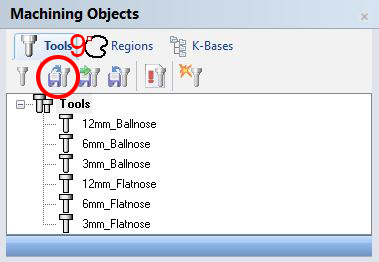
go to the Cutting Tools Browser > if it‘s not yet visible, select the menu RhinoCAM > Cutting Tools Browser
you can define your own tools or
Load Tool library
select shopbot-toollib.csv > OK > this should load 6 tools (3,6,12mm, ball- and flatnose) to your library
select the tool you want to use (we will start with the 12 mm Flatnose)
Different results with different tools and same stepsize:
left: 6mm ballnose tool
right: 12mm ballnose tool
The result is smoother with the bigger tool!
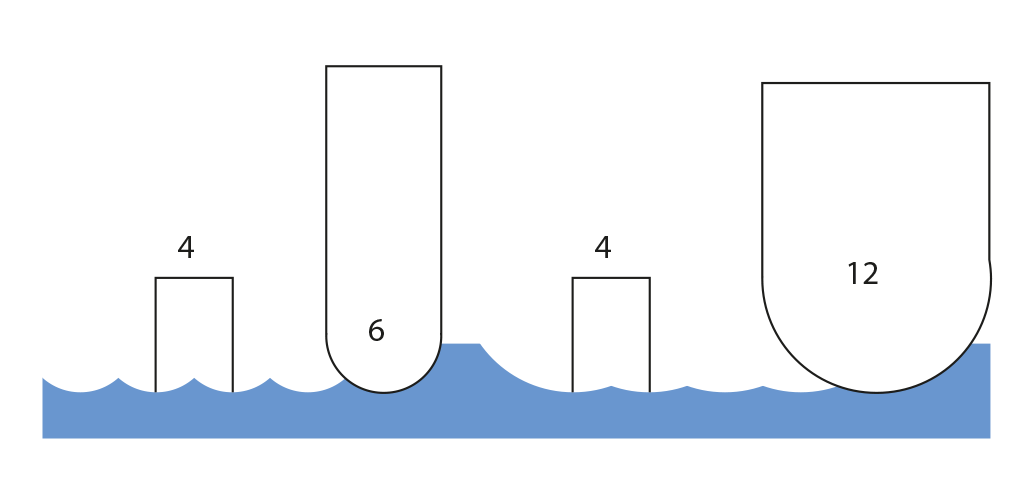
for flat surfaces, select flat-nose tools
for slopes, select ball-nose tools
for smooth surfaces, select larger tools
for narrow valleys, select thinner tools
for fast milling, select big diameters
for fine details, select small diameters
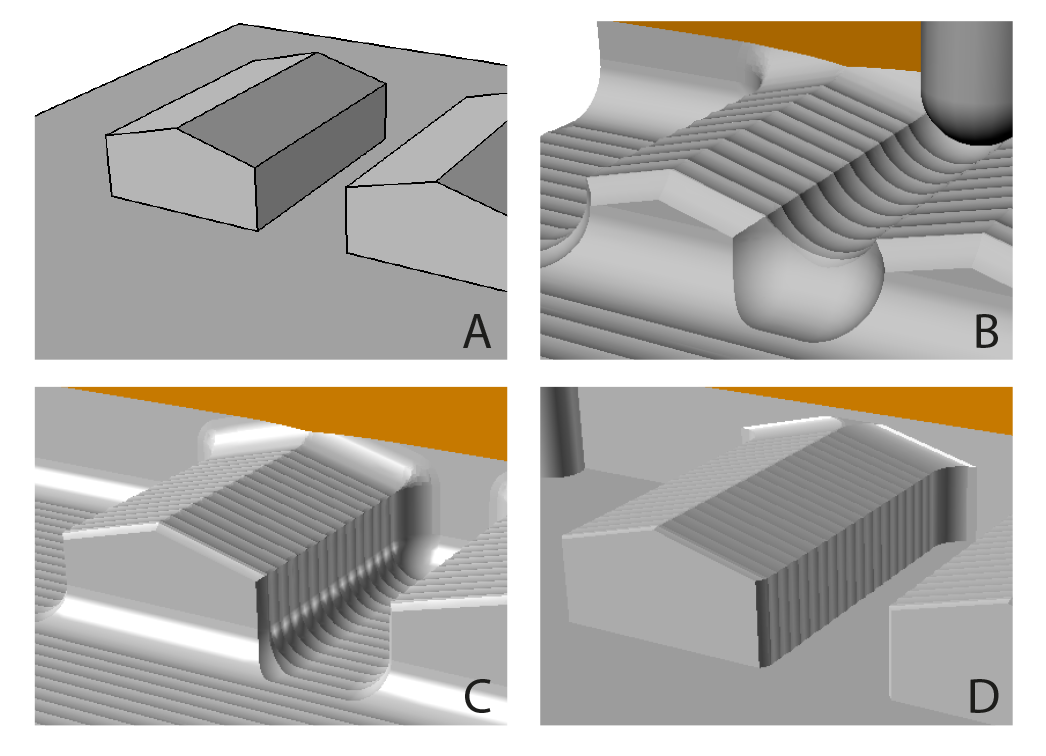
A) houses stand too close to each other
B) large tool (12mm) doesn‘t fit inbetween > a lot of rest material
C) ballnose tool leaves rounded edges
D) result with a flatnose tool
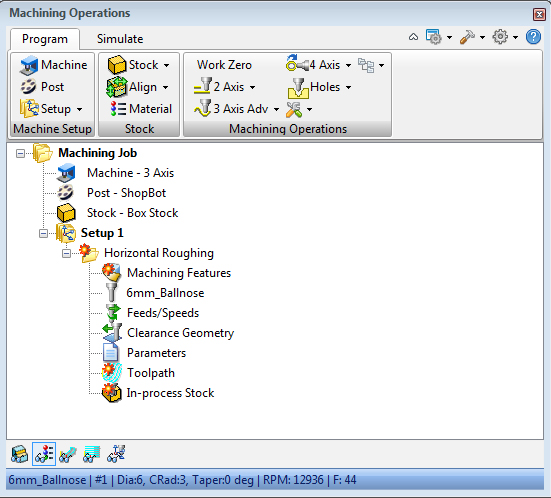
Machining operations
Machining Operations are different strategies to generate toolpaths - three dimensional lines in space as paths for the milling bit.
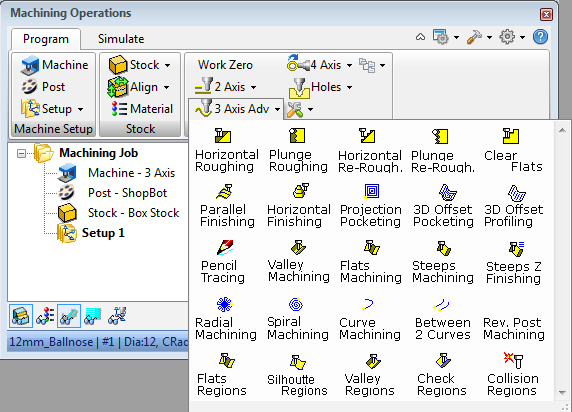
switch to the Create tab
click 3 Axis Adv > Horizontal Roughing > the roughcut quickly gets rid of a lot of material, step by step.
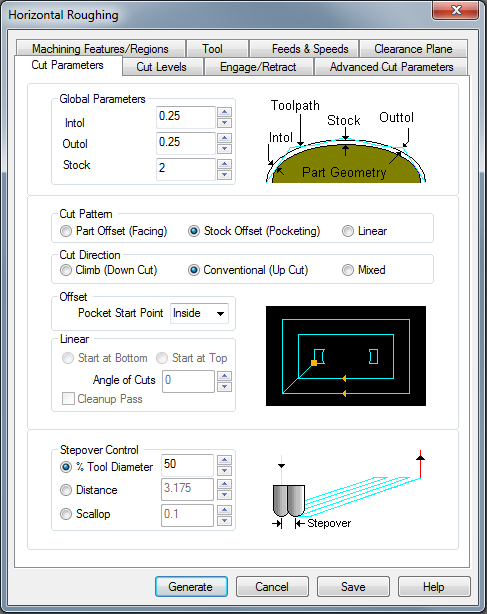
in the dialog-box that pops up, go to the Cut Parameters tab
a) set the Stock (e.g. 3 mm for foam)
b) under Cut Pattern, select Linear
c) under Cut Direction, select Mixed
d) under Stepover Control set % Tool Diameter to 90 for foam, less for harder materials…
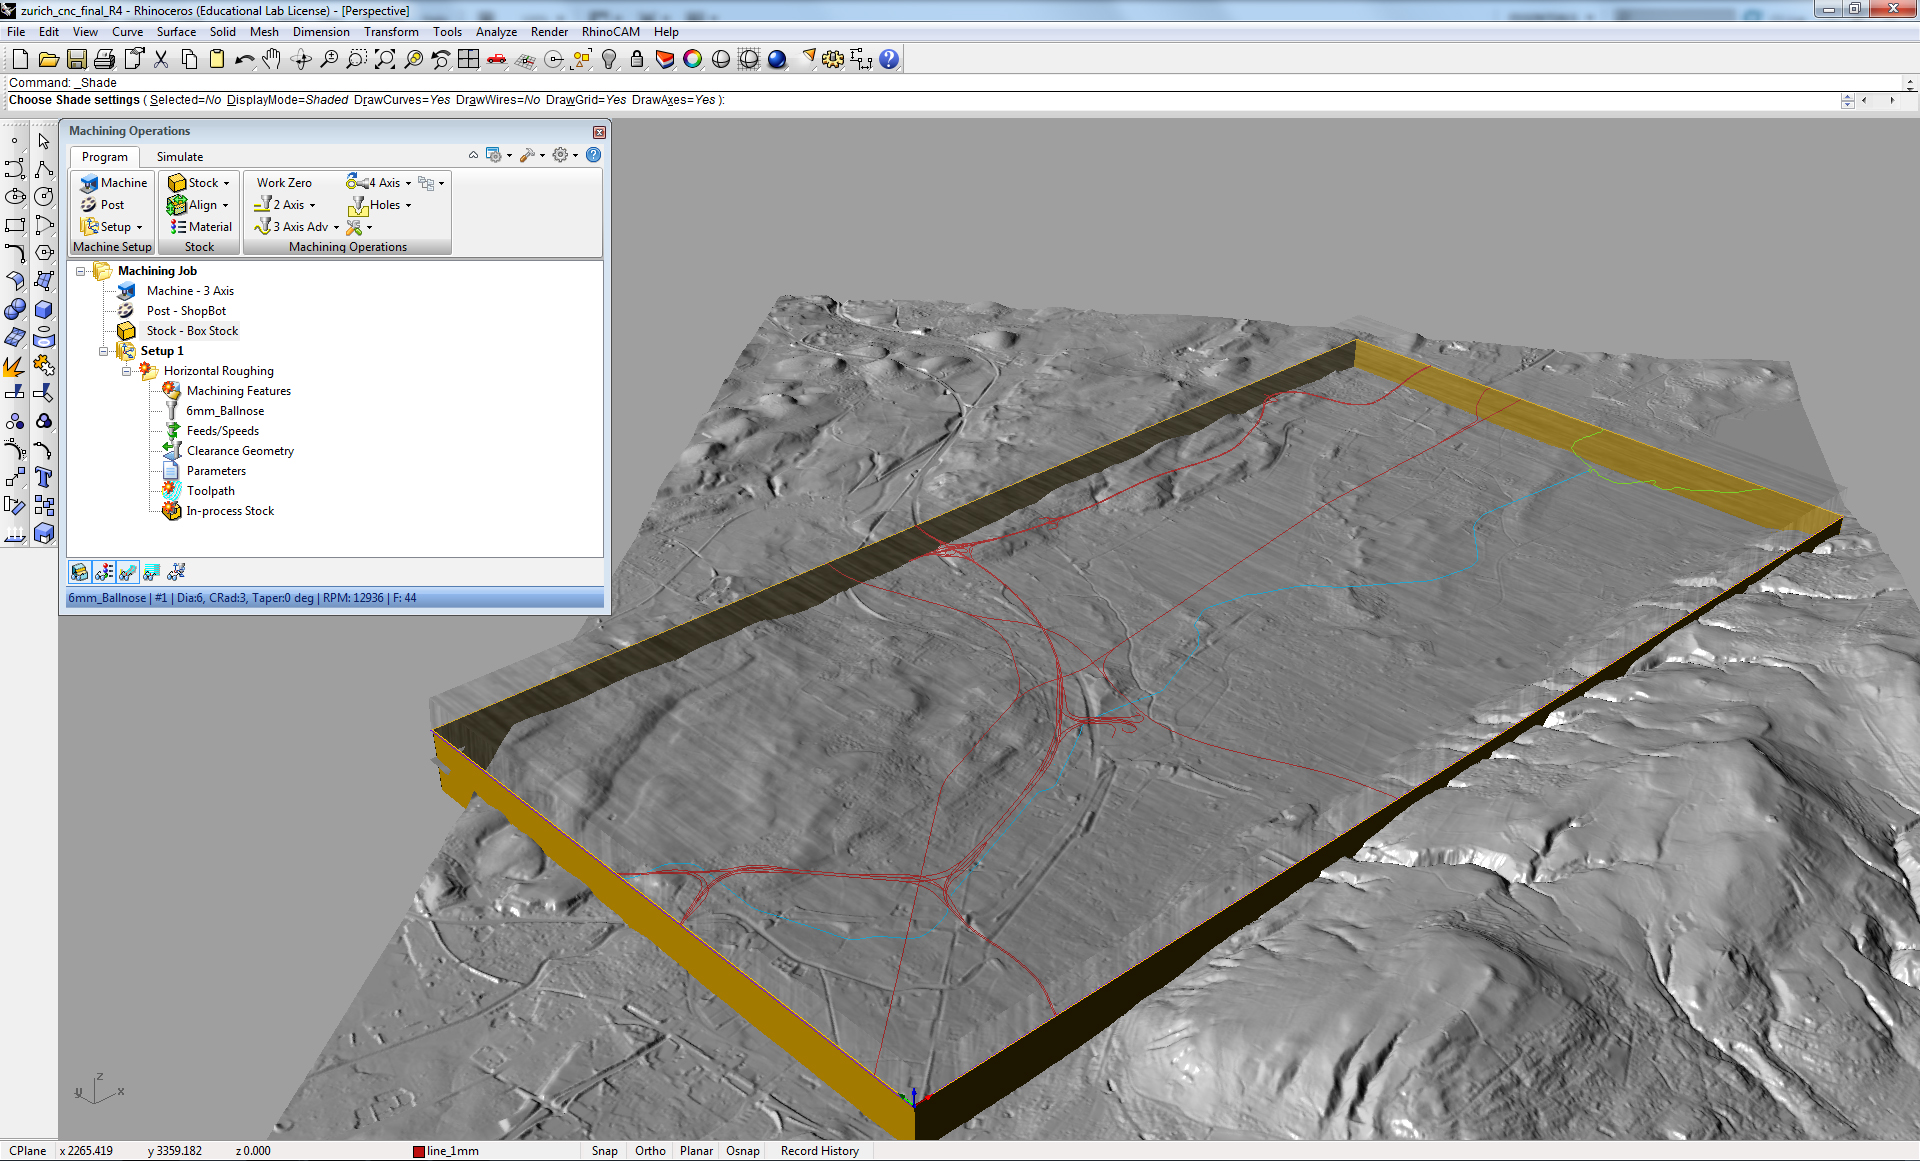
e) in the Cut Levels tab under Stepdown Control put % Tool Diameter to 100%-200% for foam, 50% for woodclick Generate to calculate the toolpath > you should now have a subfolder of Setupv 1 called Horizontal Roughing, which contains all the different components / parameters that defines the operation > double-click on one of them to change the settings > a red star on one of them means Regeneration necessary (right-click > Regenerate)
switch to the Simulate tab and hit play
configure visibility using these buttons:

A) Part visibility
B) Stock visibility
C) Material Texture visibility
D) Toolpath visibility
E) Toggle Machine GSYS
F) Tool visibility
G) Holder visibility
H) Machine Tool Visibility
switch back to the Create tab
if necessary, select a different tool from the list
click 3 Axis Adv> Parallel Finishing >in this operation, the tool will follow the surface
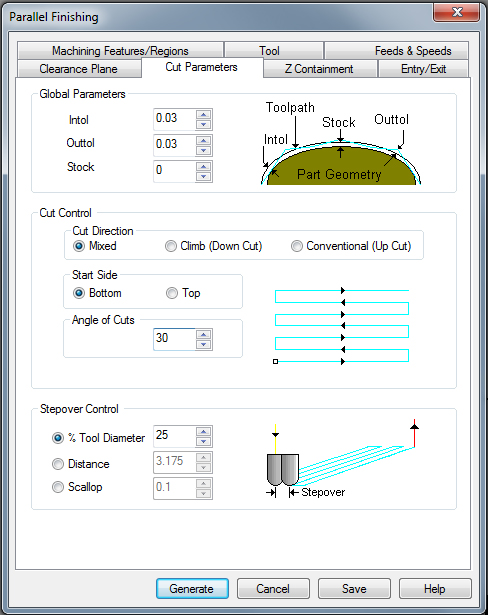
in the dialog-box, that pops up, go to the Cut Parameters tab
a) set the Stock to 0 (normally) and Cut Direction to Mixed
b) define the Angle of Cuts and the % Tool Diameter > depending on the desired pattern (min 25, max 90).
c) in the Feeds and Speeds tab, set the Speed to 16‘000 RPM and the Cut (cf) to 200 mm/min.
d) don‘t forget to set your tools in the tool tabclick Generate again and Simulate the operation > you can create as many machining operations as you like until you are satisfied with the result.
The most helpful Milling Operation Are „Horizontal Roughing“, Parallel Finishing“, „Curve Machining“ and „Engraving“. But you can also experiment with „Pocketing“ or „Between 2 Curves Machining“ and other operations.
Regions and Curves

Closed curves can be selected as so called Regions - either before the Machining Method is chosen or under the Features/Regions tab by clicking Select Curves as Regions.
These curves then act as boundary to limit the toolpath to the specific area. Curves can also be nested (islands).

Engrave a road
select a (open or closed) 2D curve
for sharp edges, select a flatnose mill from the list
click 3 Axis Adv > Curve Machining
in the Cut Parameters tab, define a negative stock
click Generate
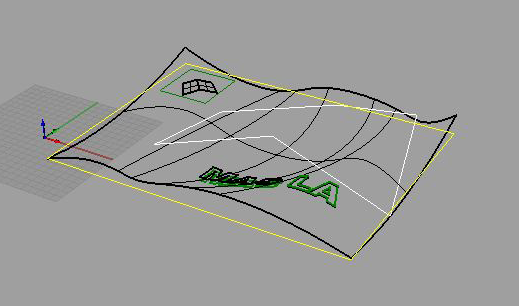
RhinoCAM automatically projects the curve onto all visible geometry and runs the tool along the rail

boarder of a river…
- select two 2D curves (both open or both closed)
- click 3 Axis Adv > Between 2 Curves Machining
- click Generate
- RhinoCAM creates not parallel toolpath-lines but lines that „blend“ curves into one another. Stepsize is smaller where the curves are closer and bigger where they are more distant > the resulting pattern integrates well in the landscape if for example the two borders of a river are selected…

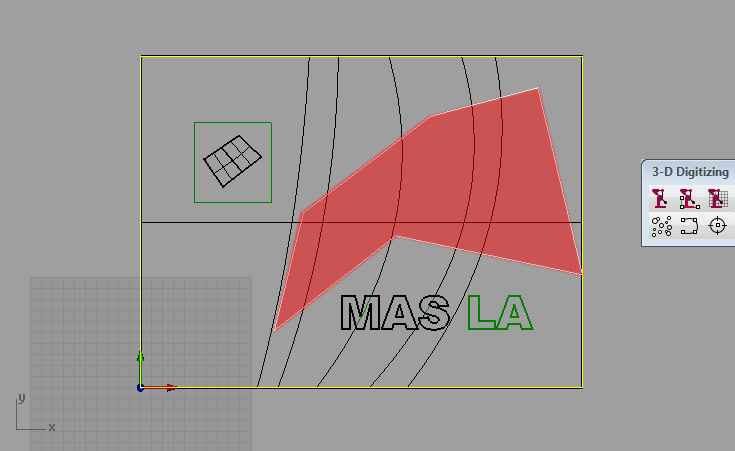
To mill the inner area (red), select the white bounding curve

To mill the outer area (red), select the white AND yellow bounding curve
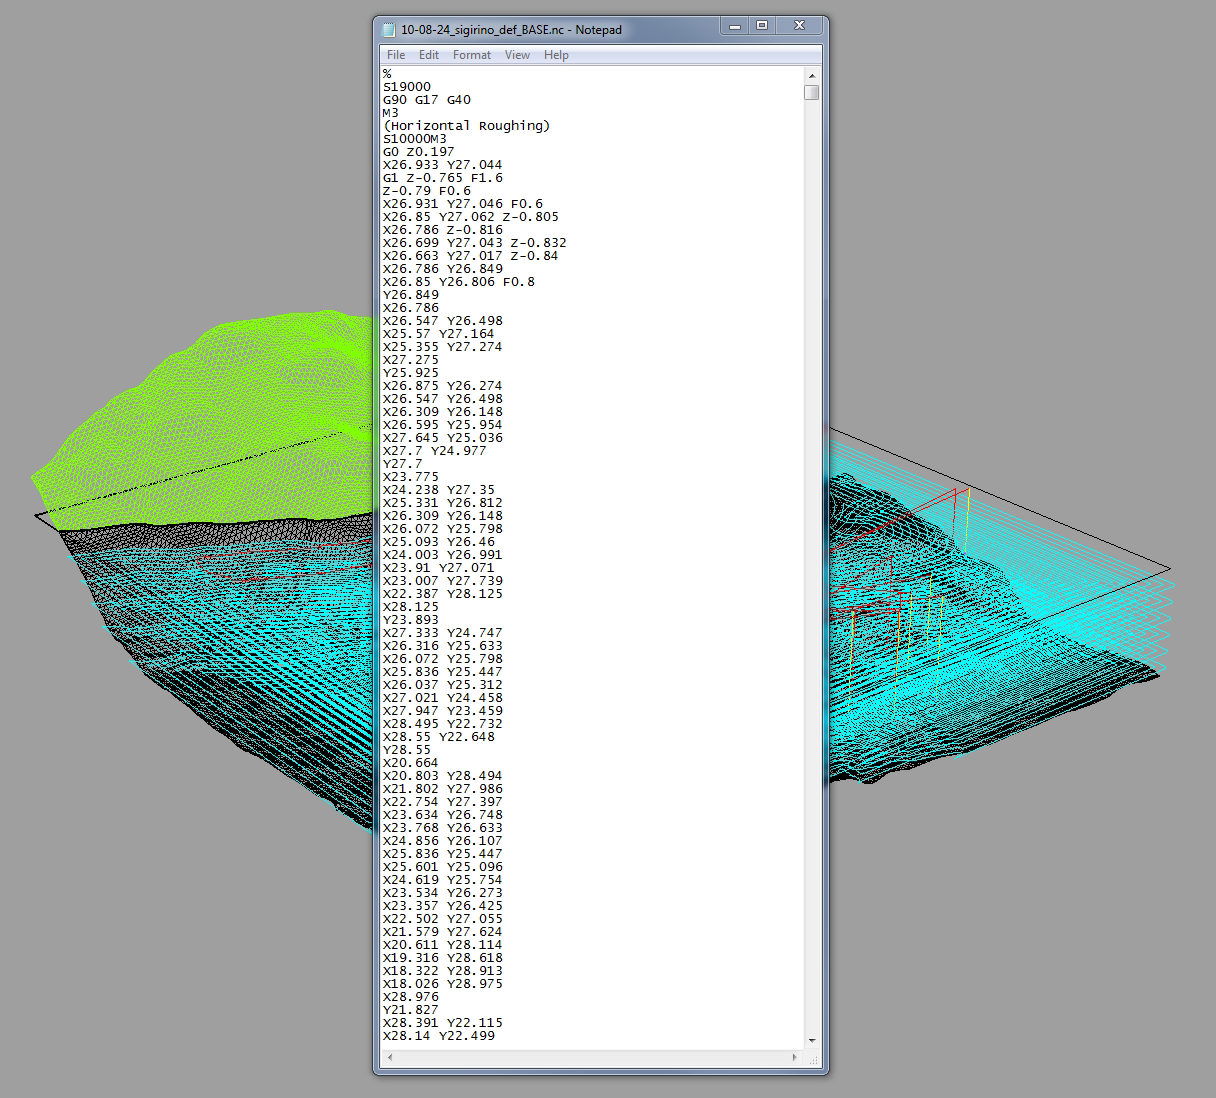
Post Processing
post the individual jobs to separate files. right-click on the machining operation you want to post and click [Post]
specify the folder location and the filename (e.g.: NAME_12Ball_6Flat.nc)
click [Post] to write G-Code file
put your G-Code on a USB stick and bring it down to the RapLab