Digital Design Methods
The official site of
Digital Design Methods
MultiCam Tutorial
Content
Jump to the topic you are looking for
LAB Set Up
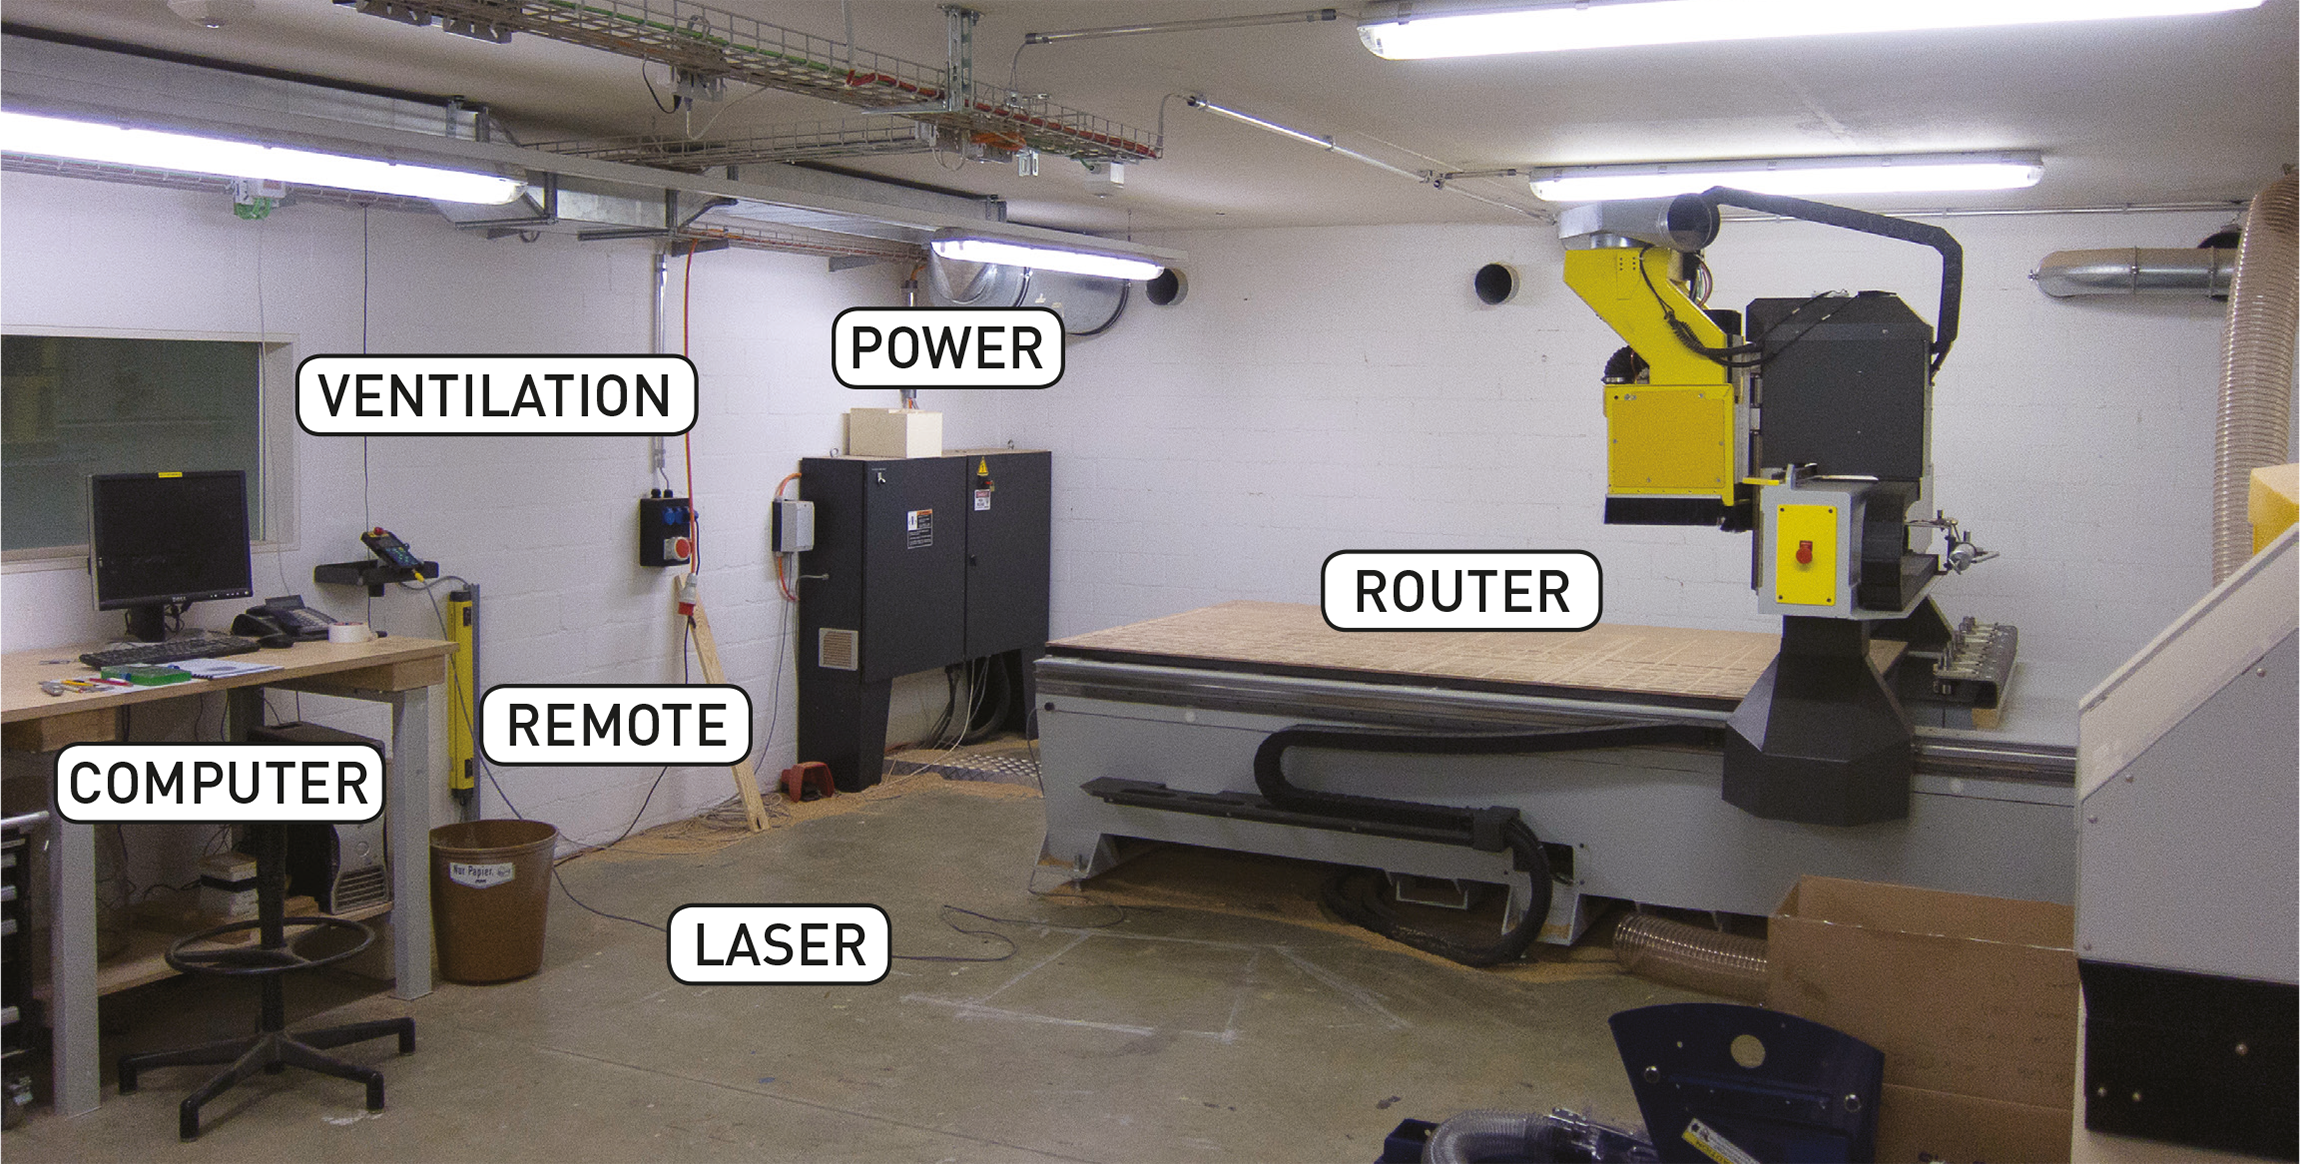
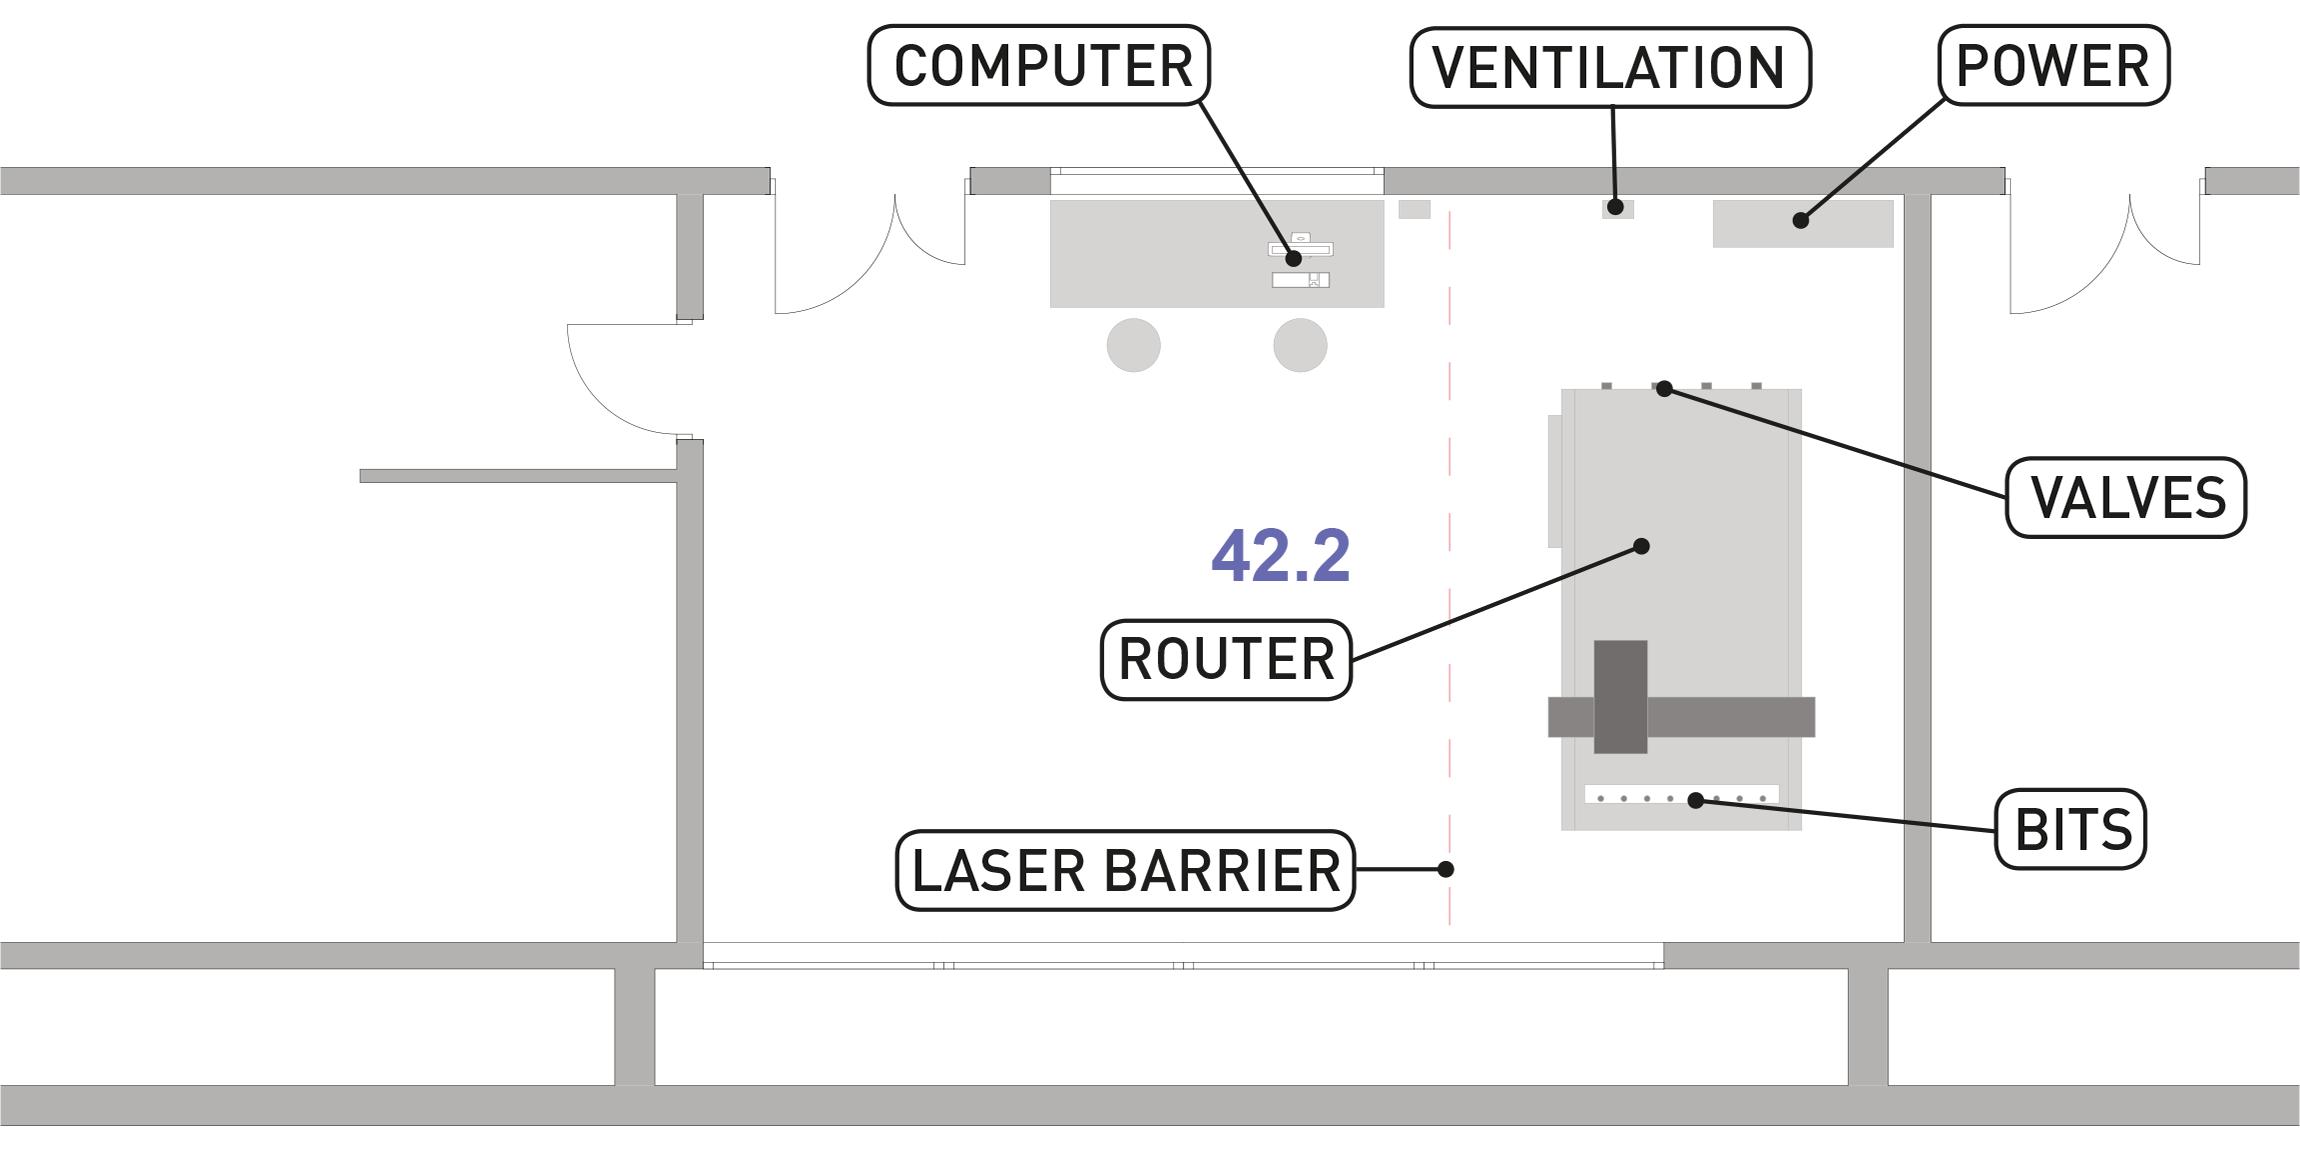
Here a short overview of the LAB-space
Controller
Machine
1.
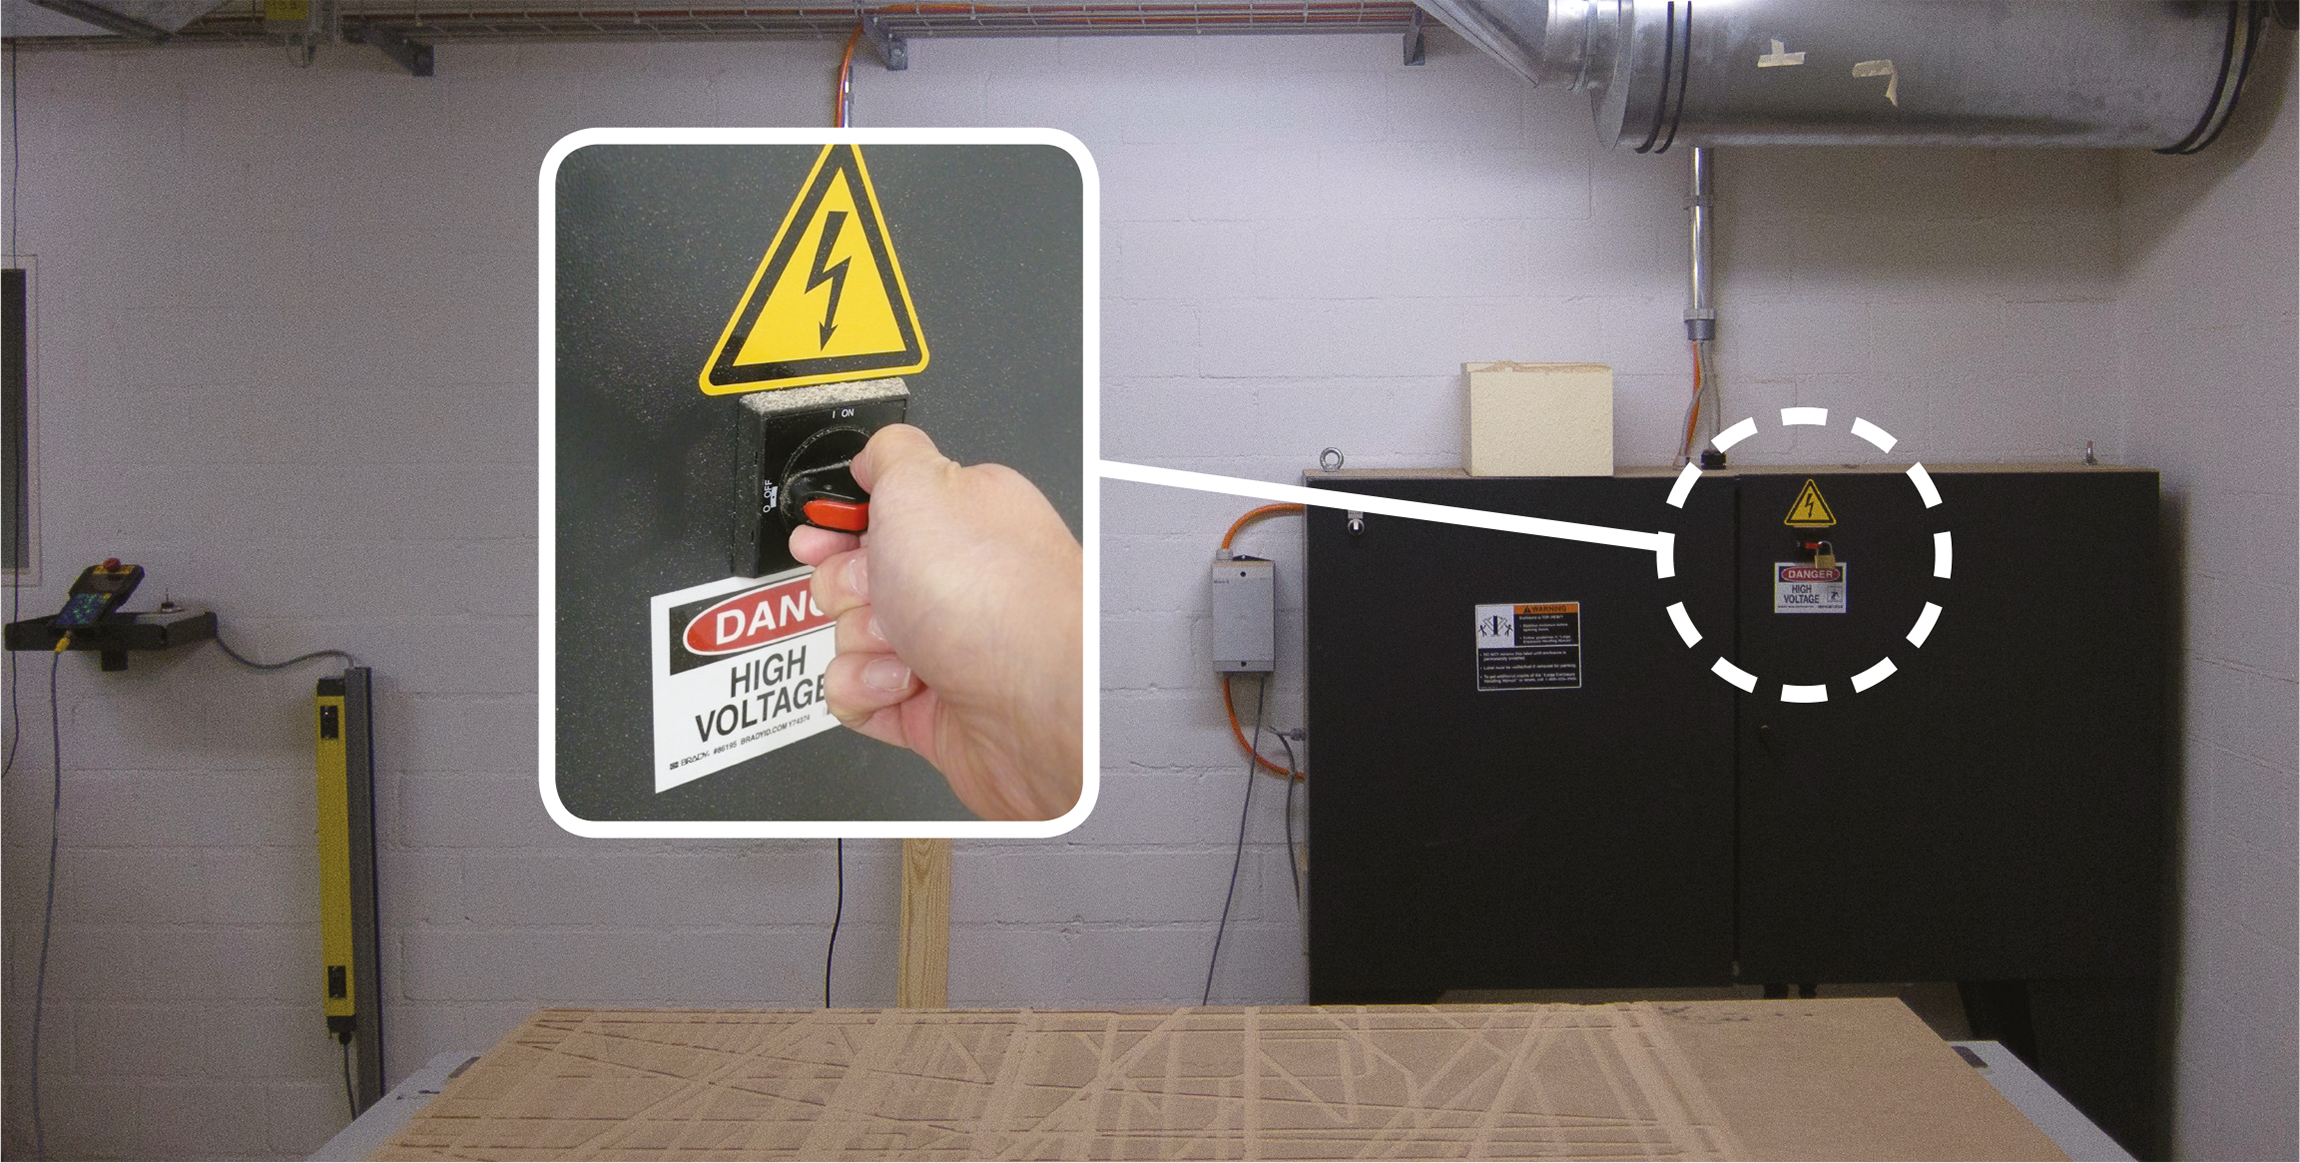
Turn on the mill with the switch on the cabinet. You‘ll need the key to the lock.
2.
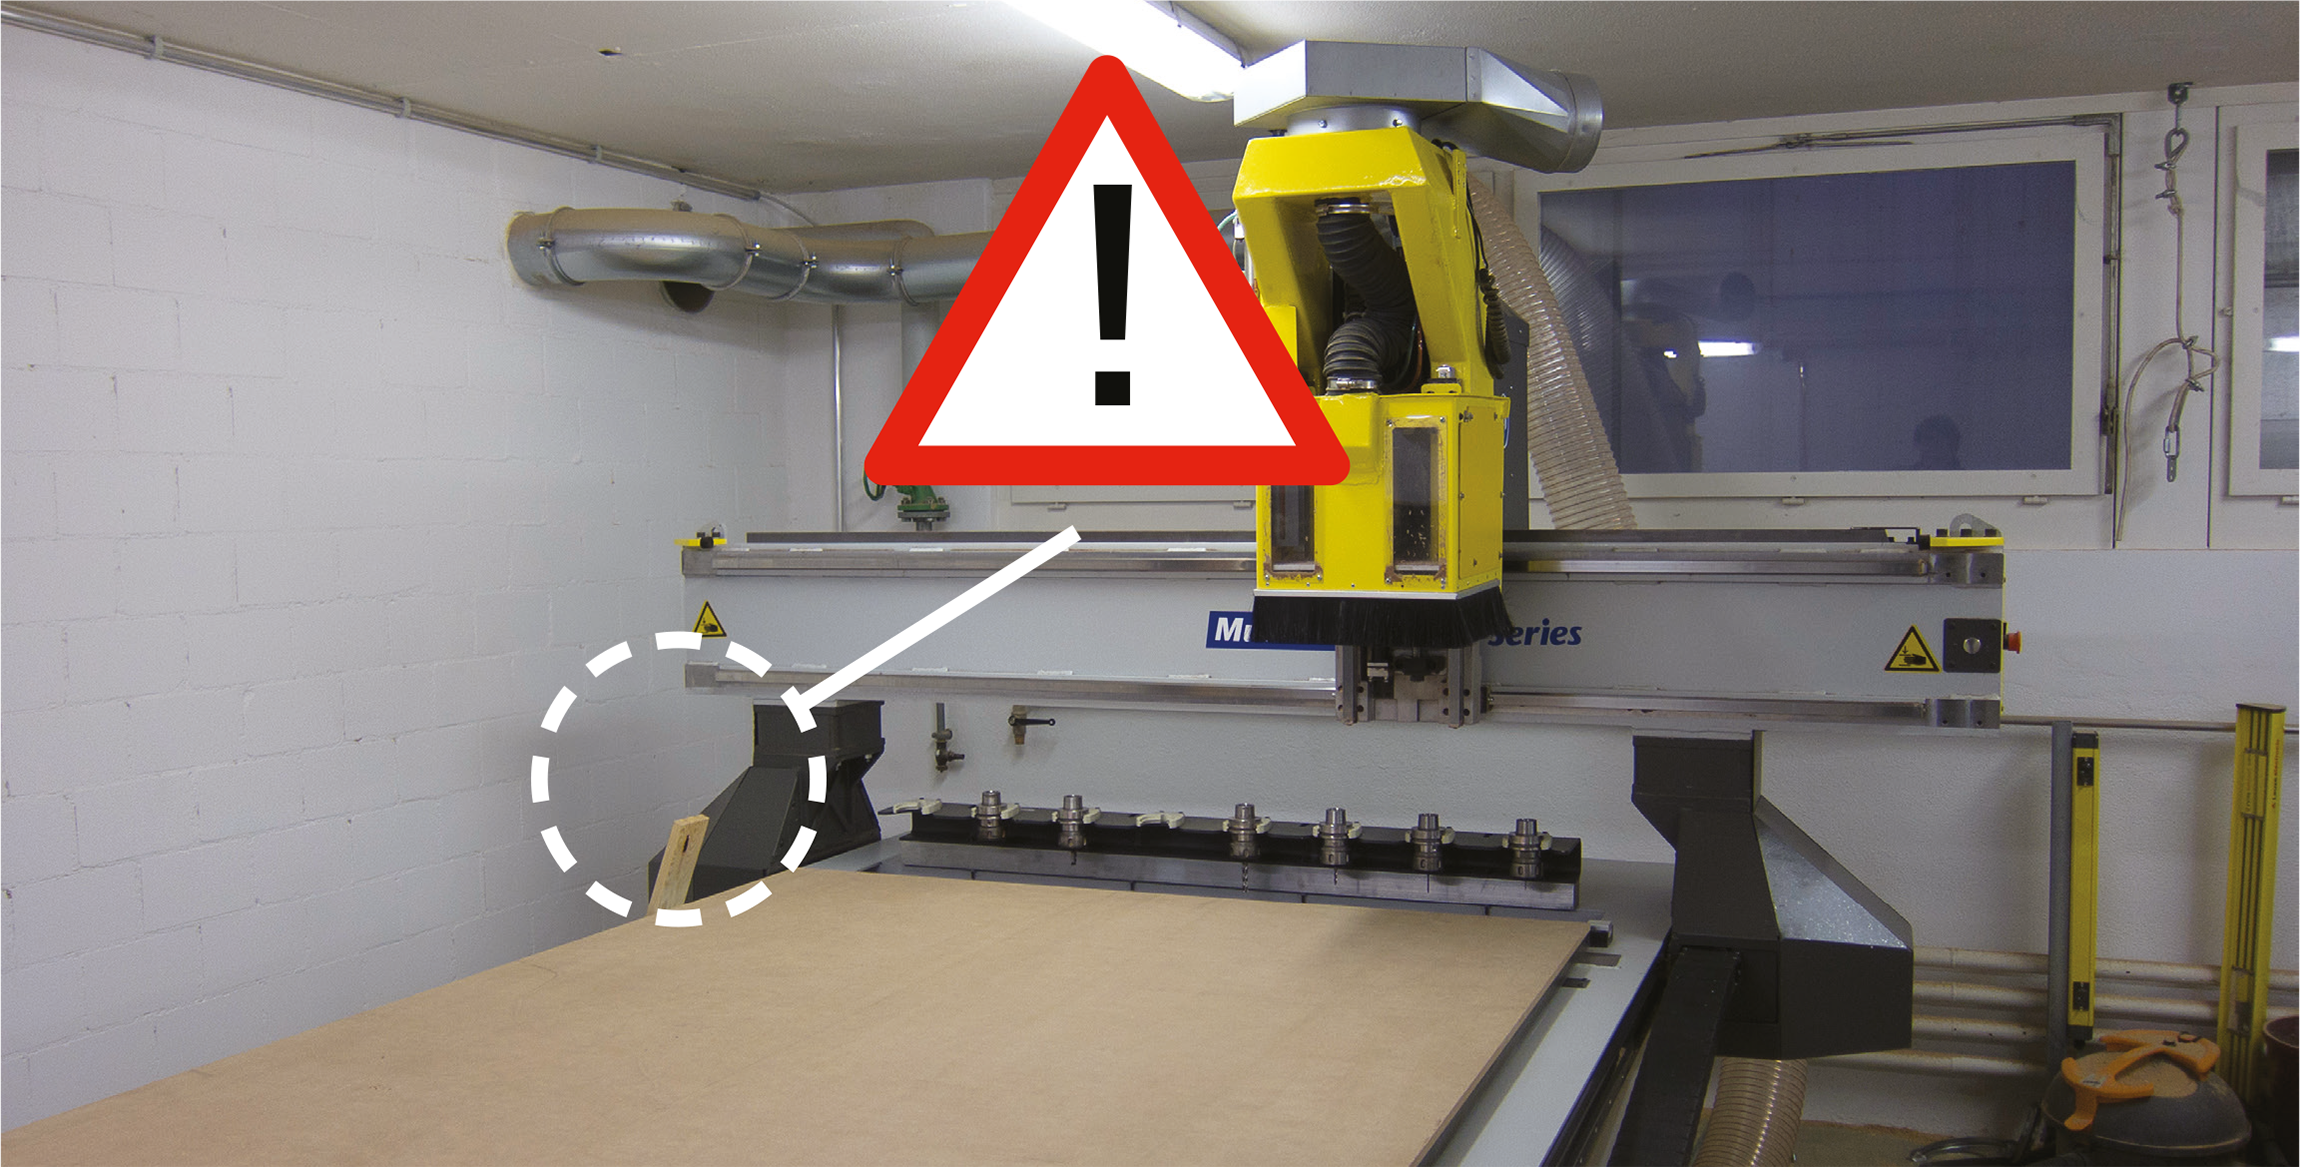
Make sure there are no obstacles around the mill or leaning against it. The ganter must be able to move freely.
Clean the milling surface with a vacuum or broom.
3.
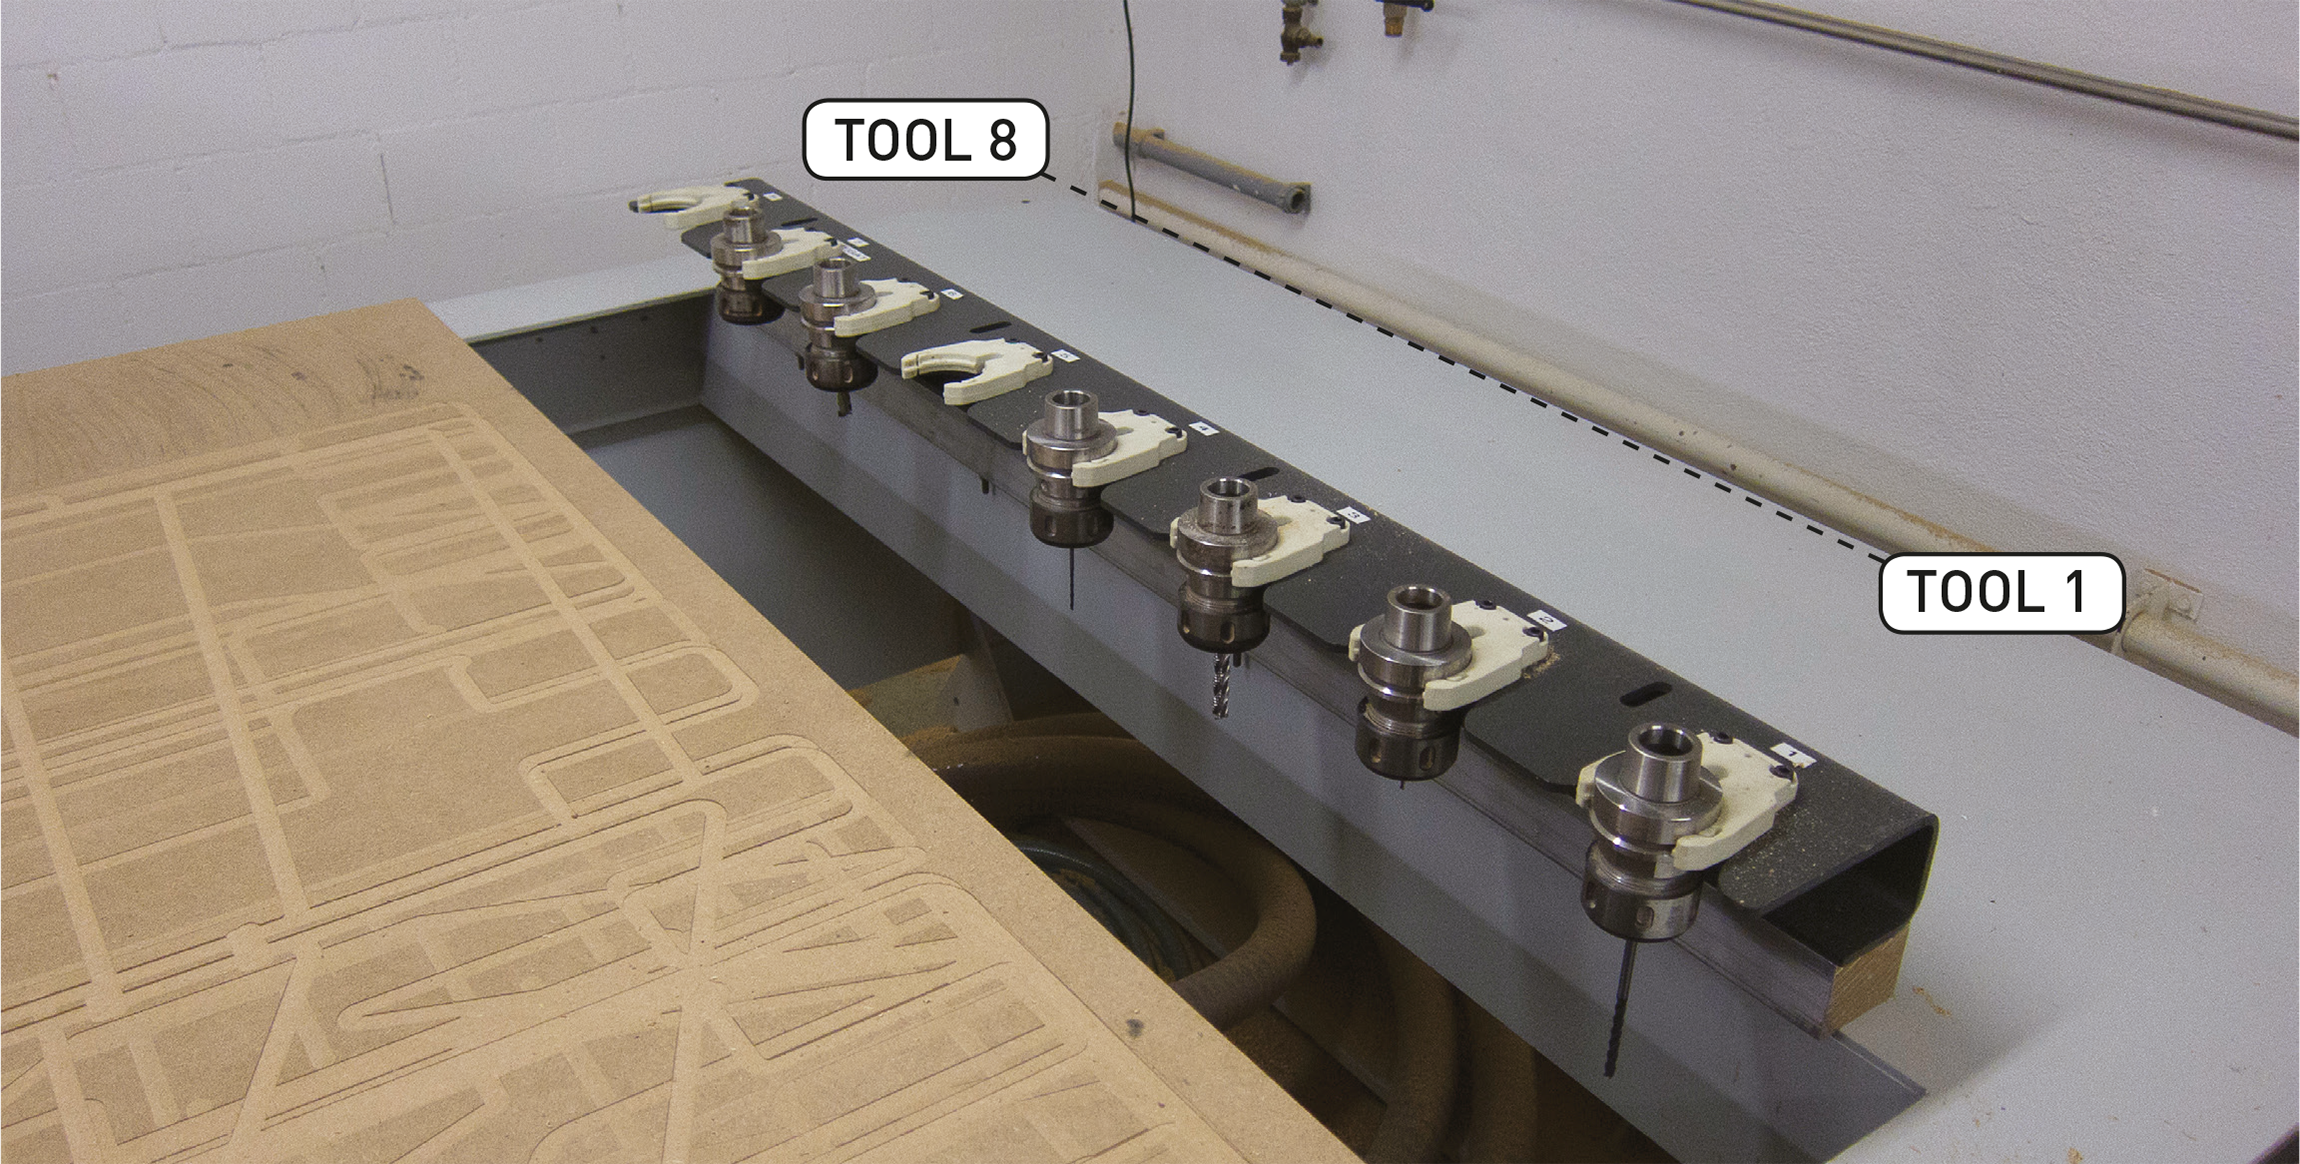
Check the parked milling bits and note their position. Are the ones you need installed?
4.
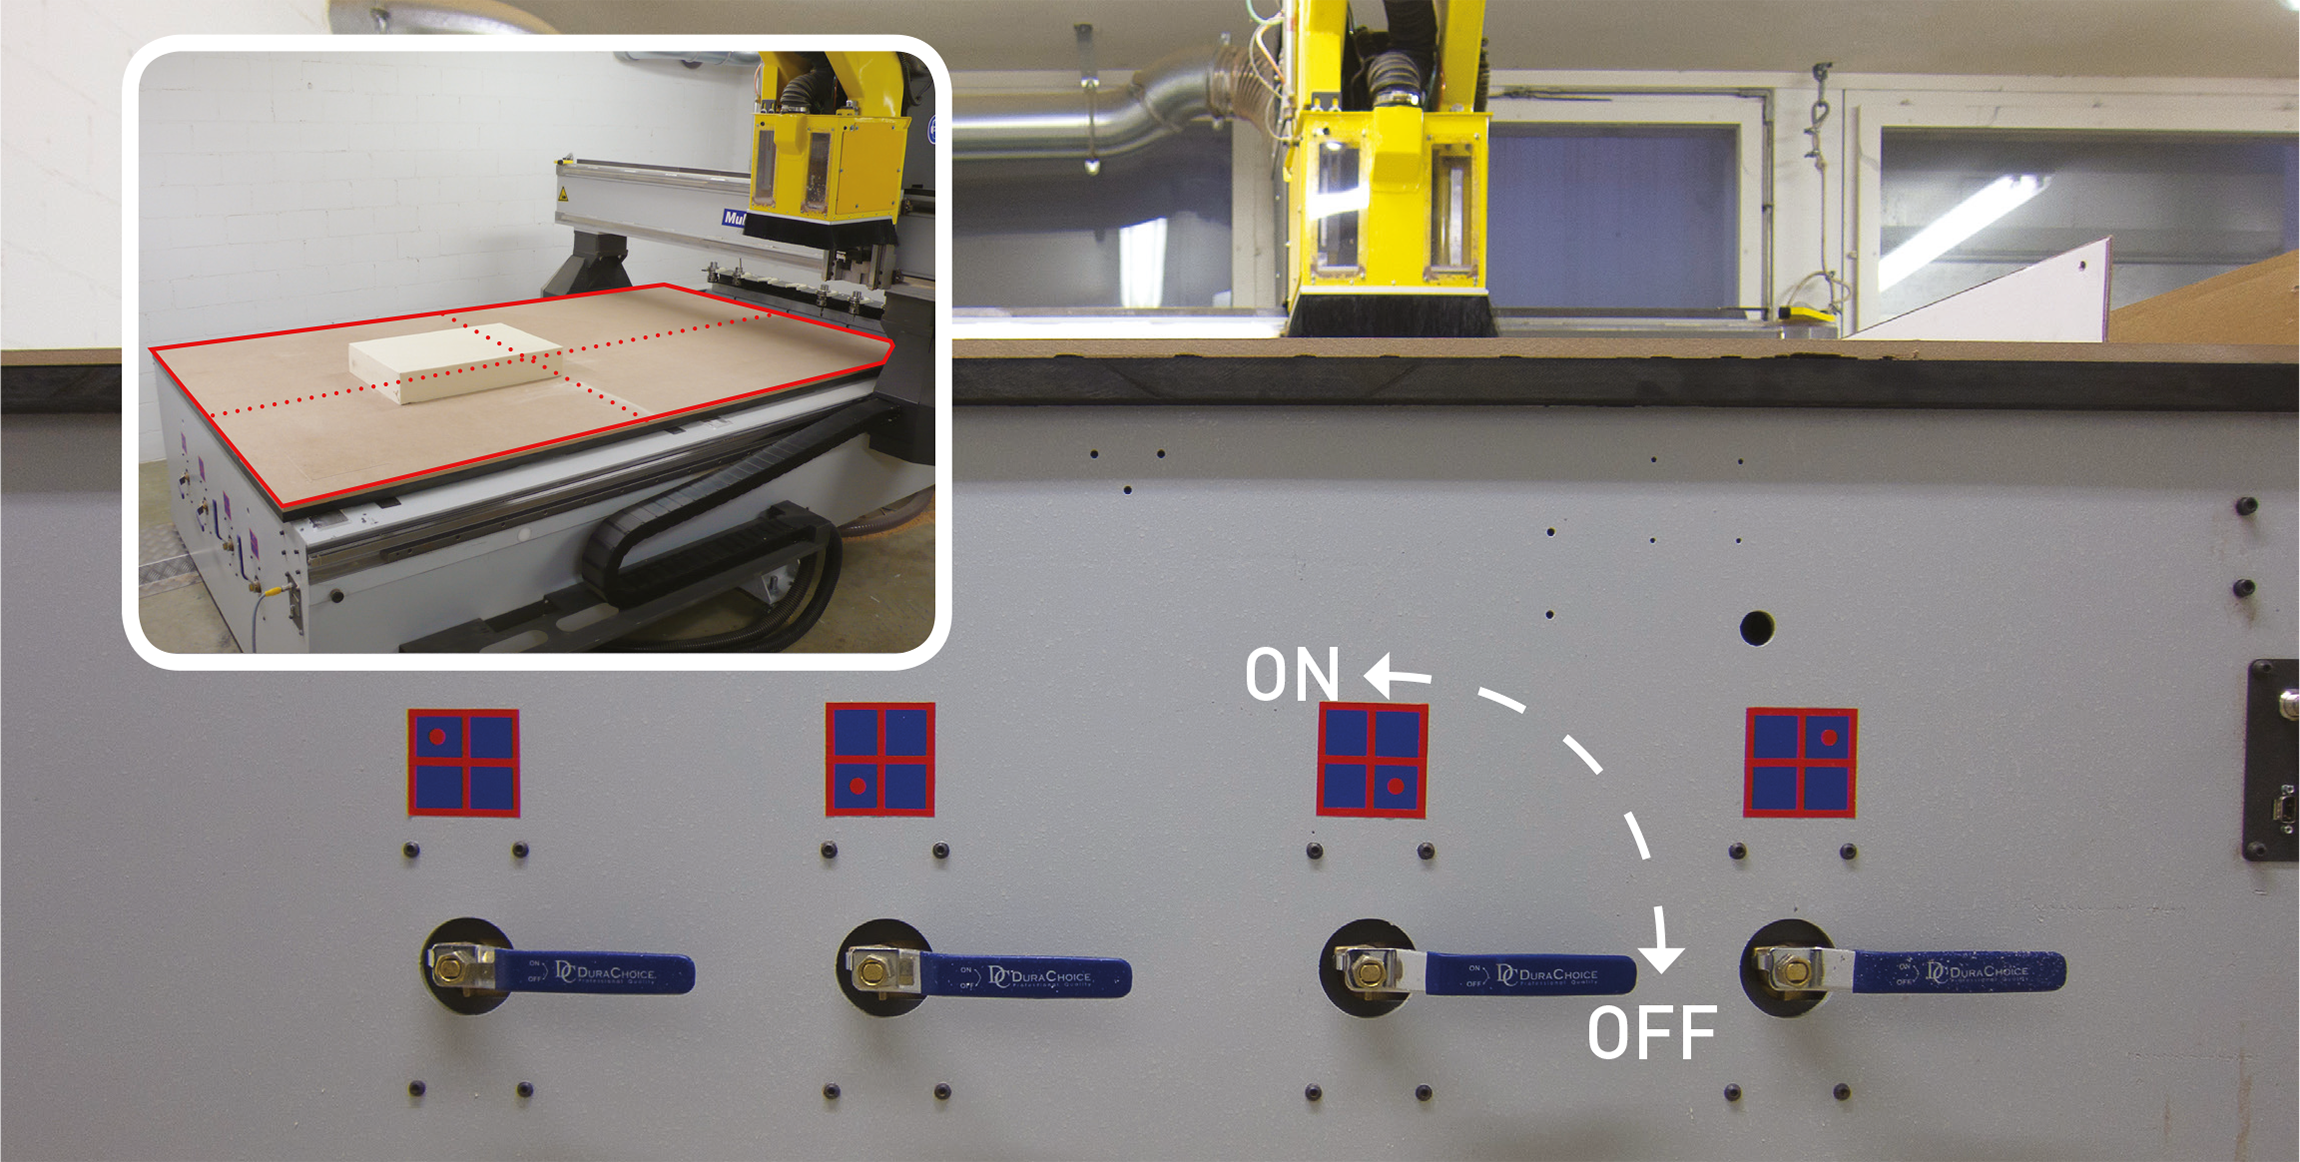
Turn suction on for each of the 4 areas of the table surface; only turn on the area(s) that you need. This will result in better suction.
Setup
1.
When the router is turned on, it has no way of knowing where it‘s positioned. It therefore needs to be homed.
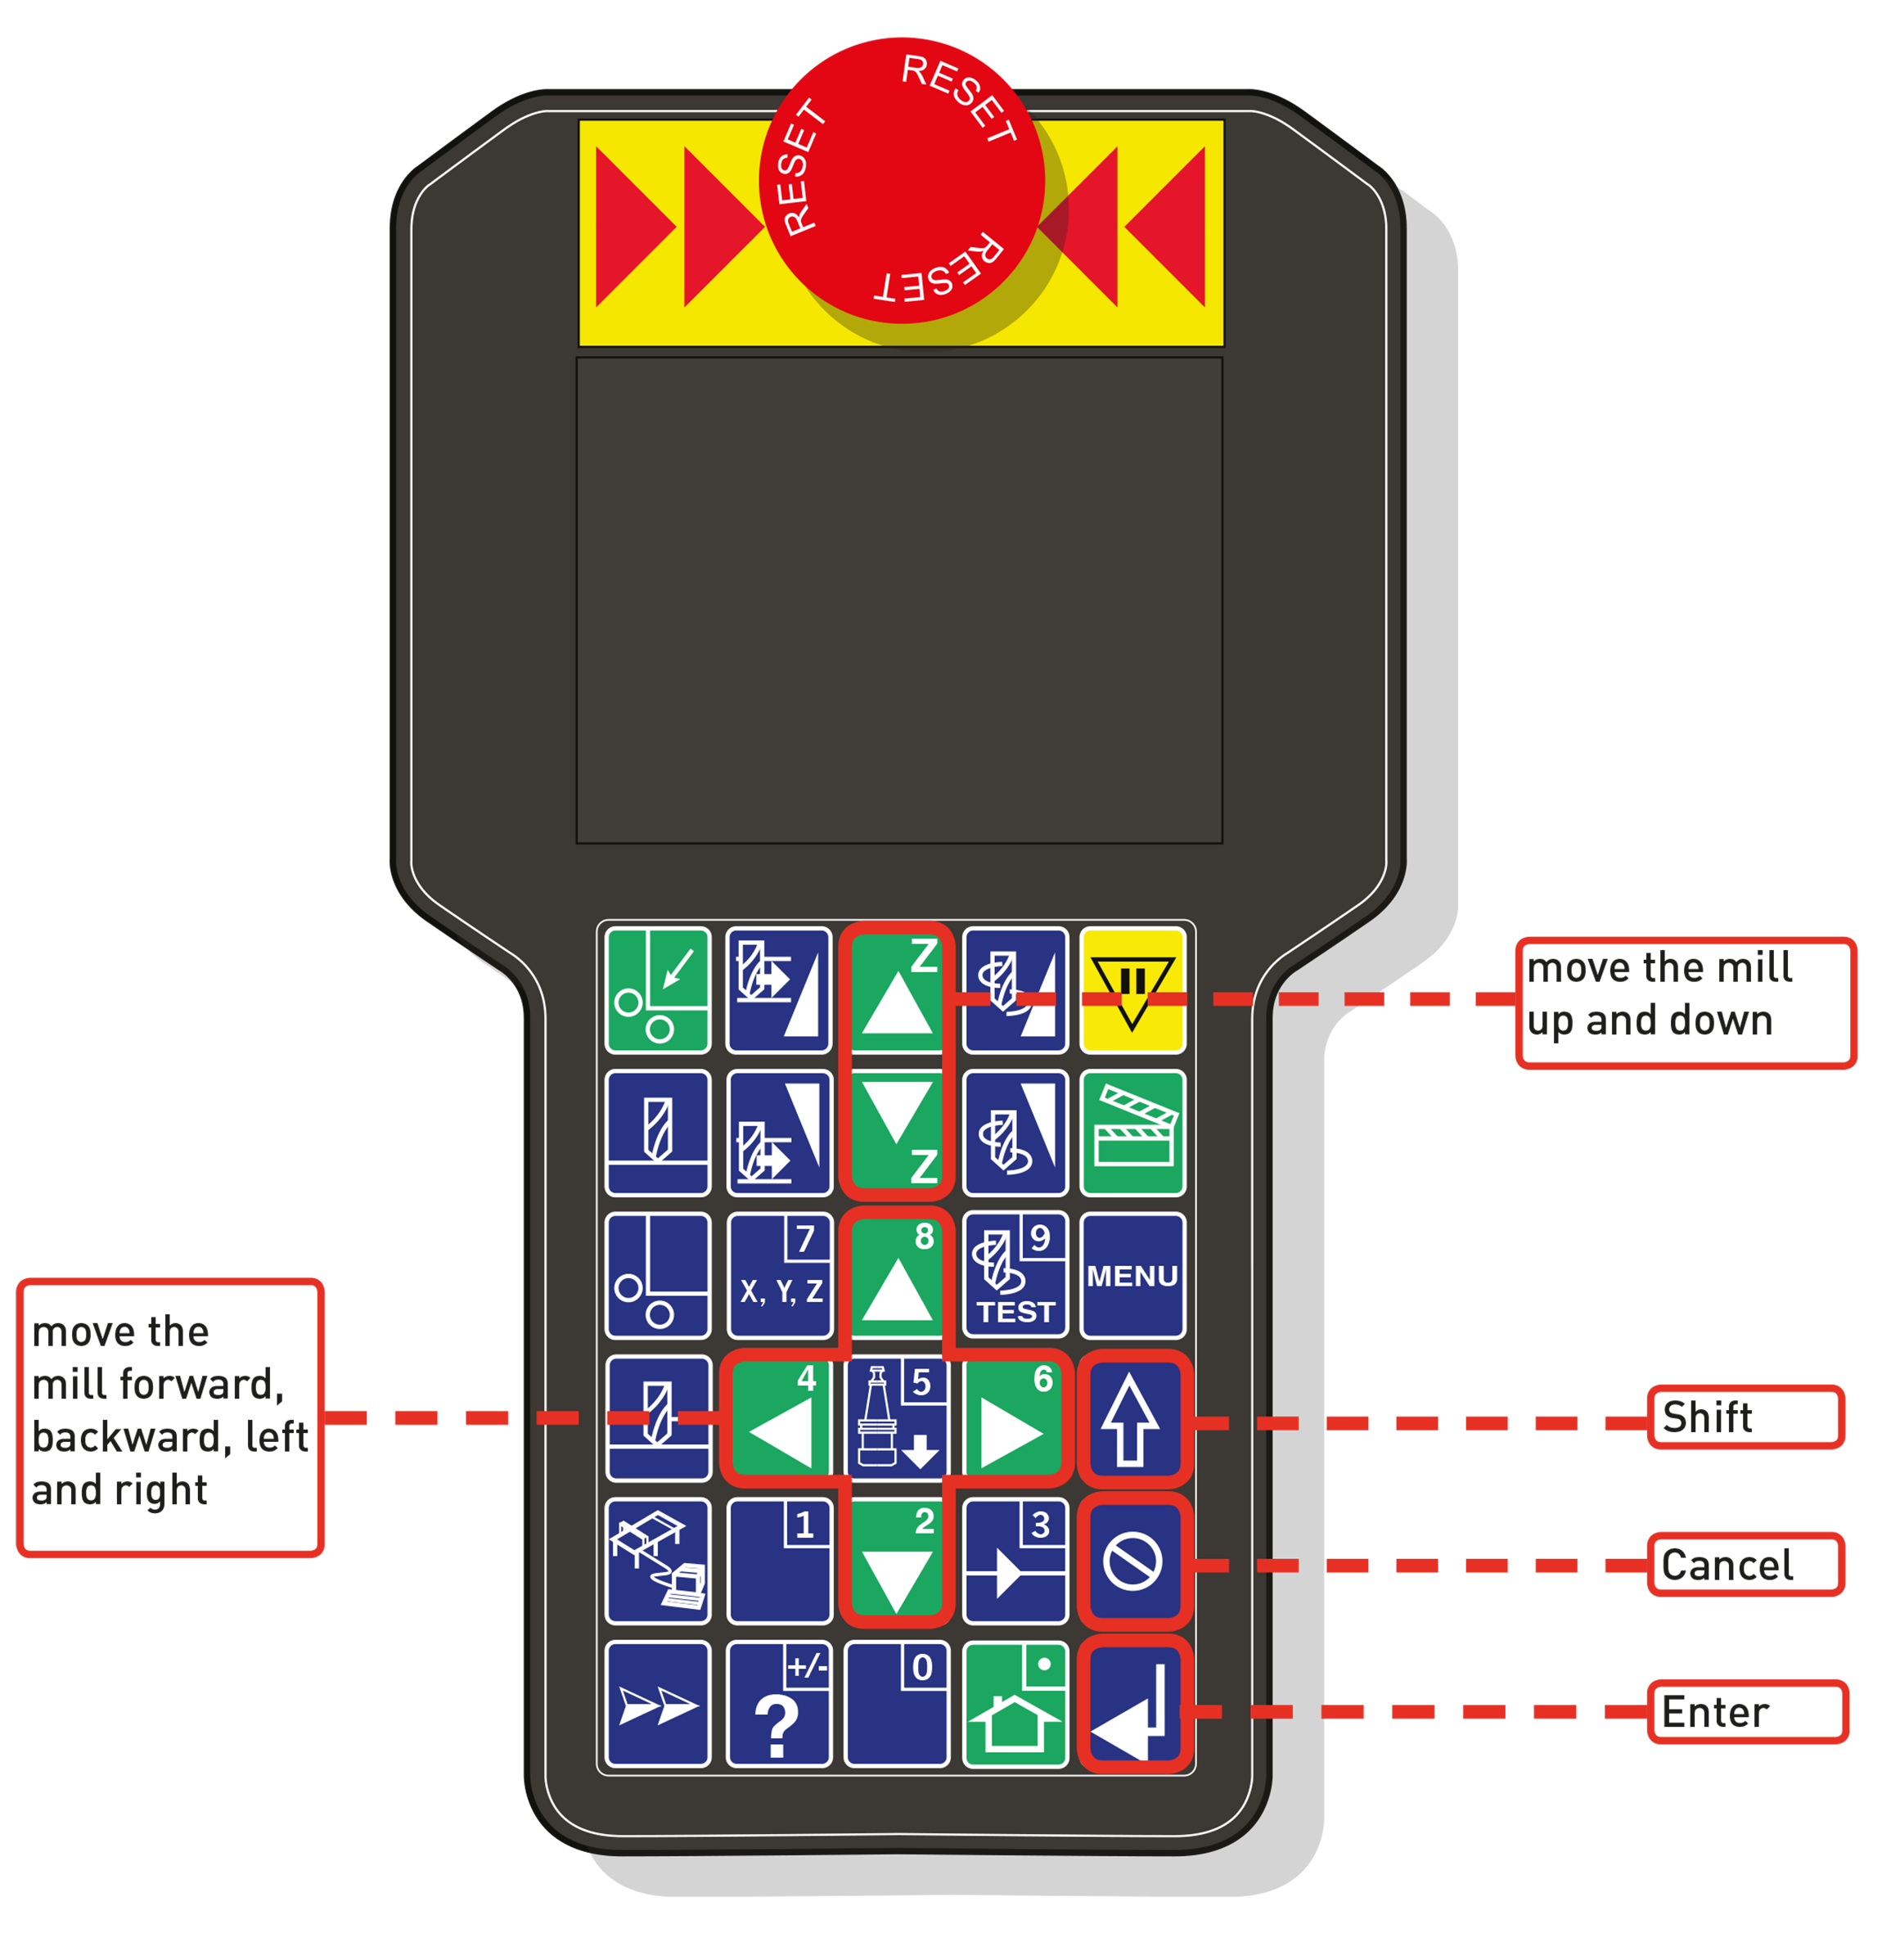
Press [shift] + [home]. The mill will move slowly to X0 and Y0. Once it has reached this position, move the ganter away.
2.
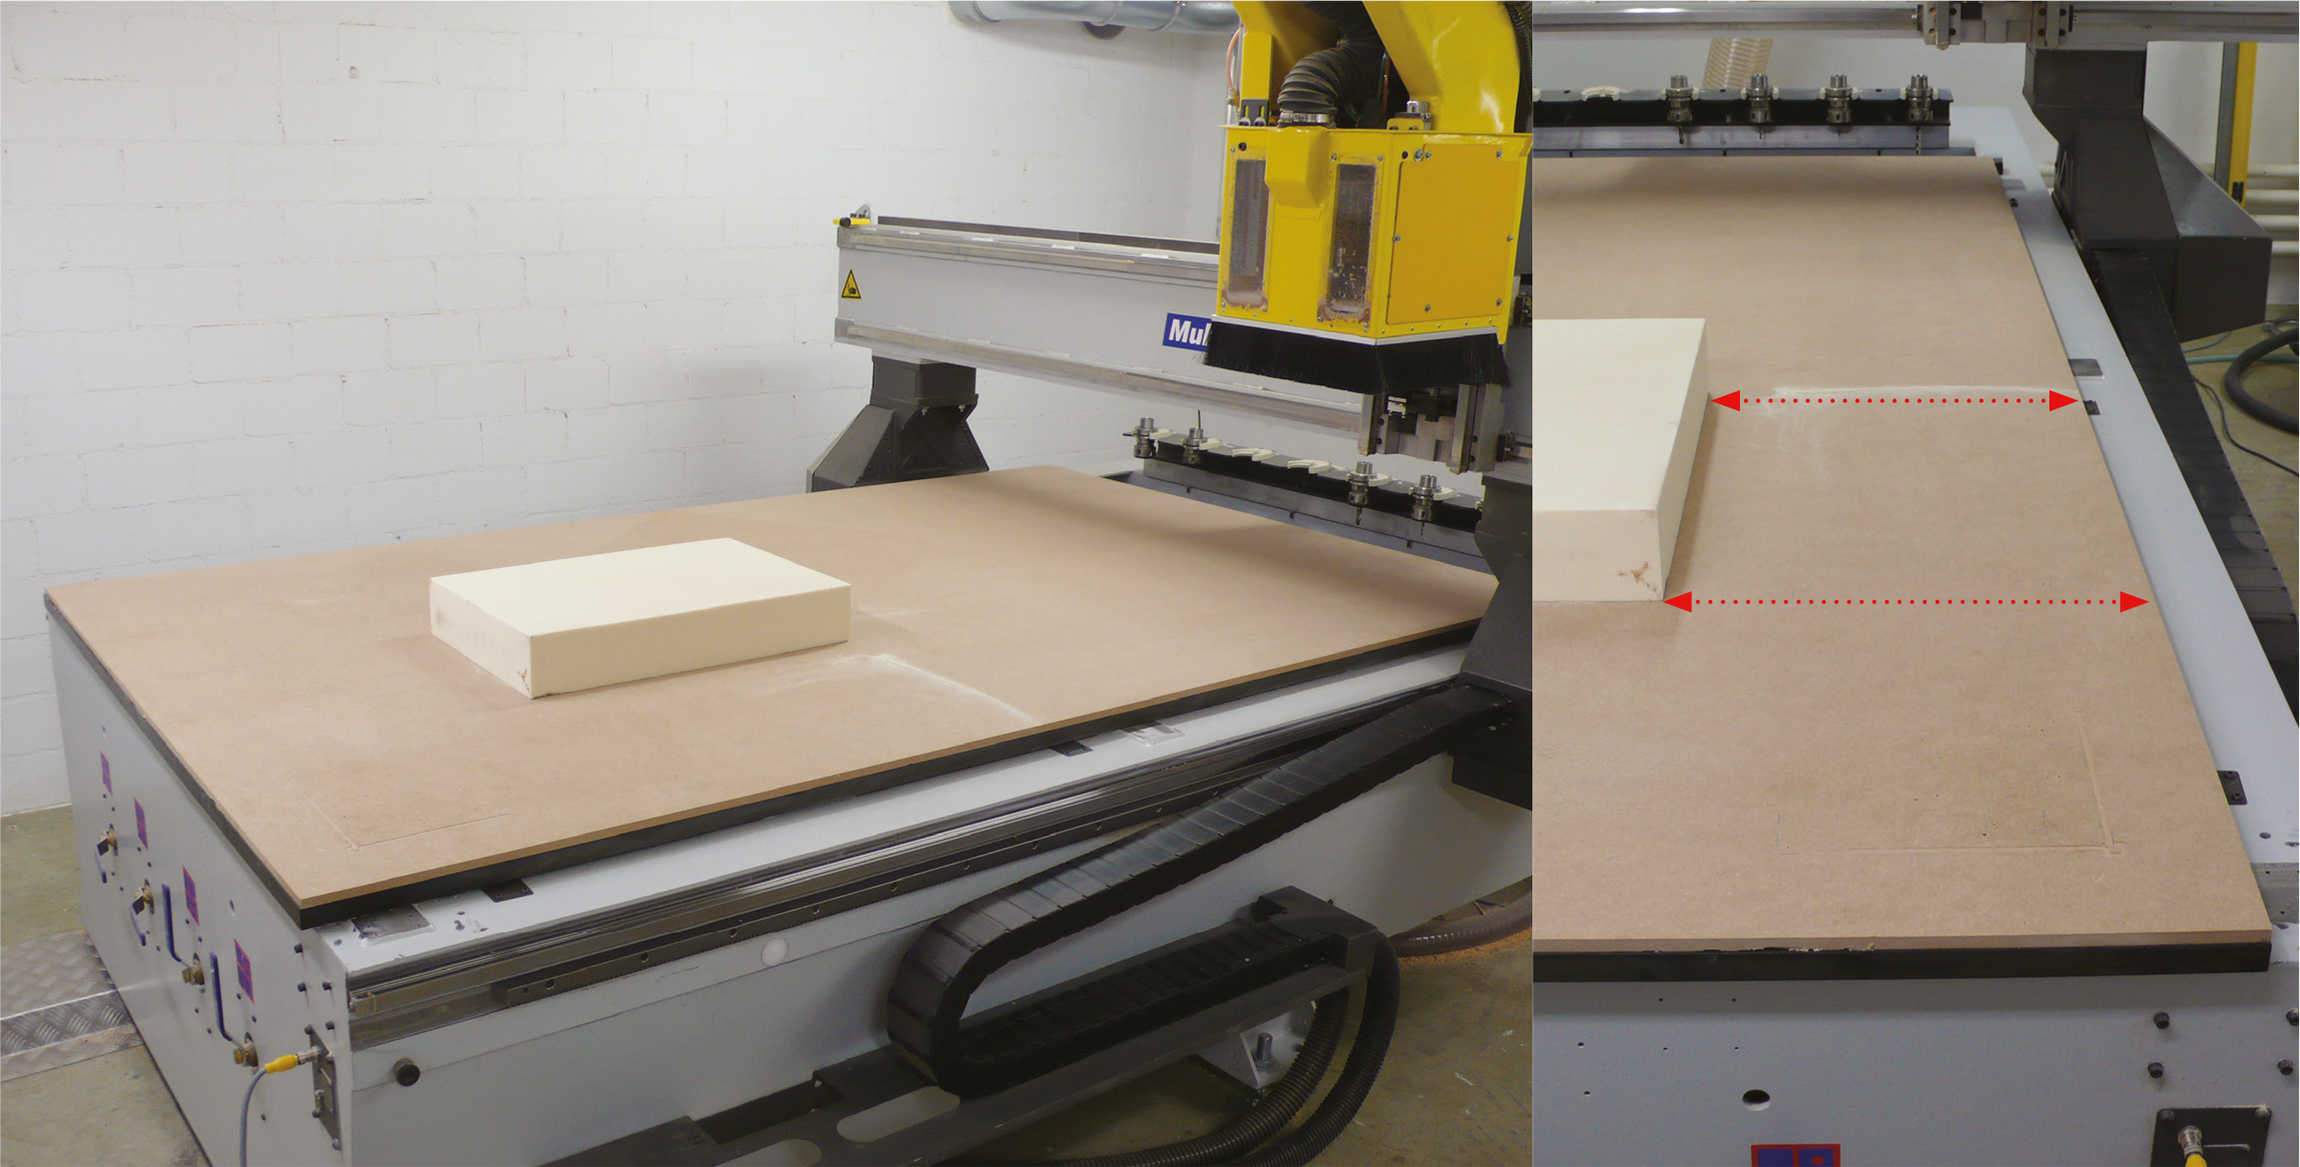
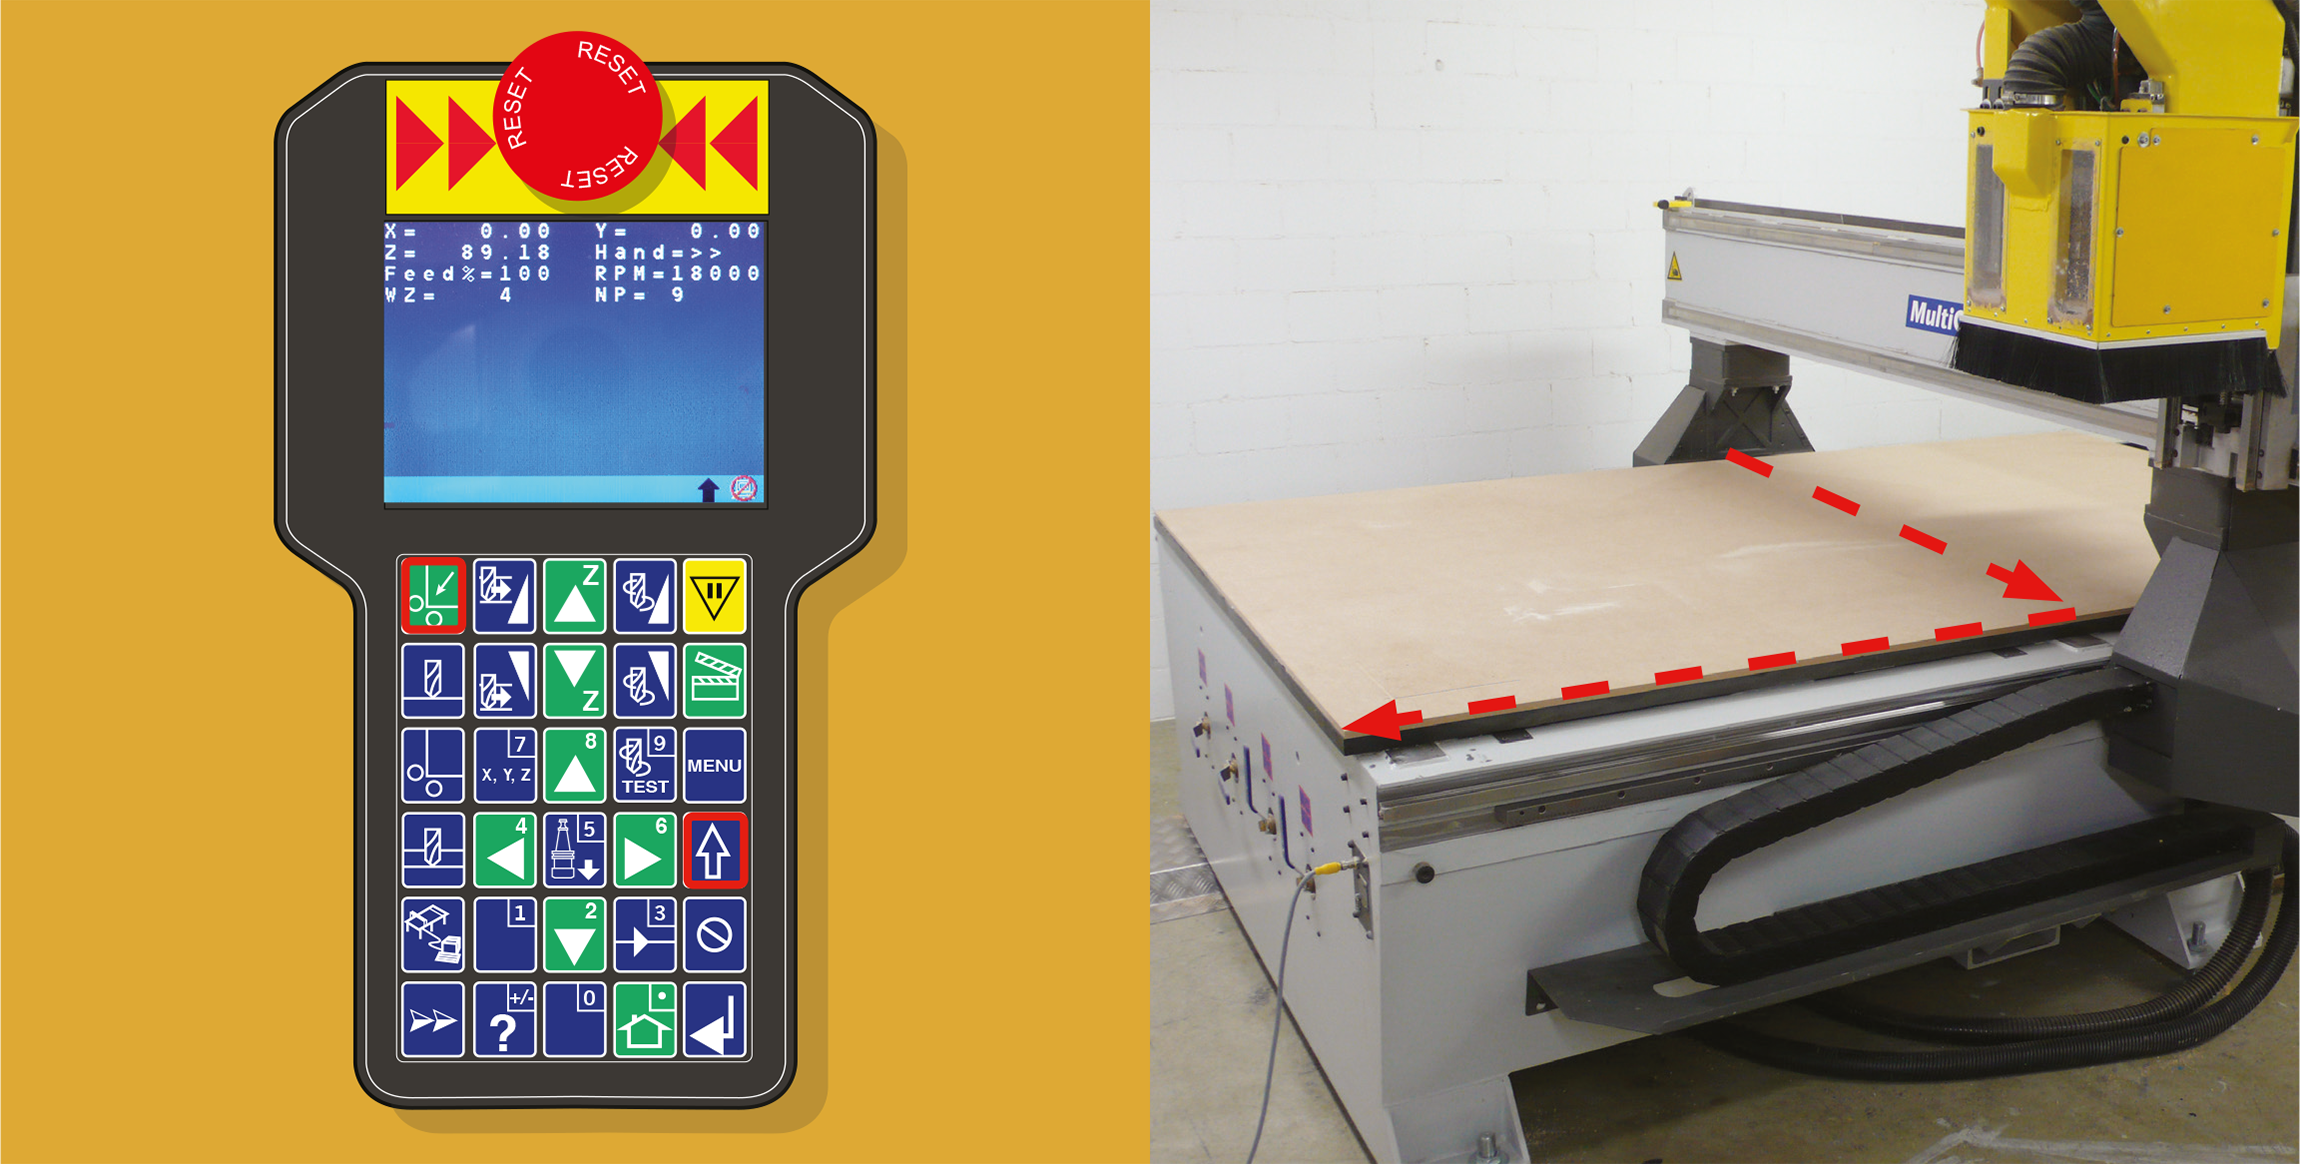
Place your block of material on the mill, parallel to the edges of the table and respecting the divisions of the suction system. Make sure the block is firmly fastened to the table surface. Use double-sided tape if necessary.
3.
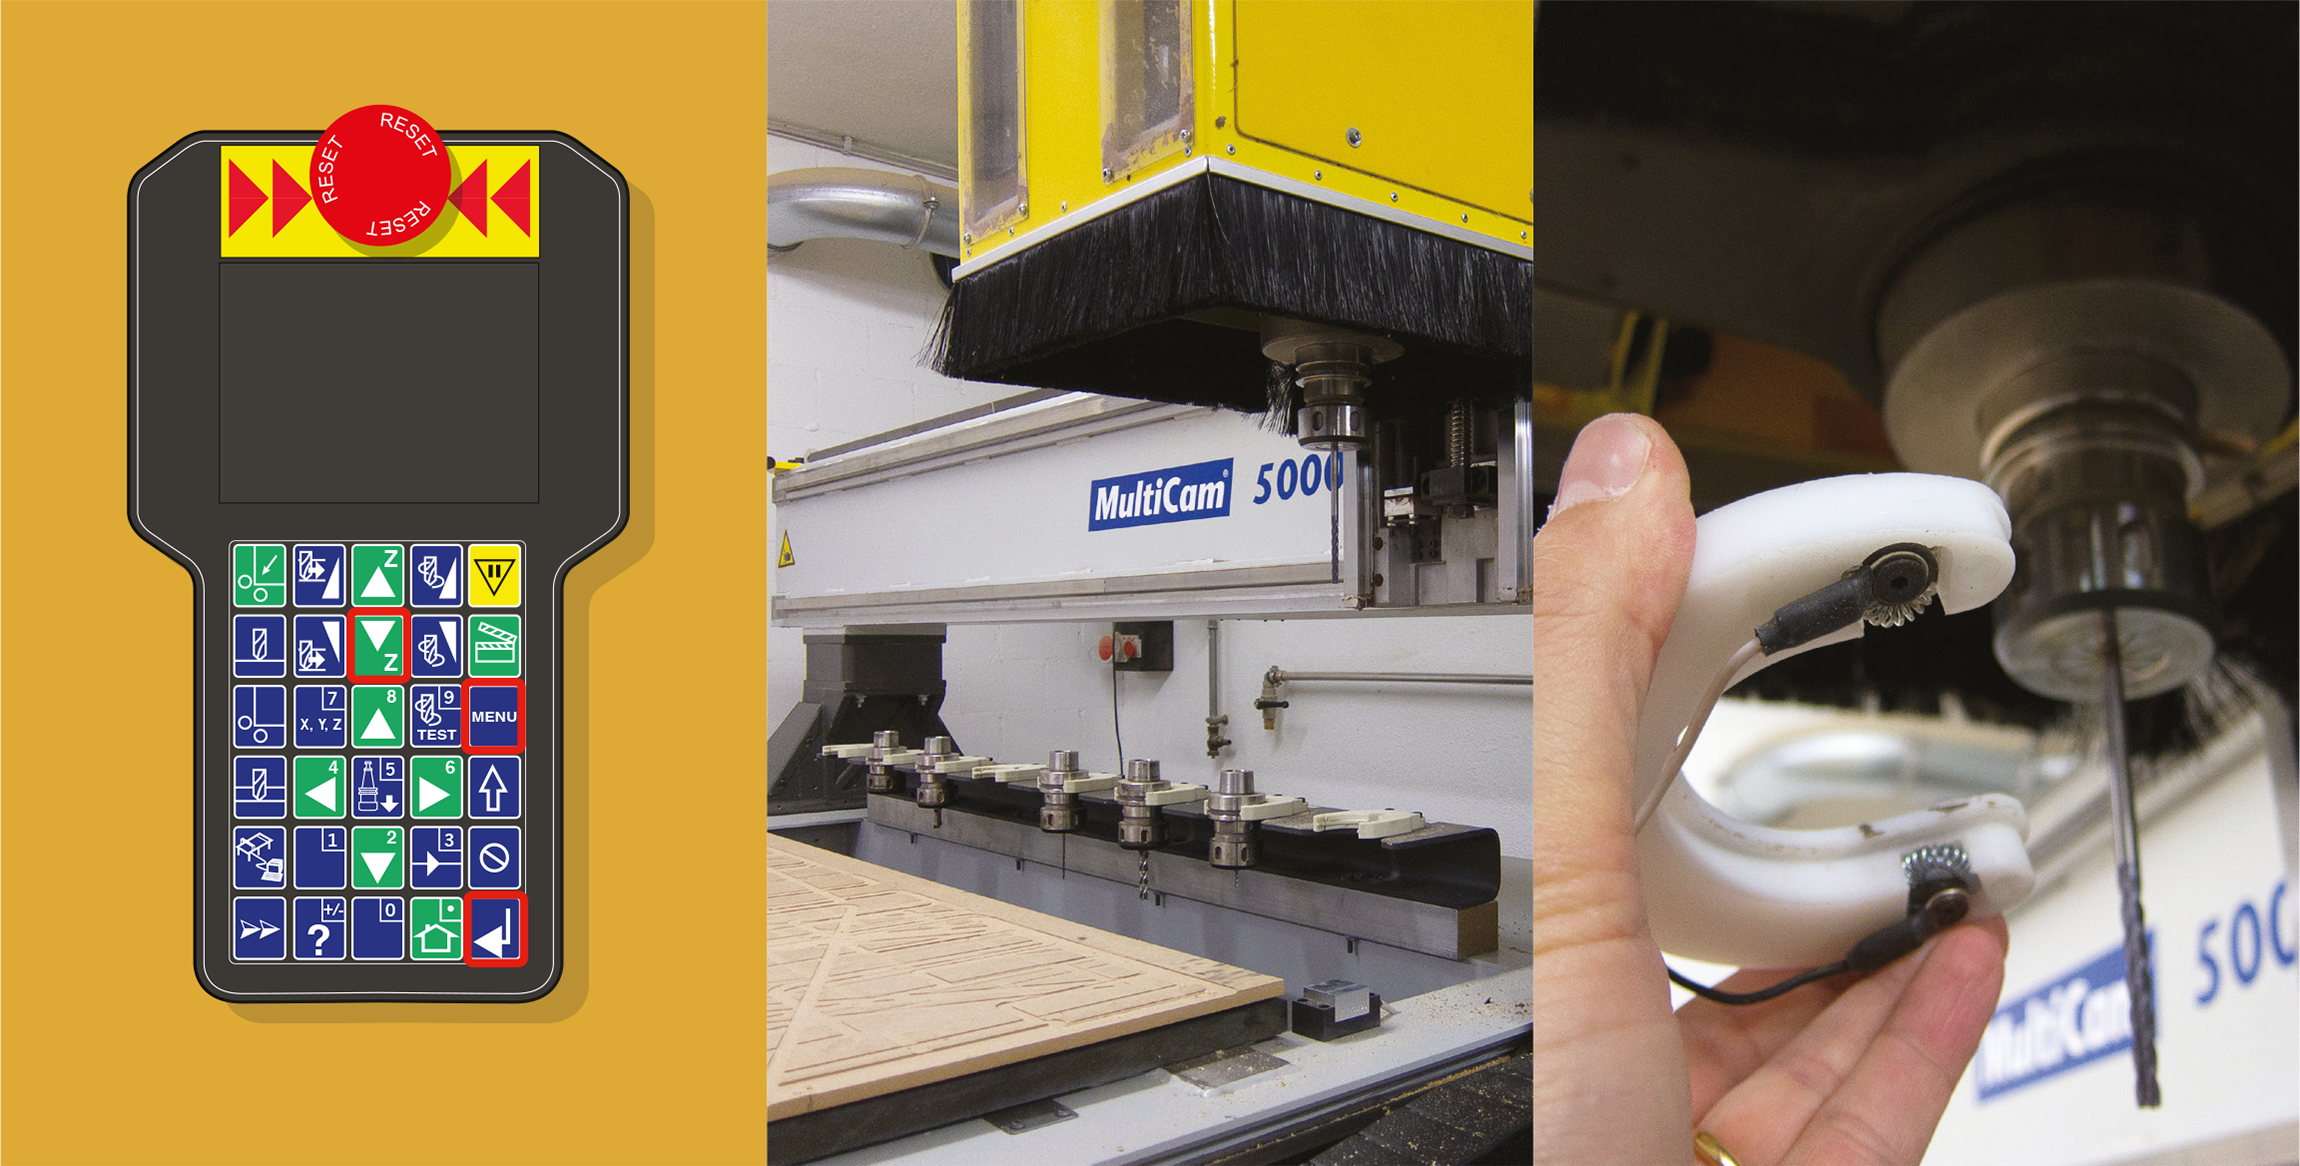
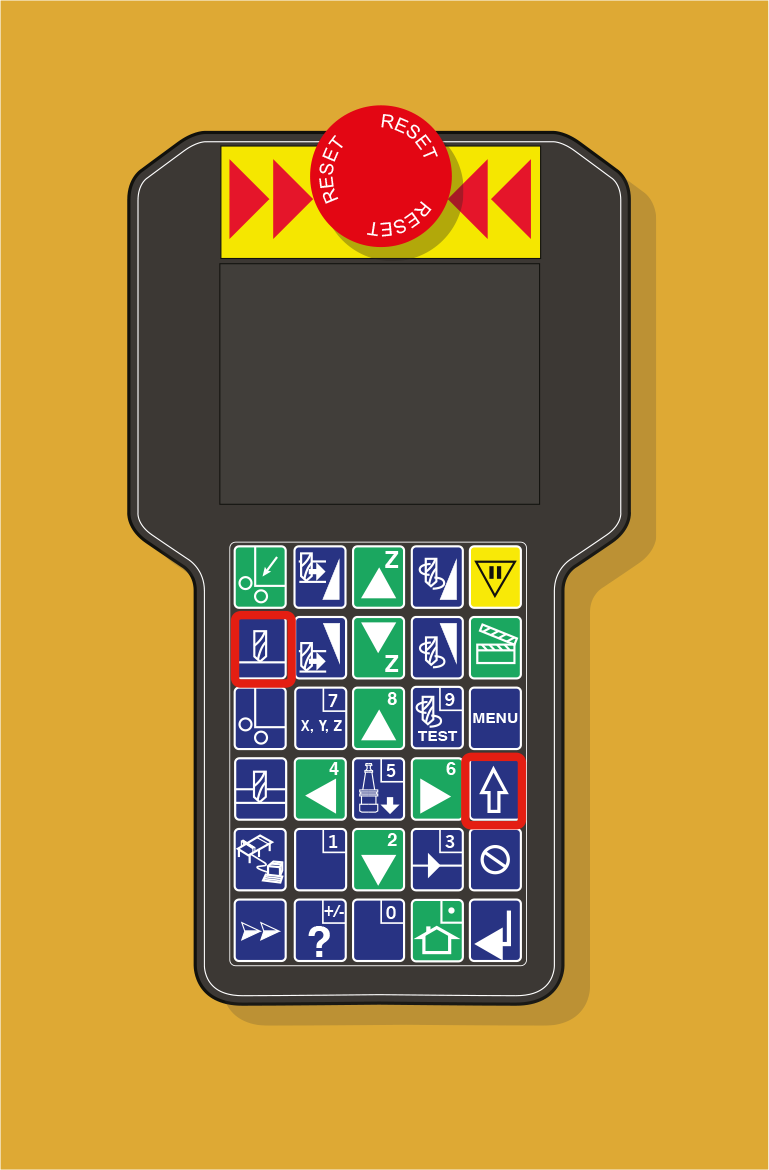
Press [Menu] > Werkzeugwechsler + [Enter] > Werkzeug vermessen + [Enter] > Choose which tool you want to calibrate (1,2,3,etc) and press [Enter]. The mill will pick the appropriate tool / bit and position itself above the small metal plate (Z0).
BEWARE THE MILL WILL MOVE RAPIDLY SO STAND BACK!!!!!
Place the ring around the collet of the bit.
4.
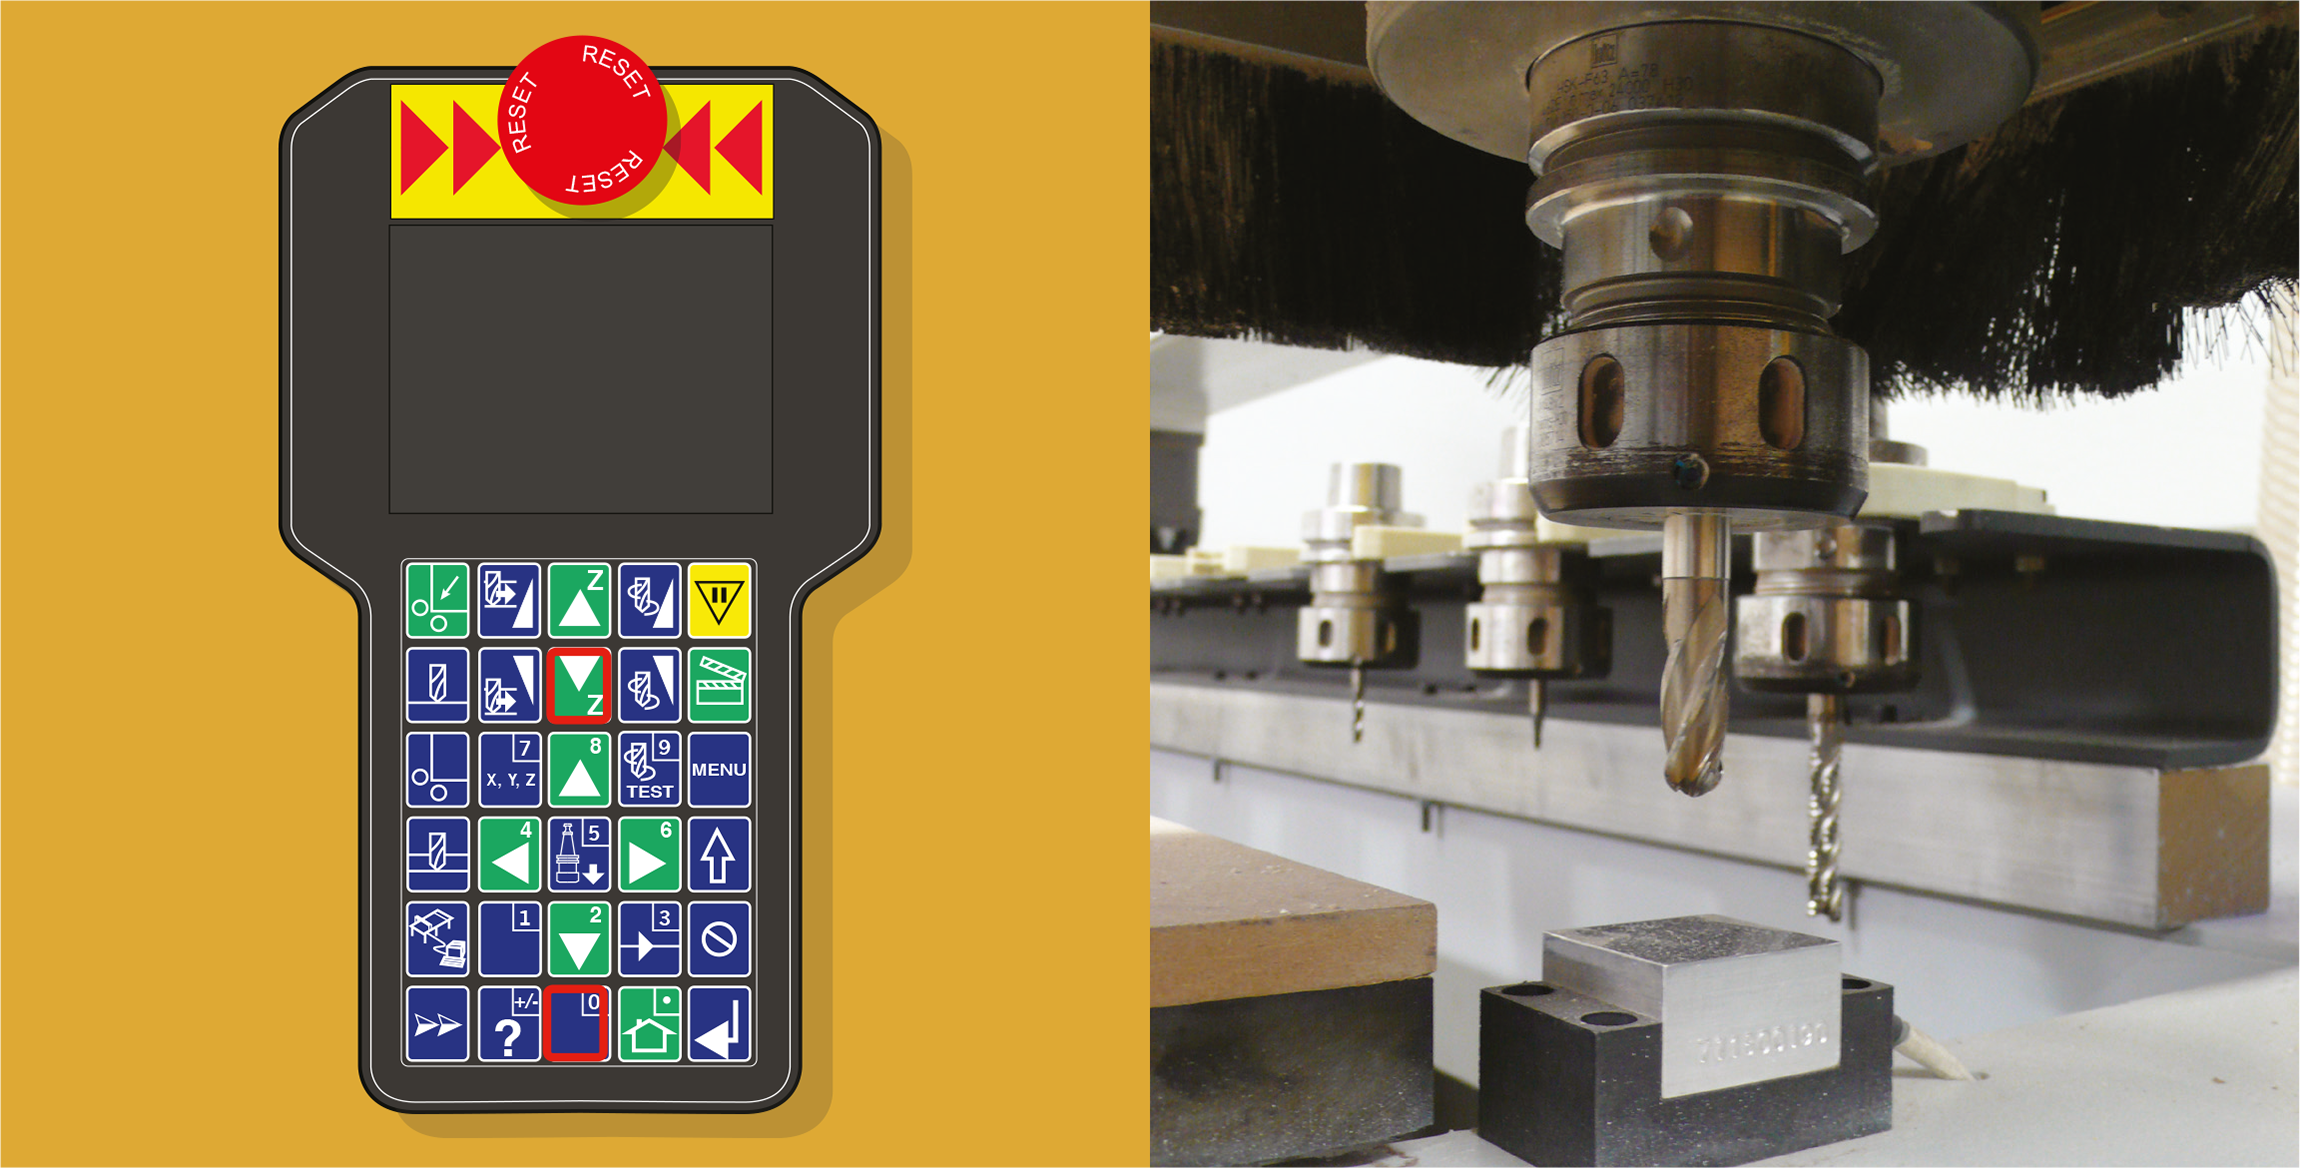
With the [Down] arrow, bring down the bit until it is 2-3 cm above the metal plate, then press [0] continuously until the tip of the milling bit touches the plate and moves up.
Repeat this step for all bits that you are going to use on this milling project. Enter the tool number and press [Enter] Remove ring and press [Enter] The router will then proceed to the change of bits. Same proceedure as before… and so on… Press [Cancel] when all tools are measured. remove Clip + [Enter] + [Menu]
5.
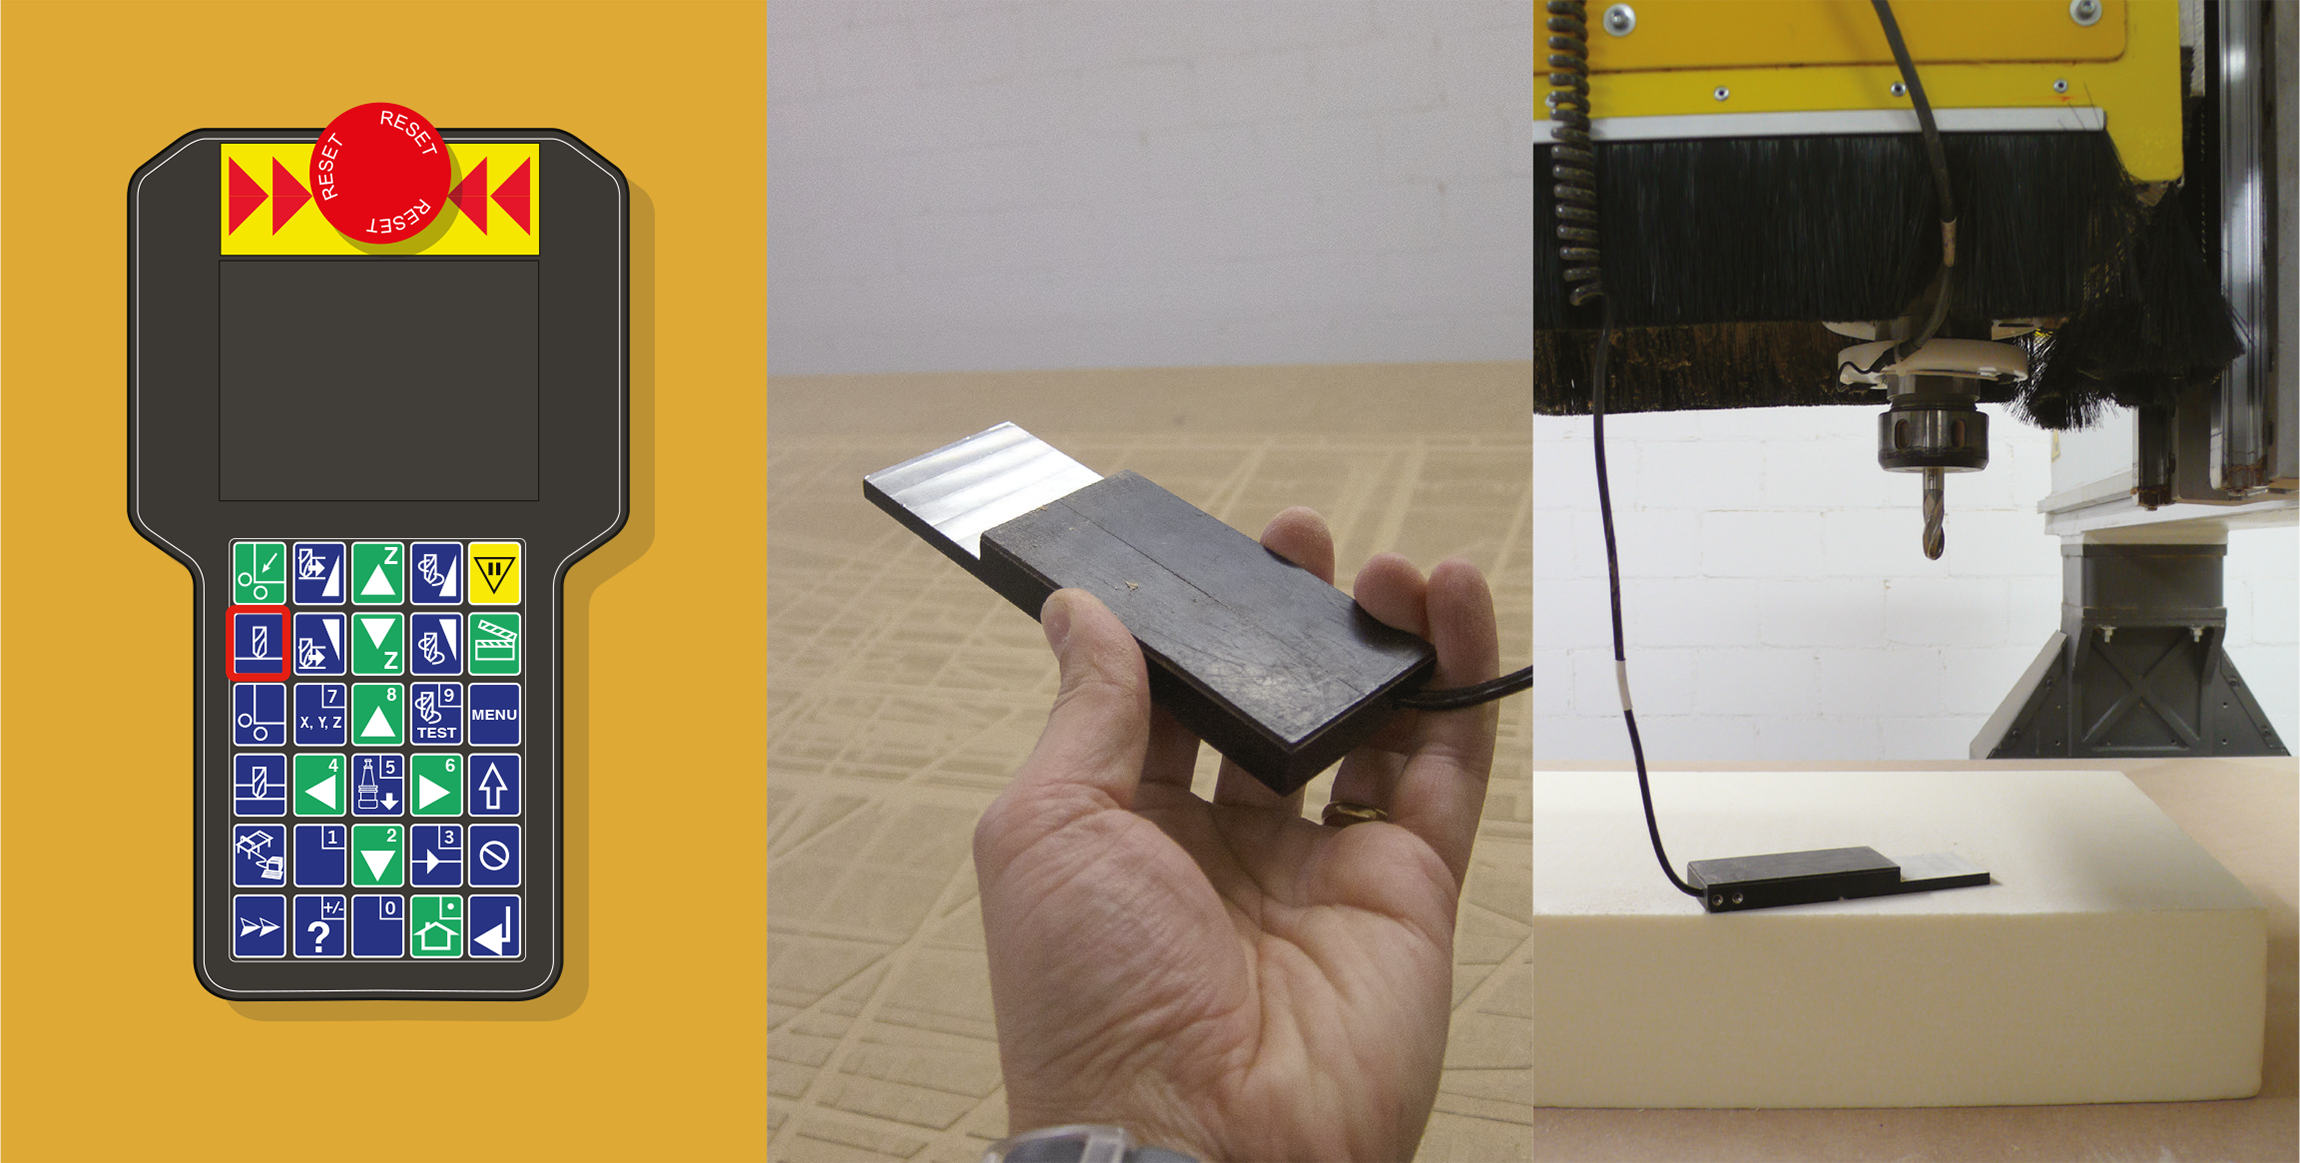
Setting the material height (Z0):
Press appropriate key. Choose with which bit you want to calibrate (ideally the rough cut tool) and bring the mill somewhere over the material. Fix the ring to the collet and place the plate on the material. As before, press the Z-down arrow or 0 until the drilling bit touches the metal plate. Remove ring and plate, press [Enter]
6.
Setting the material height (variant):
bring the mill somewhere over the table. Press the « table height » key. Enter the height in mm and press [Enter]. Fix the ring to the collet and place the plate on the material. Press 0 until the drilling bit touches the metal plate.
7.
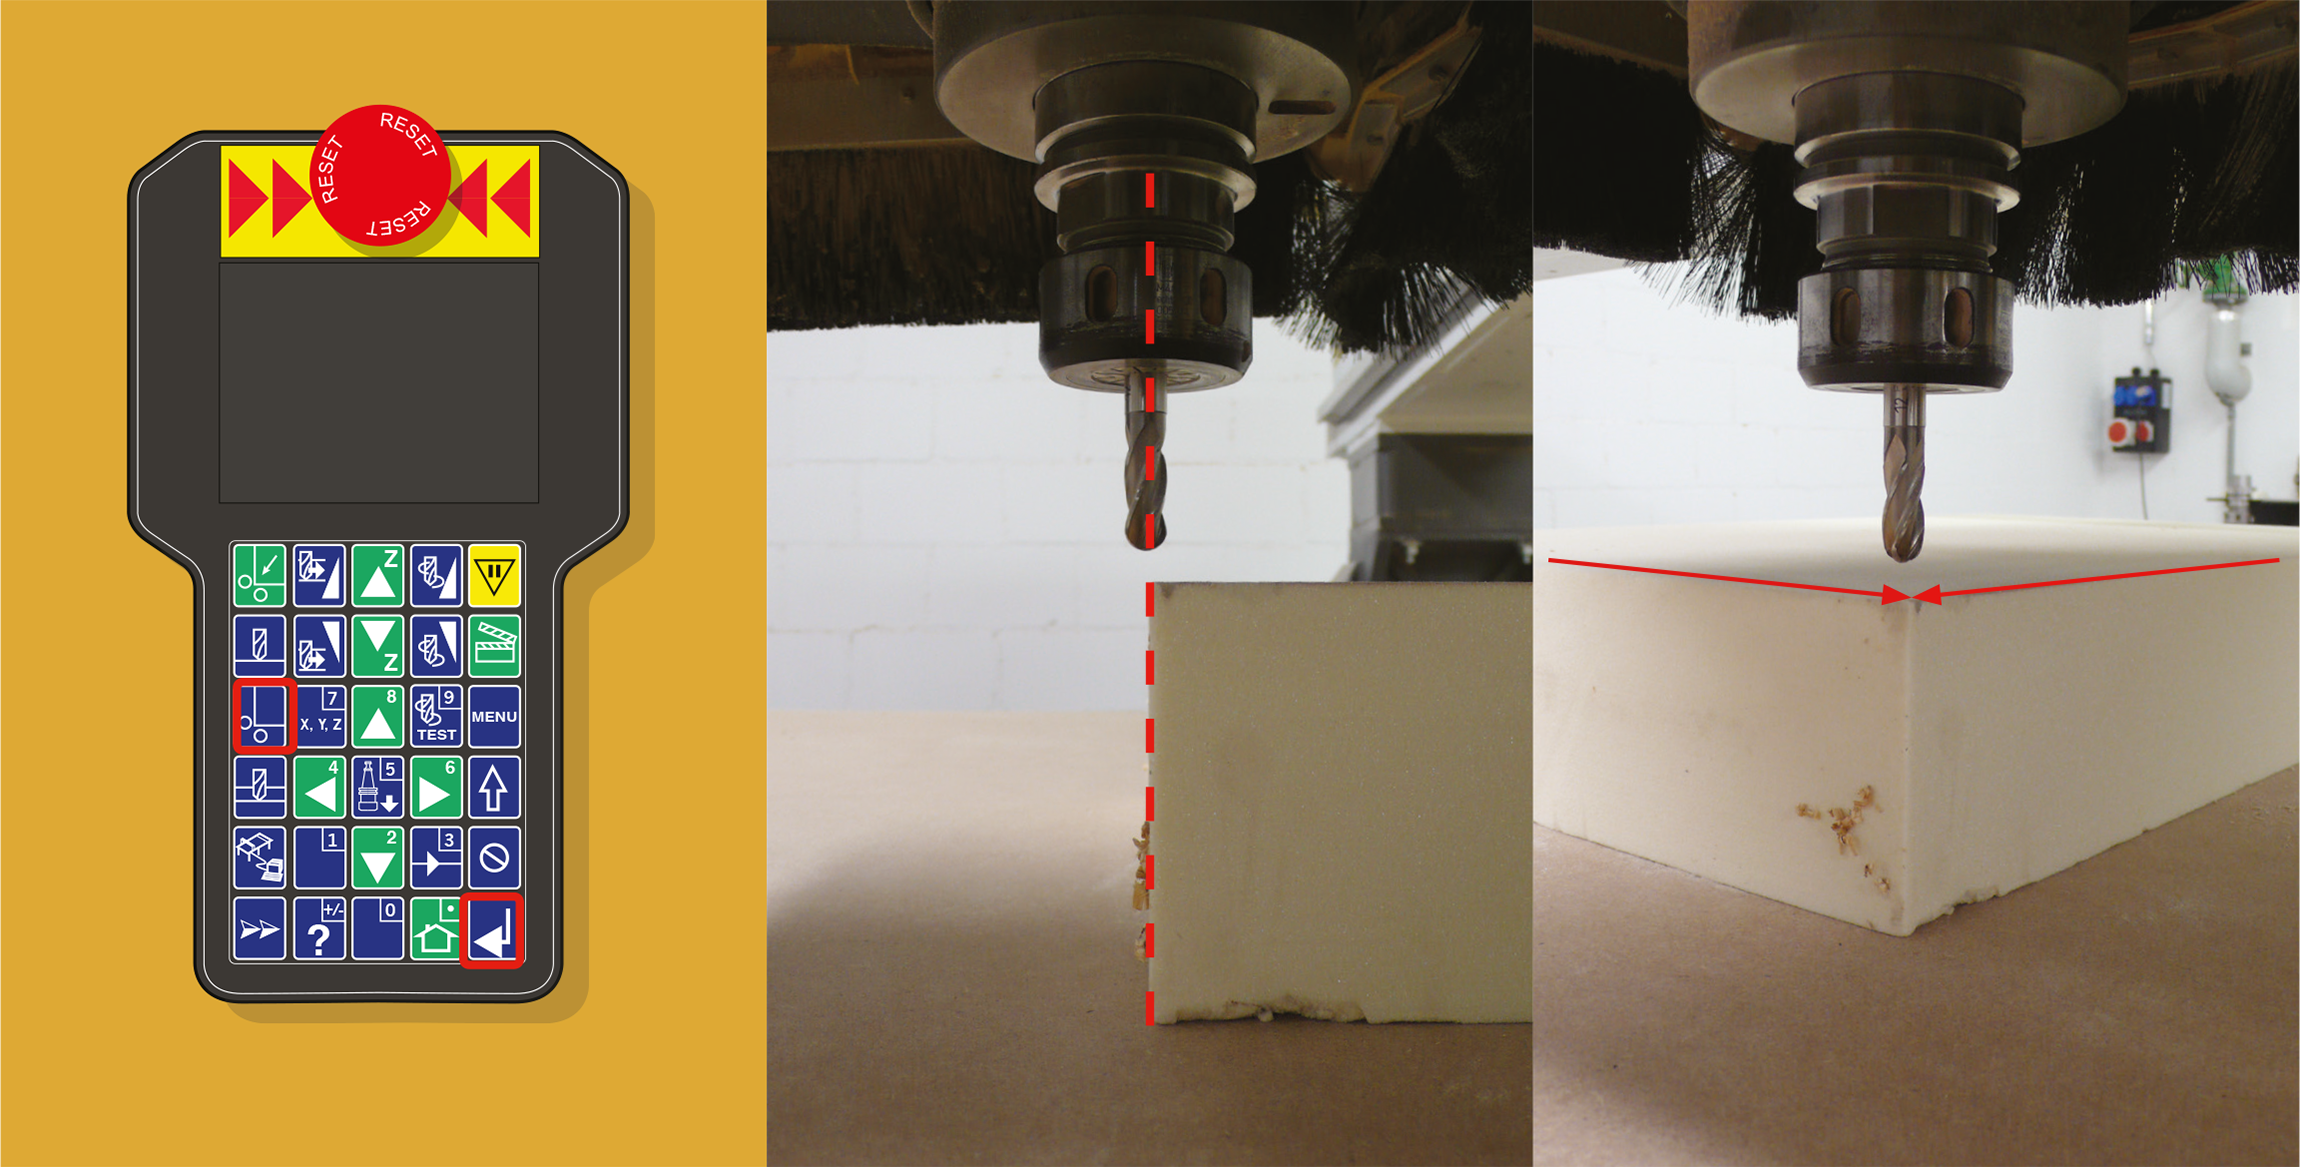
Setting X0 and Y0 of the material box:
With the arrows, bring the bit to the bottom, right corner. Bring Z down for more precision. Press [Origin] and [Enter].
To save an origin for later use, press [Shift] + [Home], and select a holder (0 to 9).
Software Setup
1.
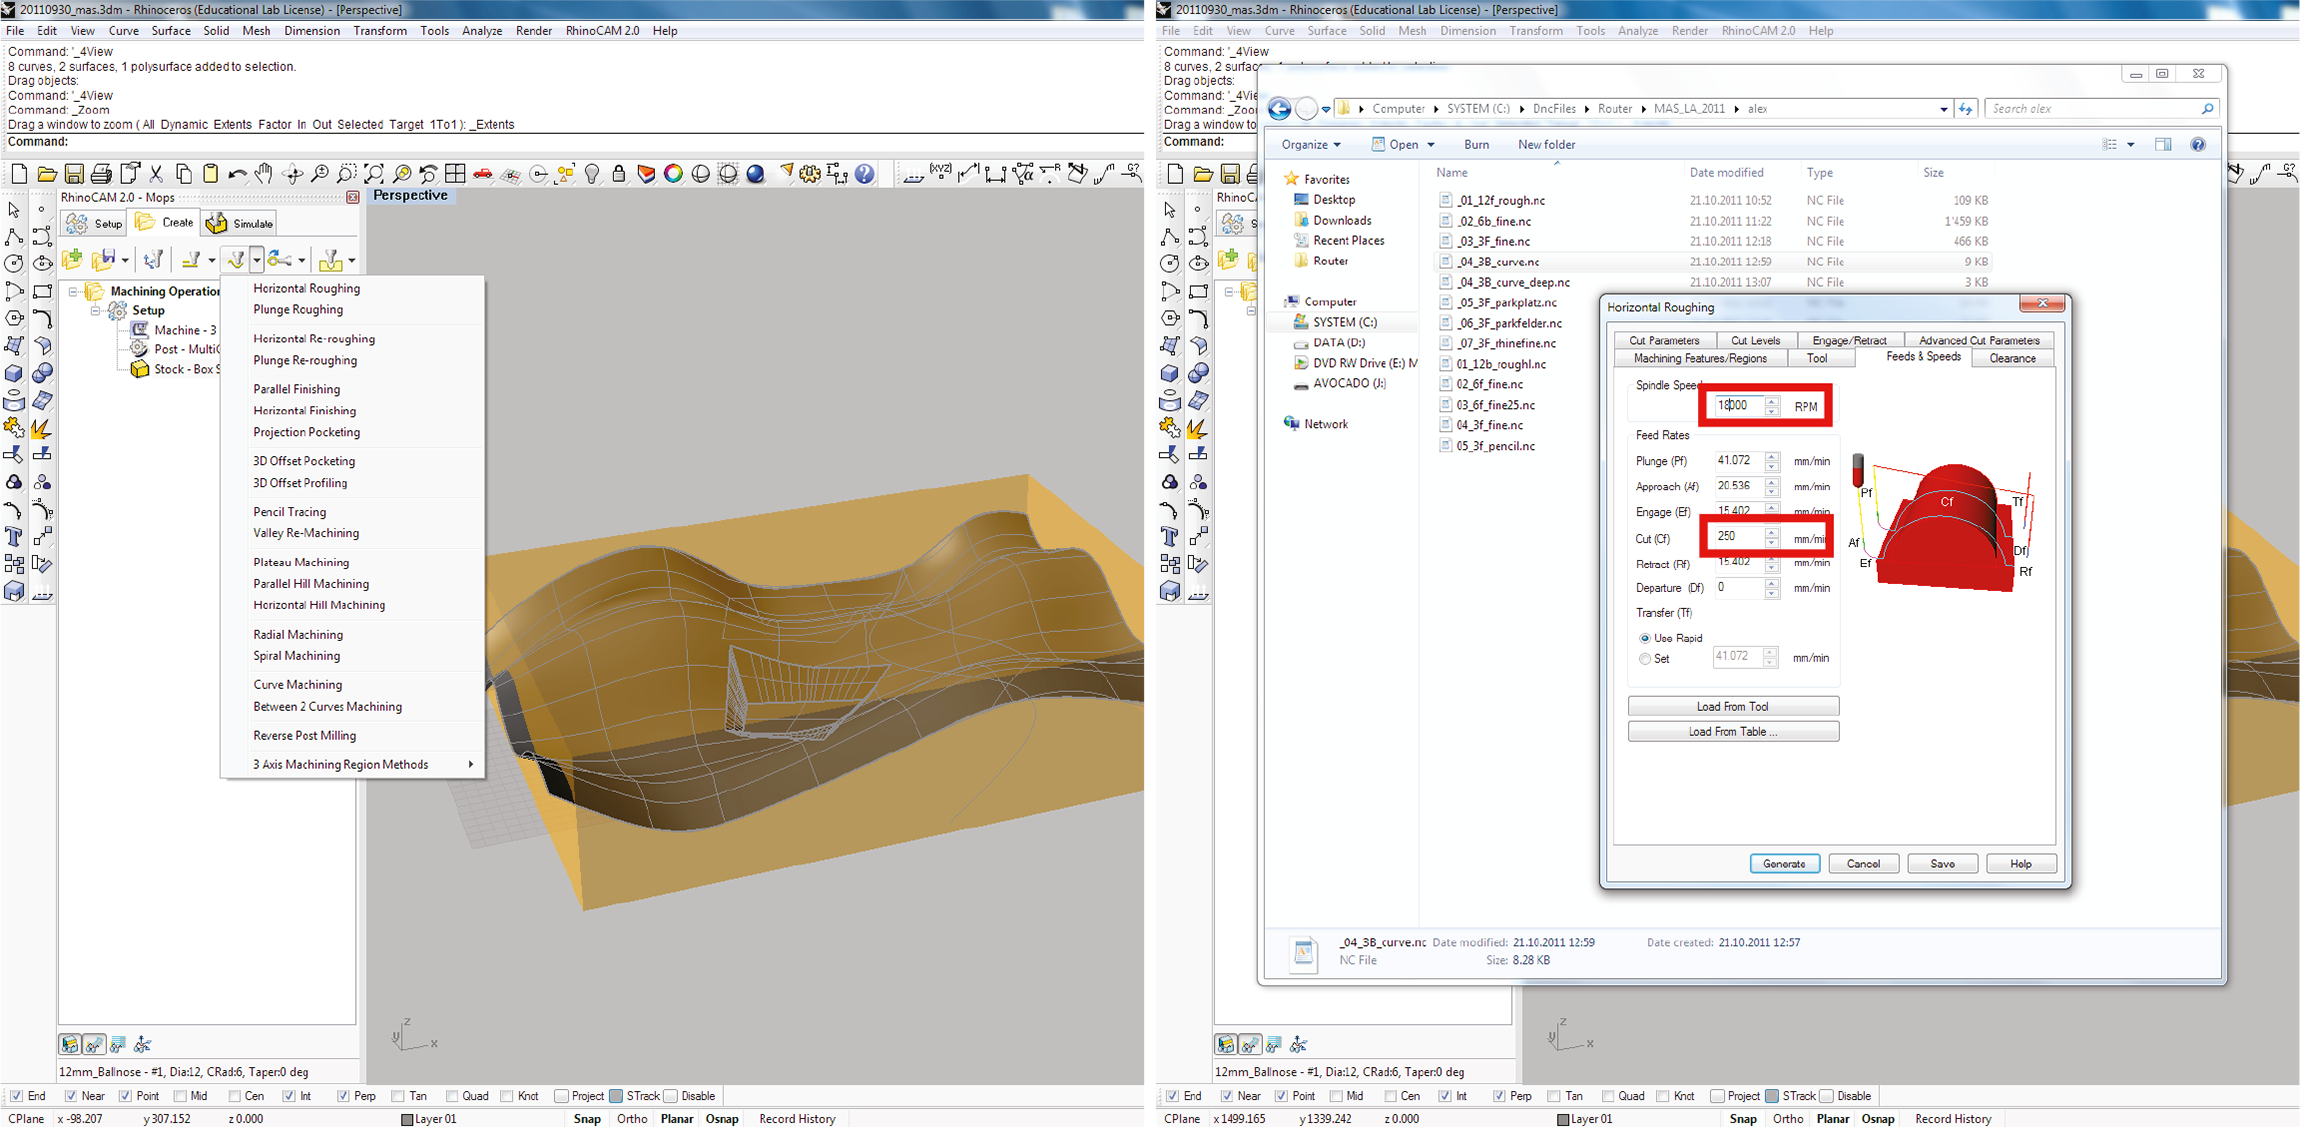
In the « Machining operations » window, select any existing Mops or create new ones.
In Feeds and Speeds tab, input a spindle speed of 12000 rpm, and a CUT (CF) of 200 (min). These are settings specific to this mill.
2.

In the RhinoCam 2.0 menu, select Machine Operations Browser. Select the tool you want to edit by double-clicking on it…
3.
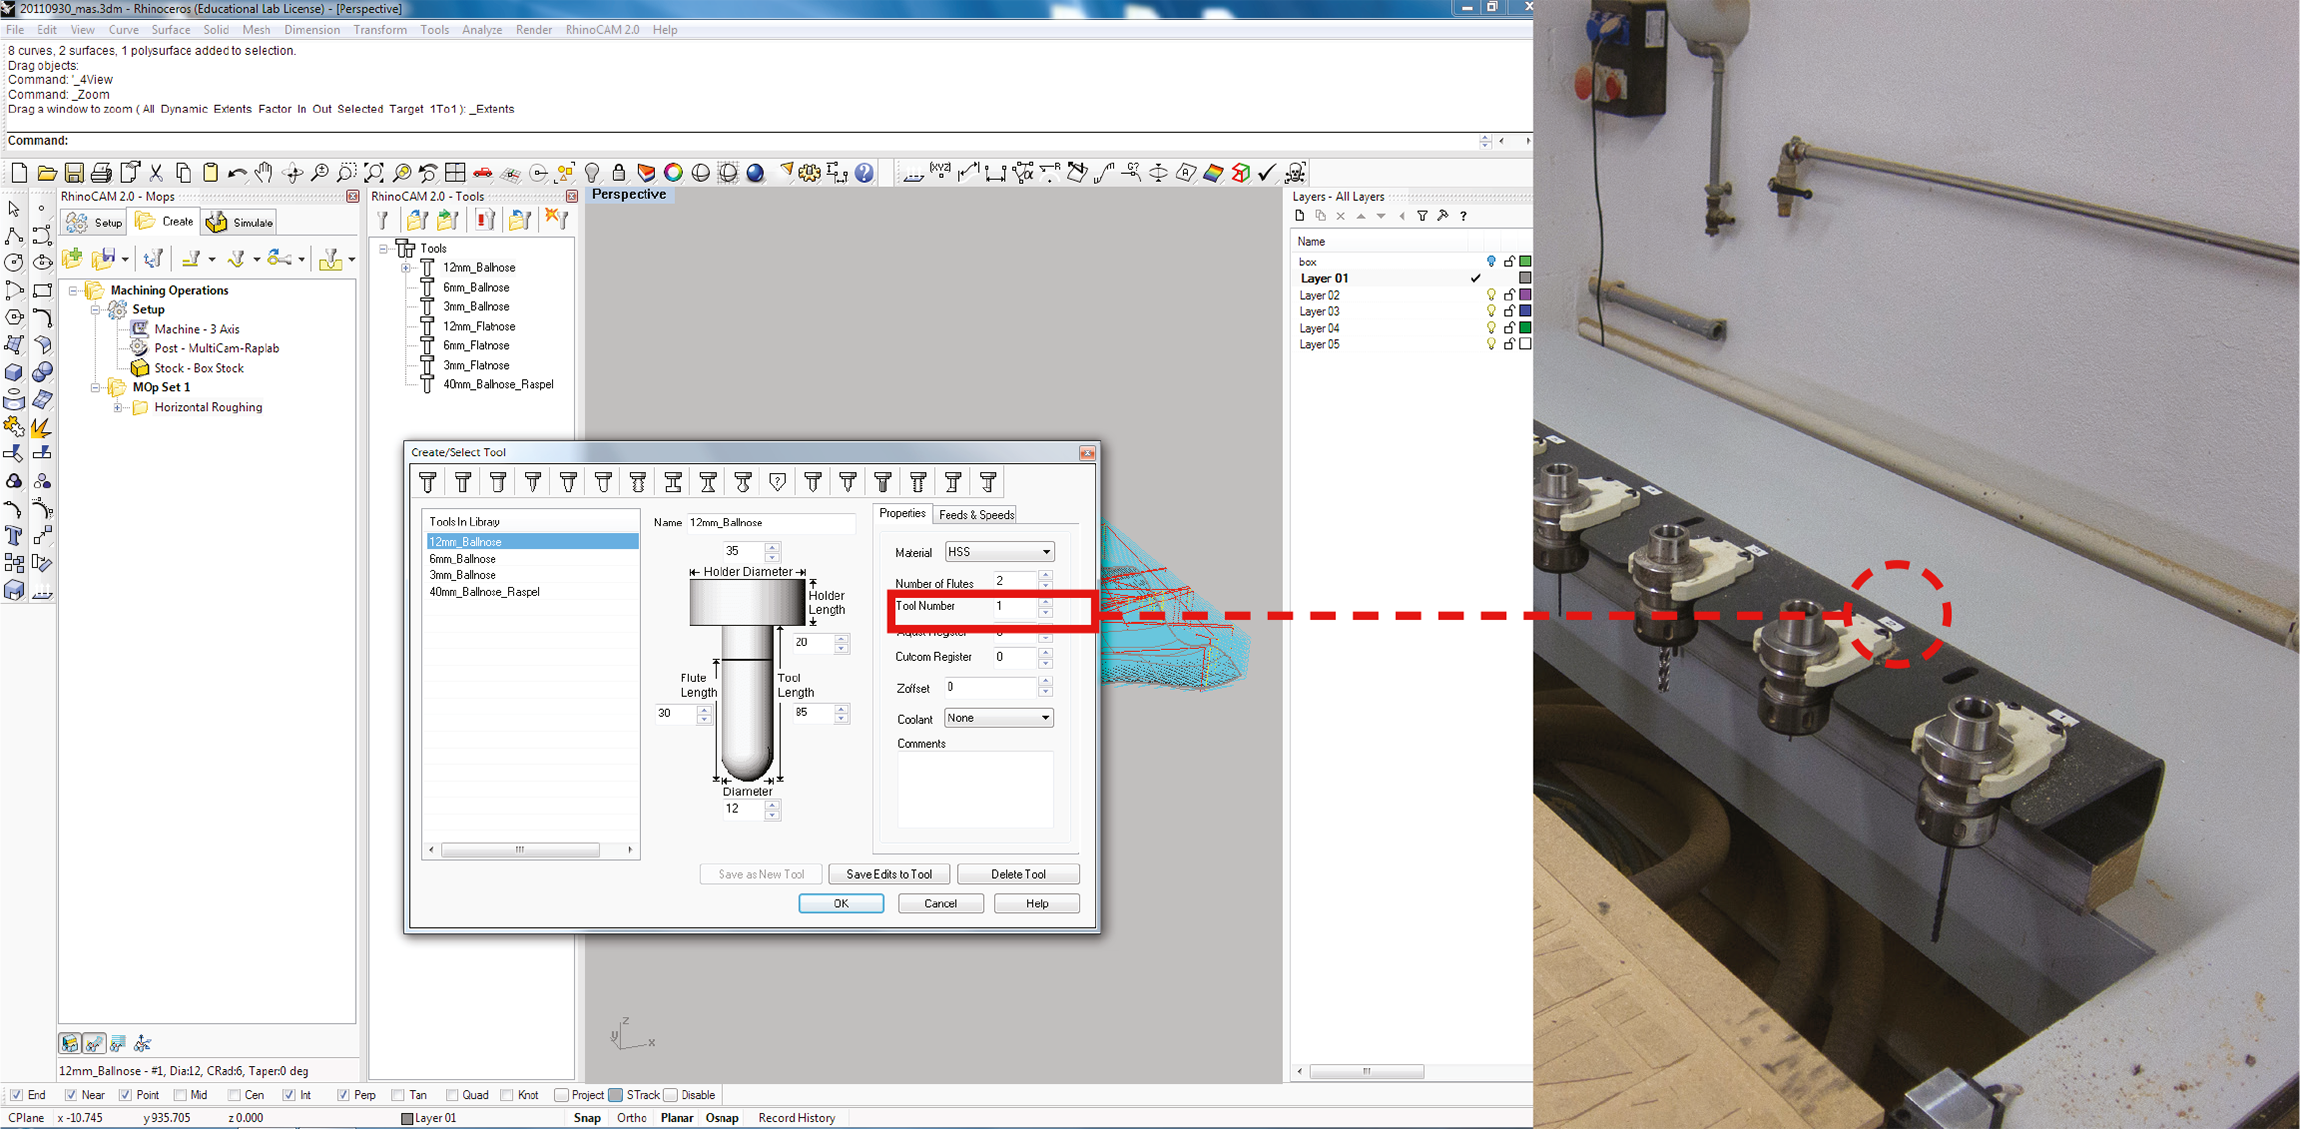
In the ToolNumber, enter the corresponding number from the router.
4.
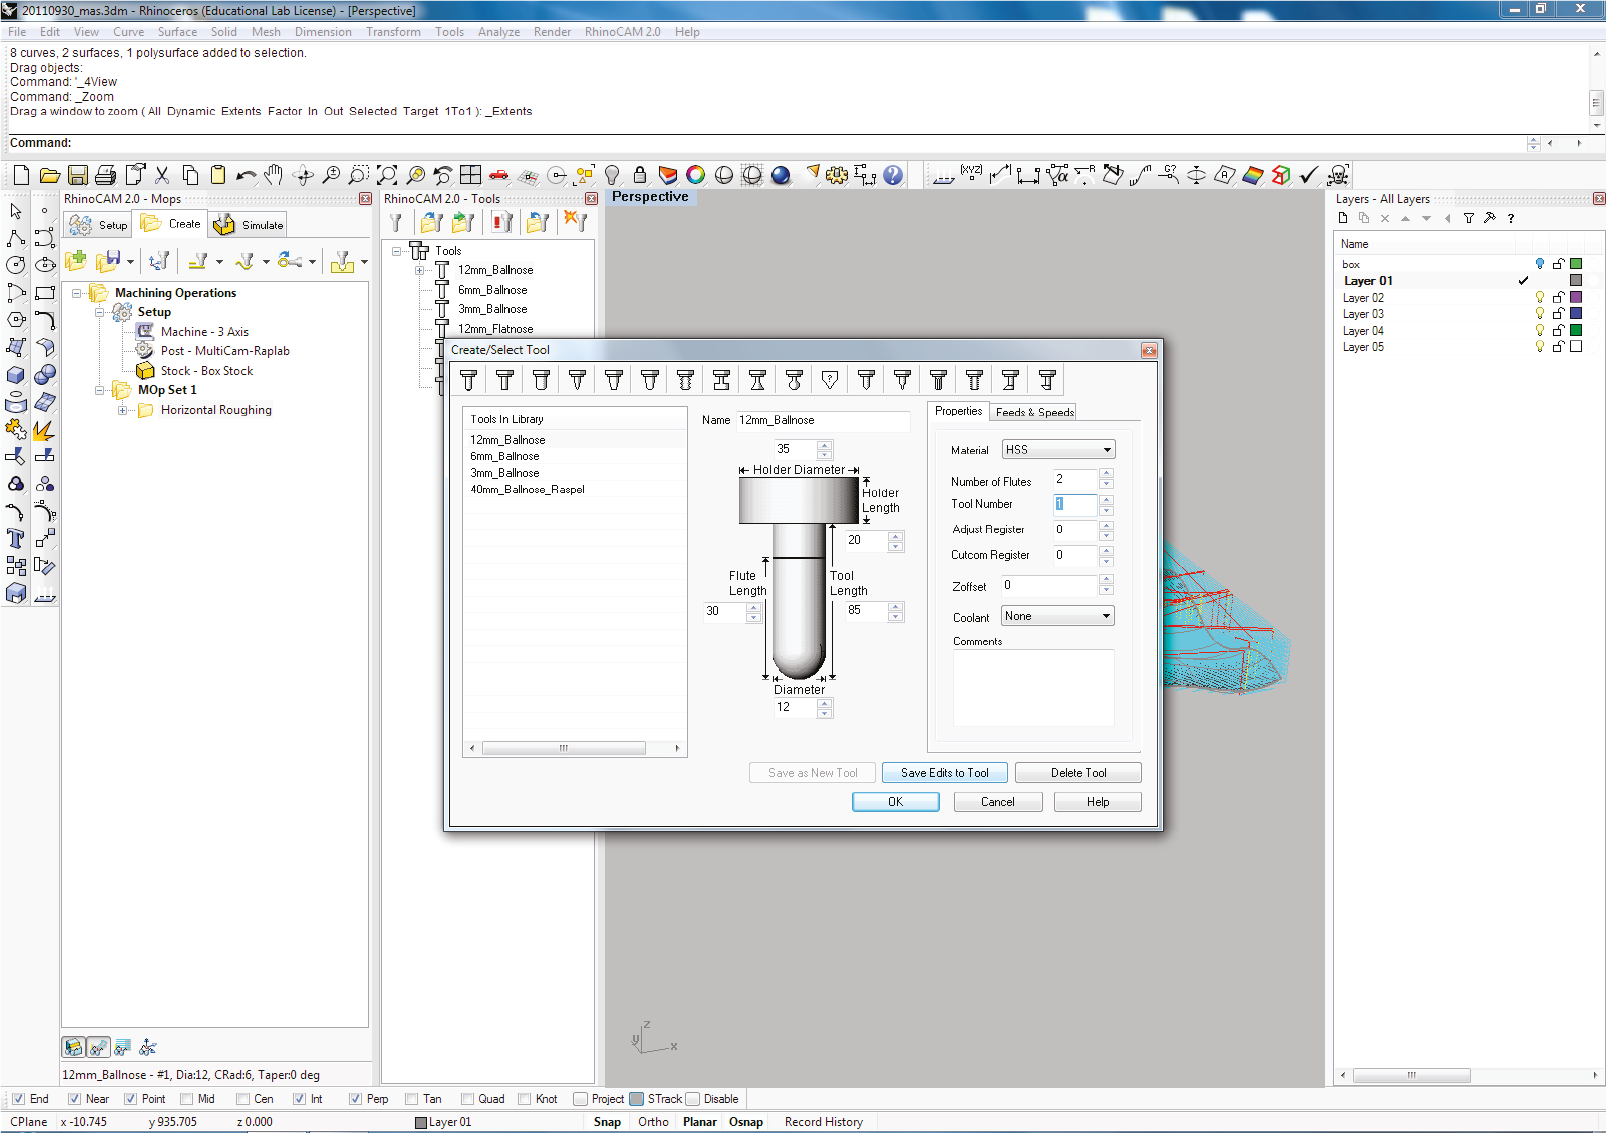
Click on [Save Edits to Tool]. Select and modify any other drilling bits you are planning on using in the same way.
Click [Ok]
other settings
In the “Untermenu”, go to “Werkzeug Funktionen” and check “Dust”
Bring down the speed with the keys.
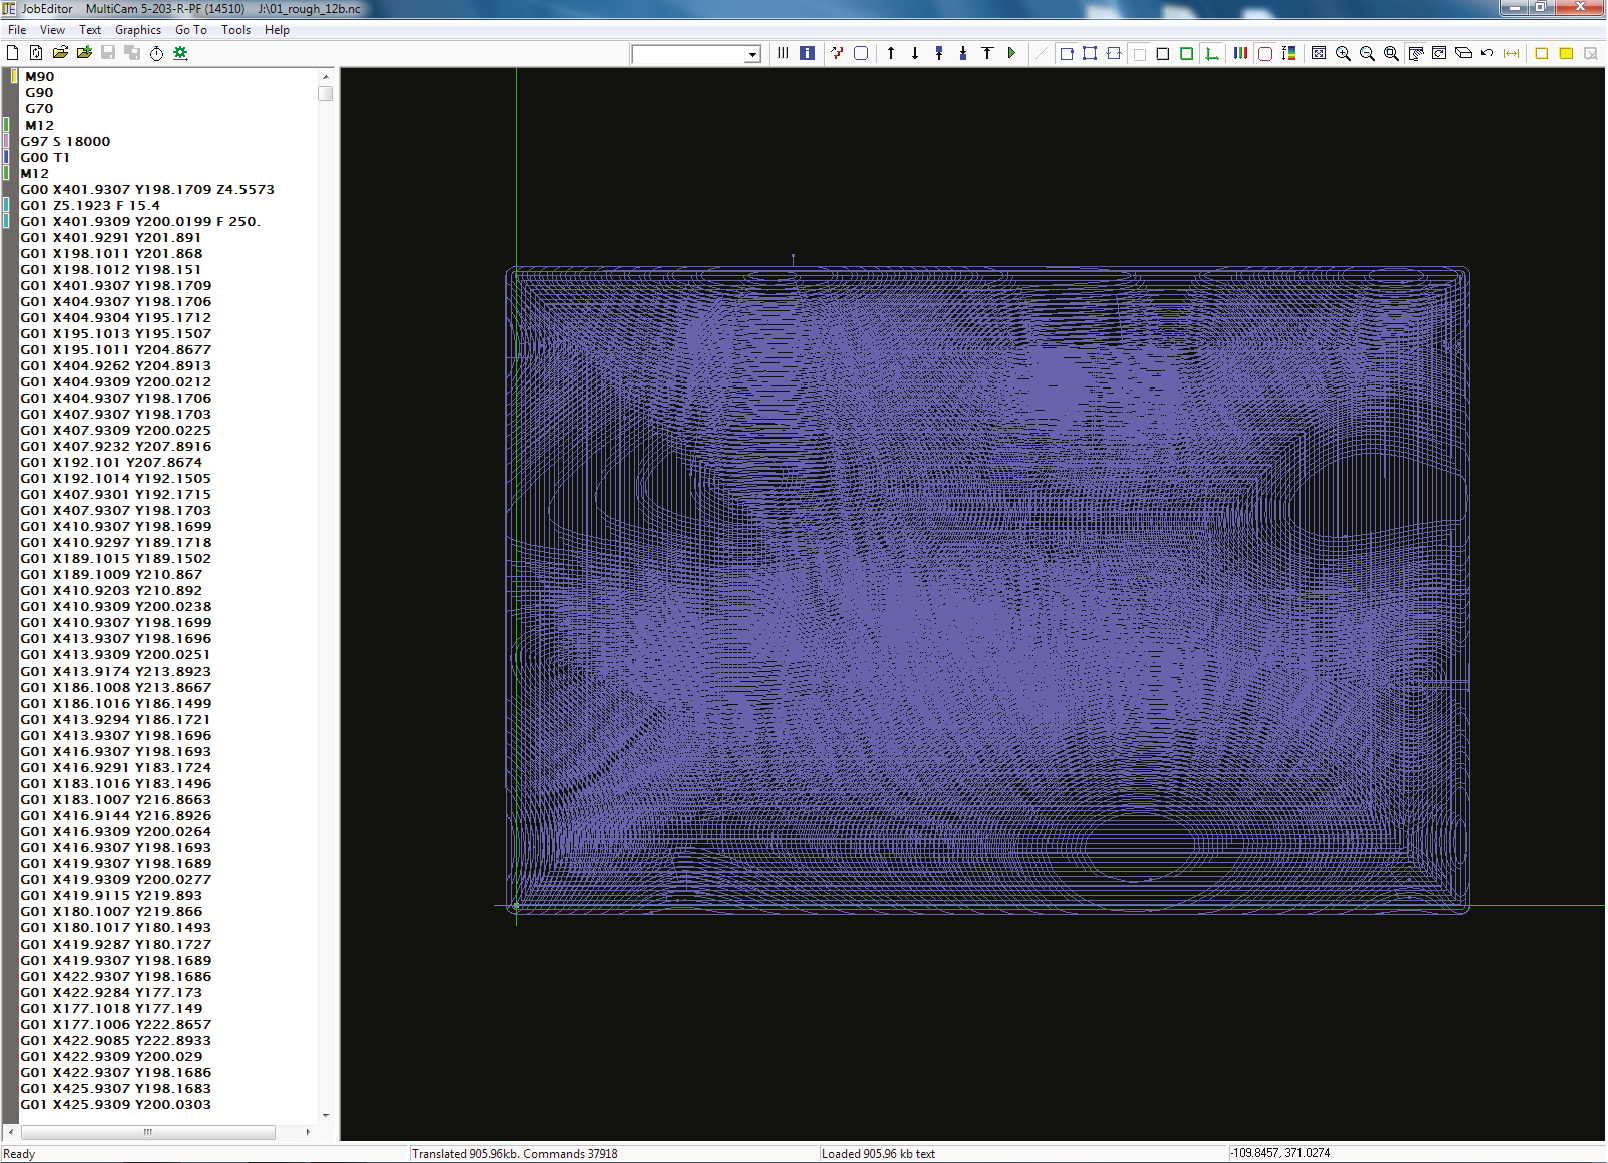
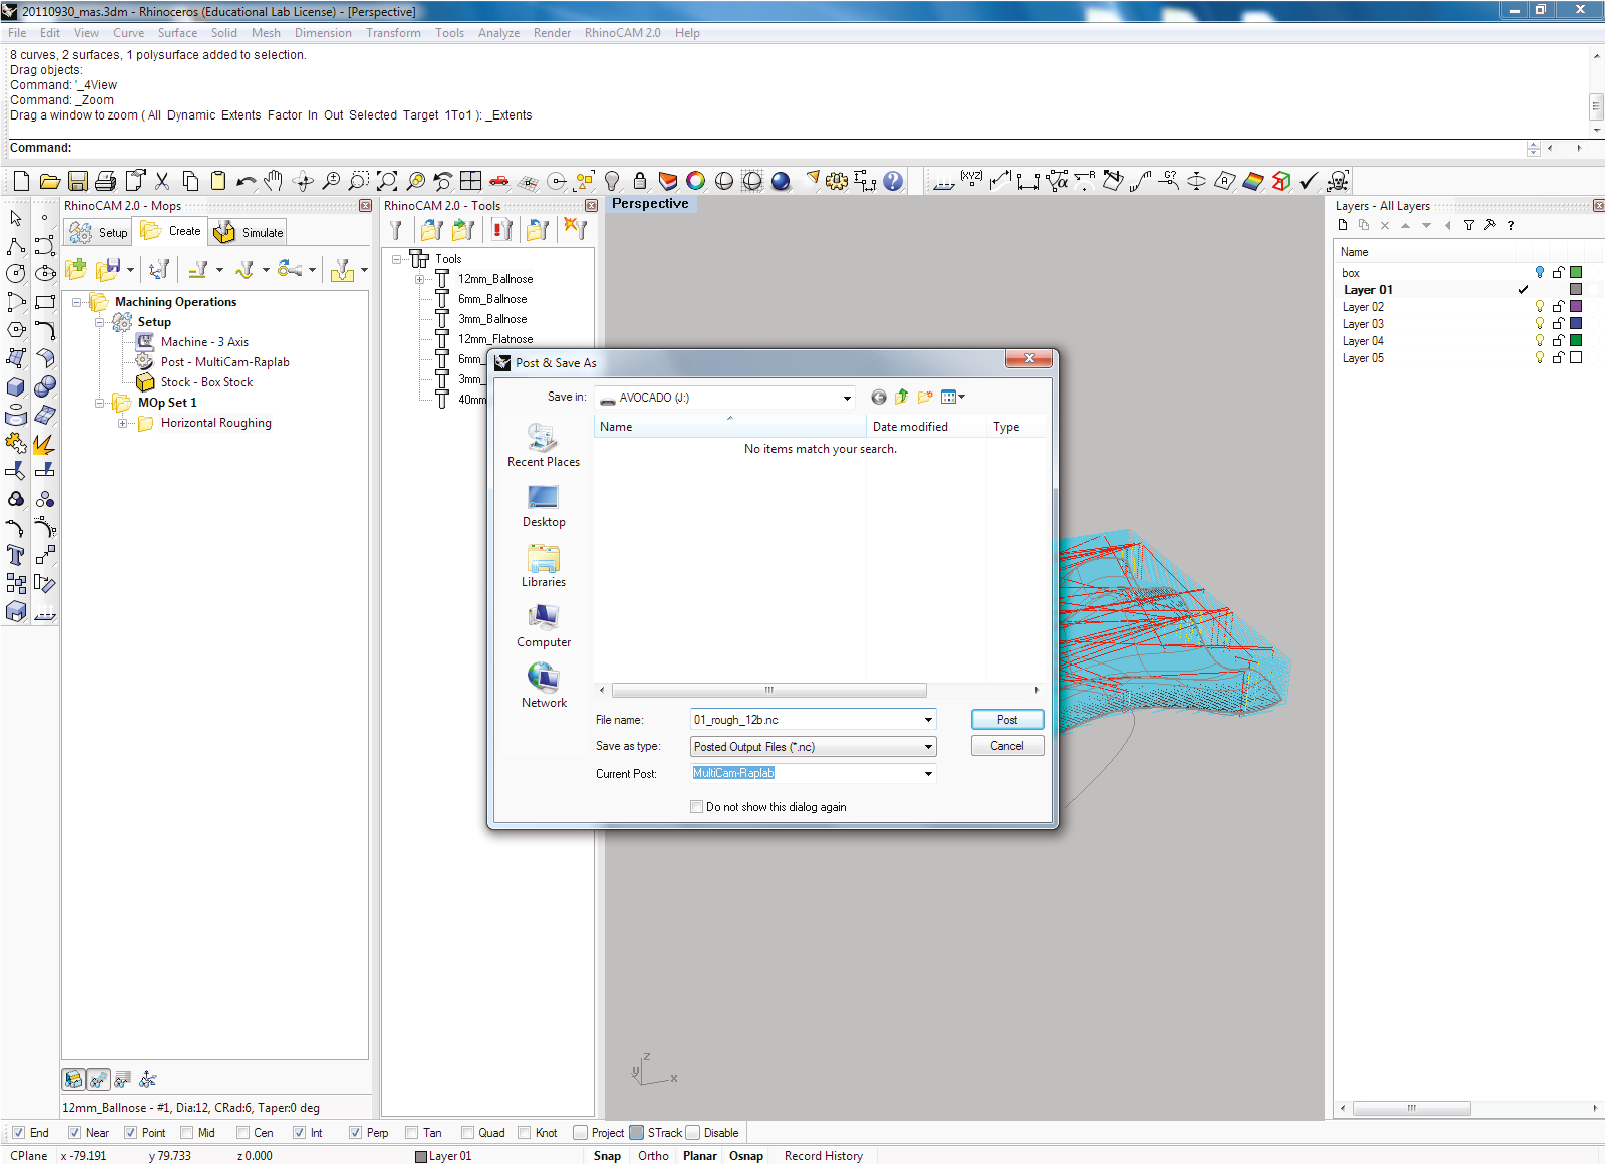
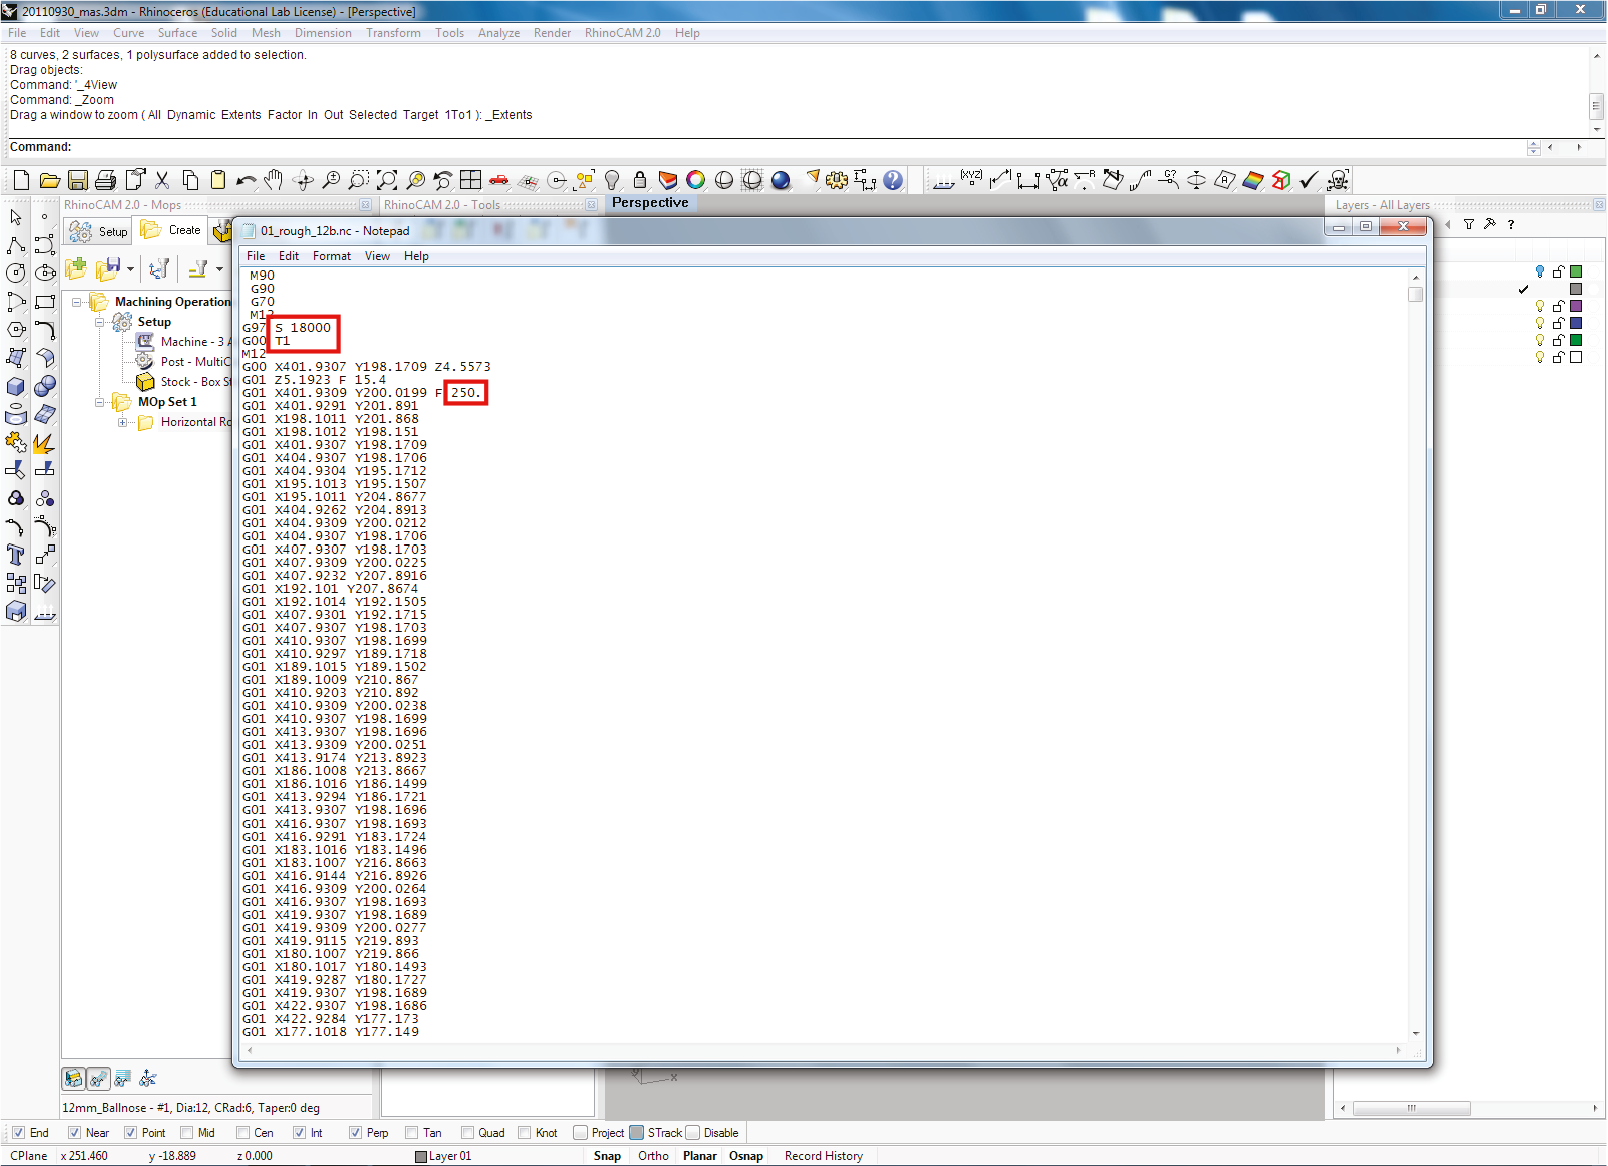
You can check the .nc file with JobEditor; you can verify the correct orientation of the model, milling paths, etc.
now we are ready
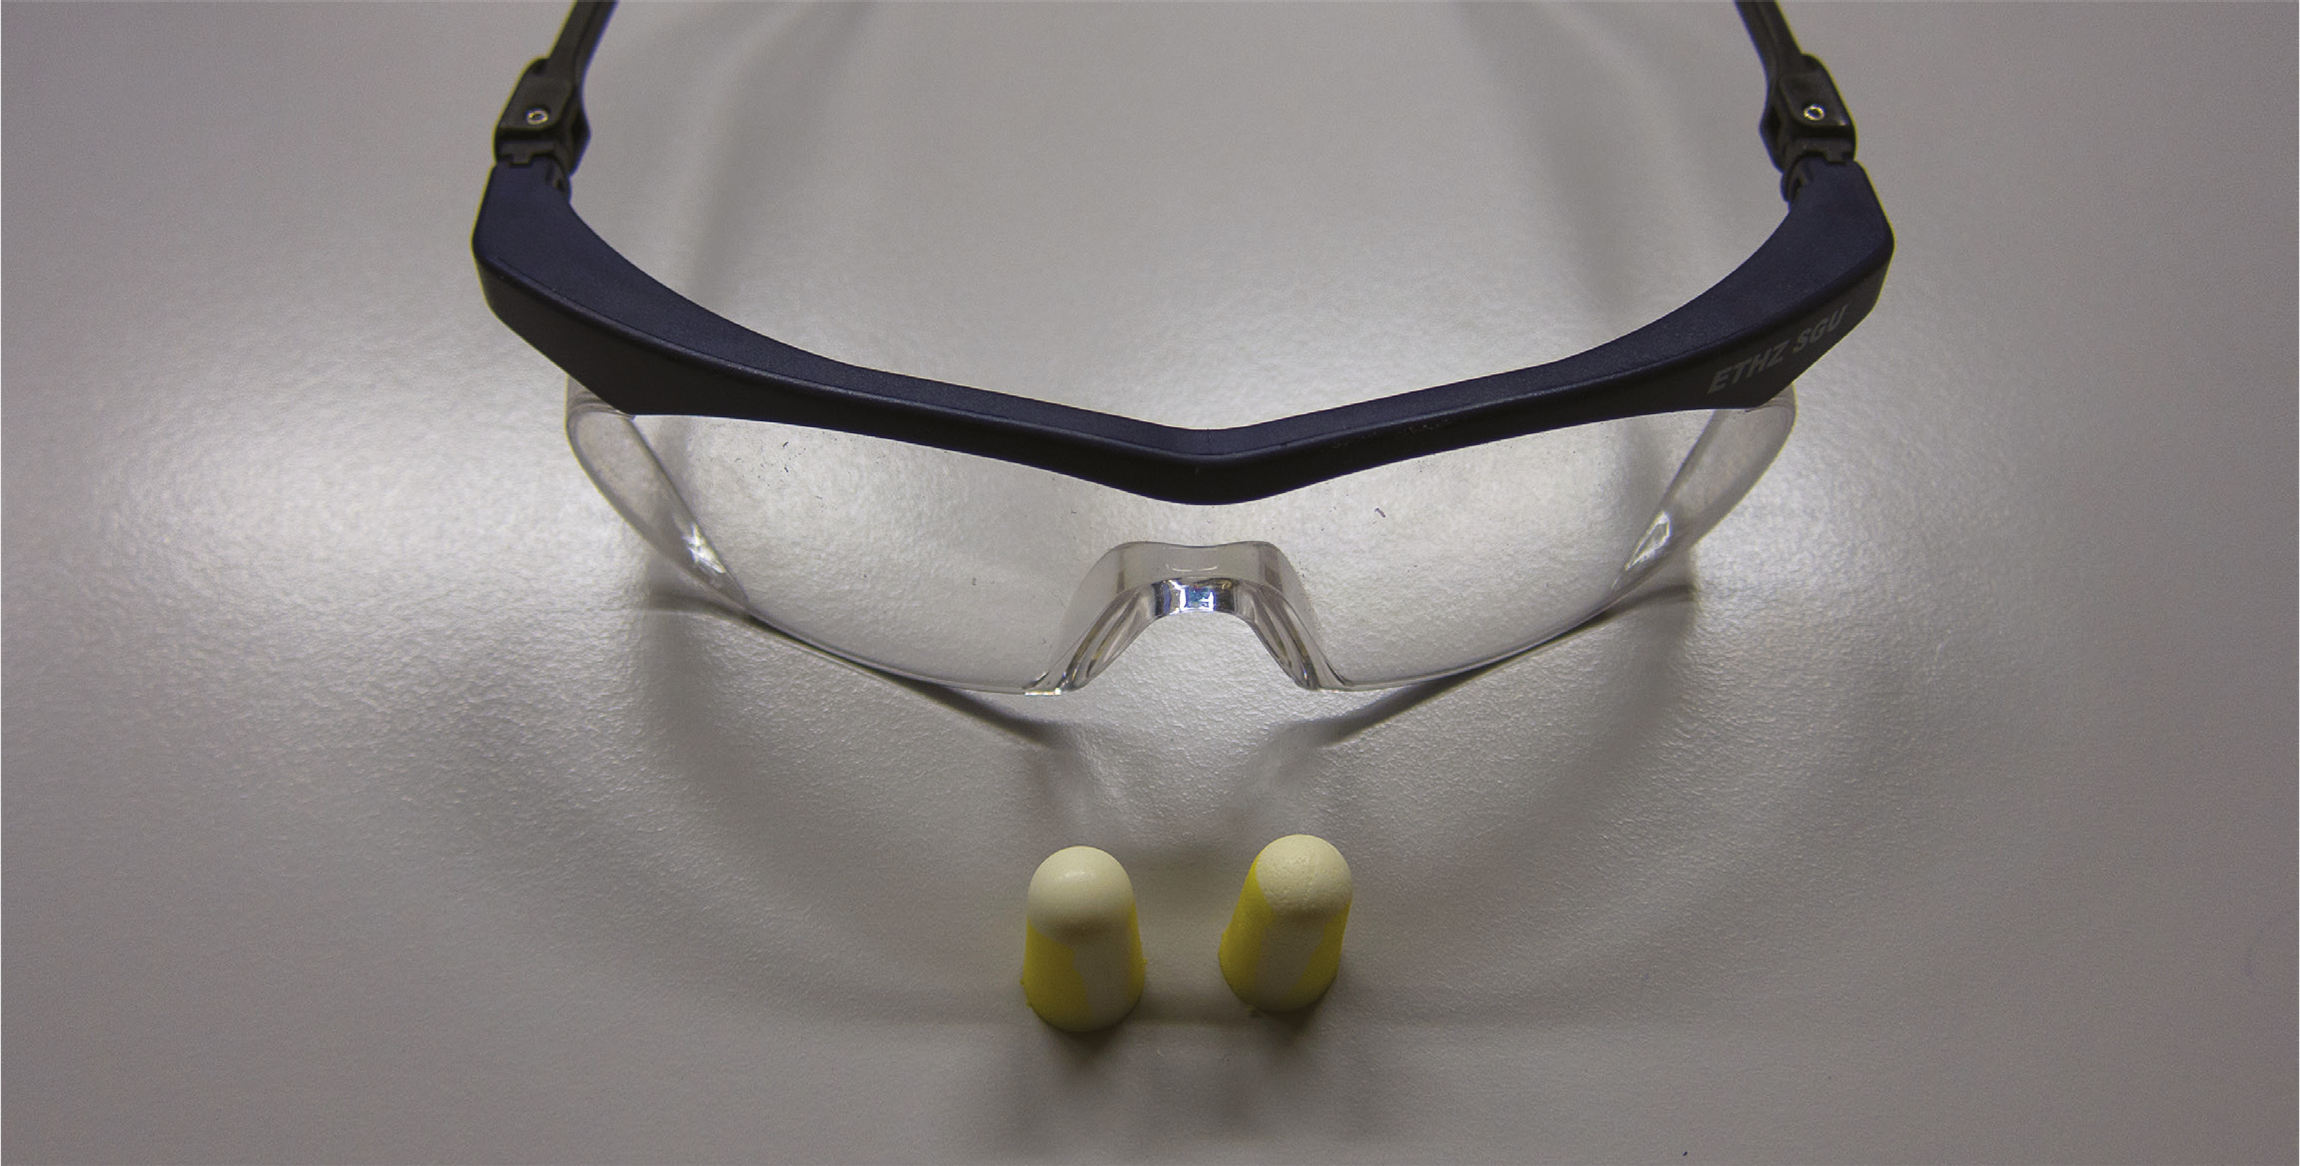
Put on your glasses and earplugs…
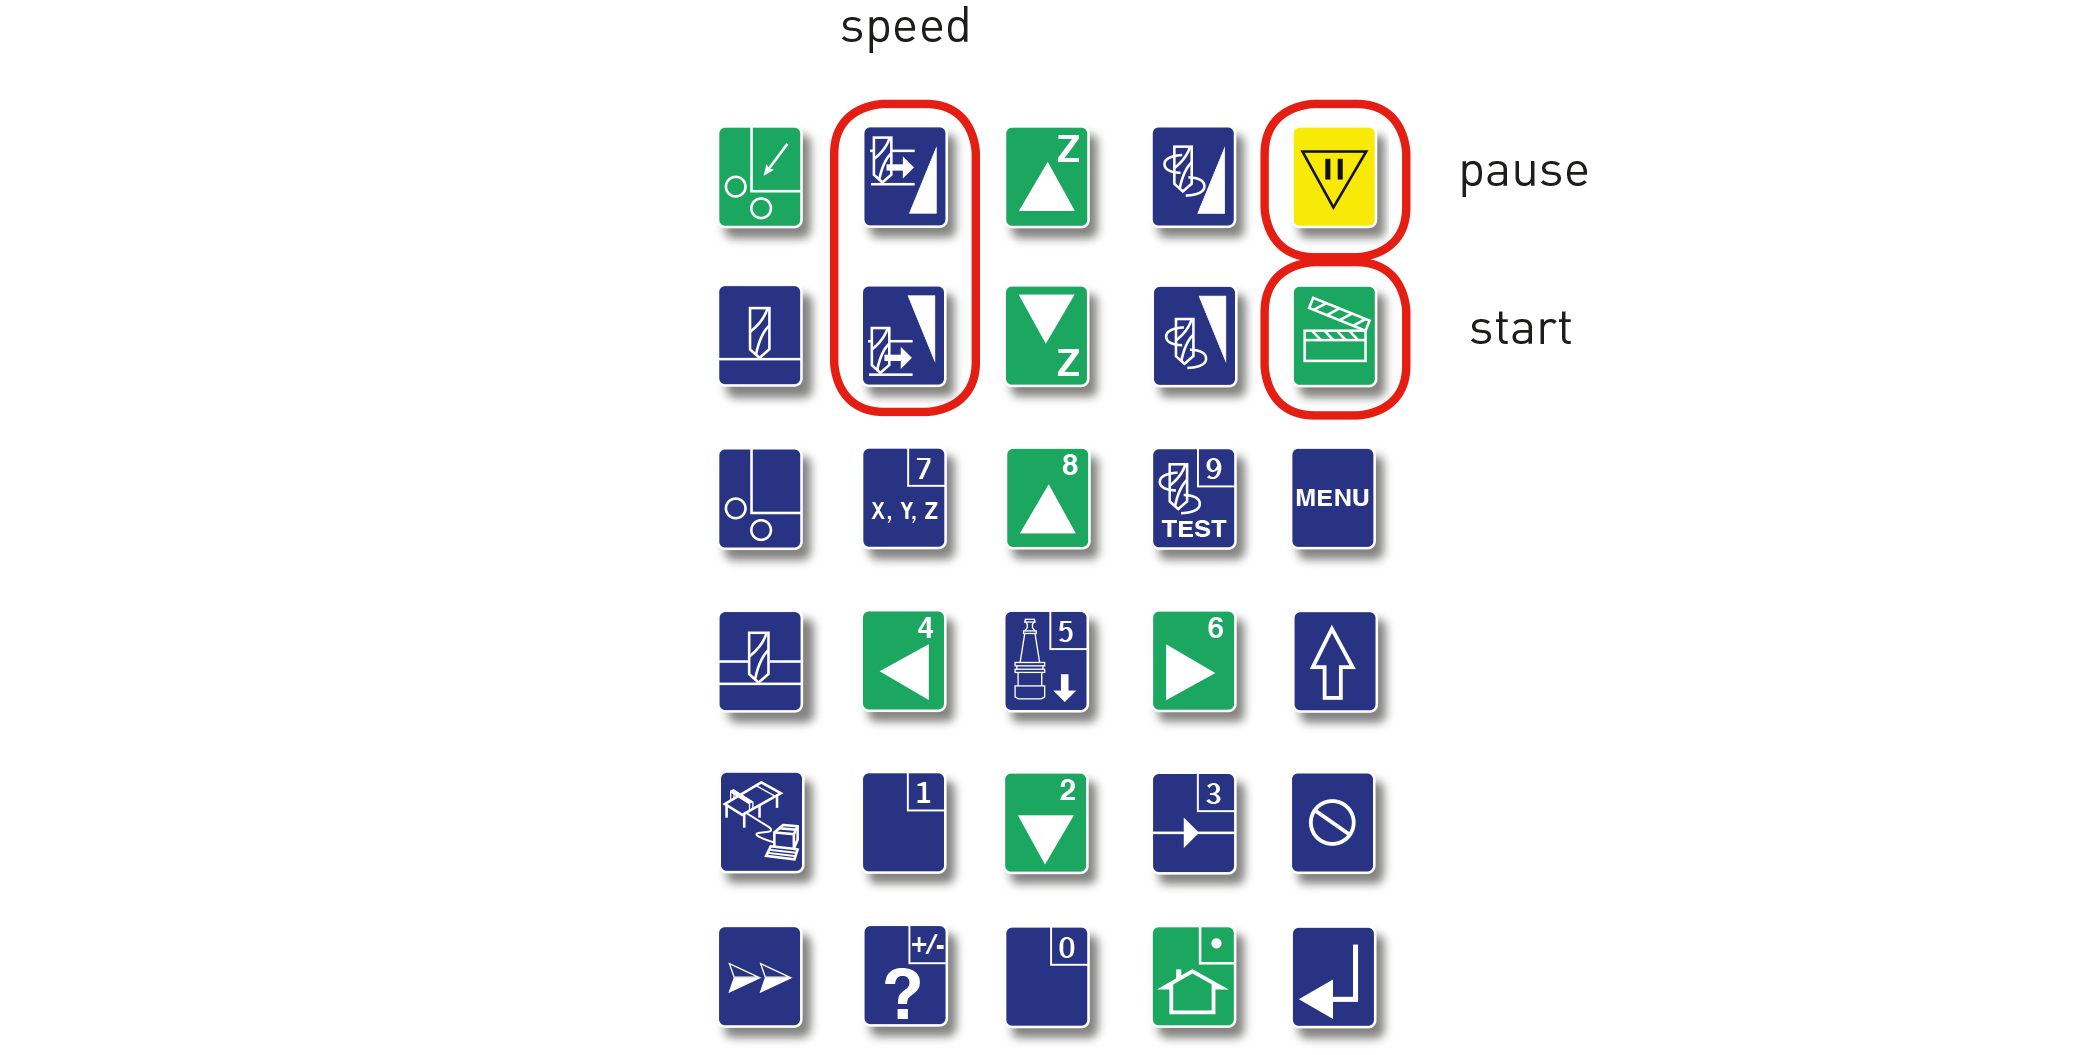
Before you press the ‚start‘ buttom make sure you lower the cutting speed to 20%. After all looks fine you can increase the speed to 100%. Now you can press ‚start‘.
When your done select ‚menu‘ > ‚shutdown‘. Press ‚enter‘ to confirm. You can now turn the machine off.