Digital Design Methods
The official site of
Digital Design Methods
ReCAP Tutorial
ReCAP is a program by Autodesk to import raw 3D poincloud scans from certain supported laser scanning devices, e.g. FARO laser scanners. It can also be used for Photogrammetry; the creation of pointcloud from a seelction of photographs. This tutorial will guide you through the importing of raw scans as well as simple pointcloud modifications. For the Photogrammetry tutorial please refer to ReCAP Photogrammetry.
Getting Started
- 1. Creating a new project
- 2. Import settings
- 3. Register the scans
- 4. Additional register information
- 5. Target groups
- 6. Launch project
- 7. Edit your point cloud model
- 8. Export
Also have a look at:
- https://knowledge.autodesk.com/support/recap/learn?sort=score
- http://docs.autodesk.com/RECAP/1.1/ENU/index.html?url=files/GUID-D8248B08-5161-489C-8E06-22BD5EBE5757.htm,topicNumber=d30e3633
User Interface
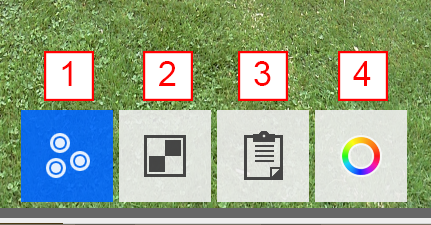
The user interface is very simple and consists of only very few buttons.
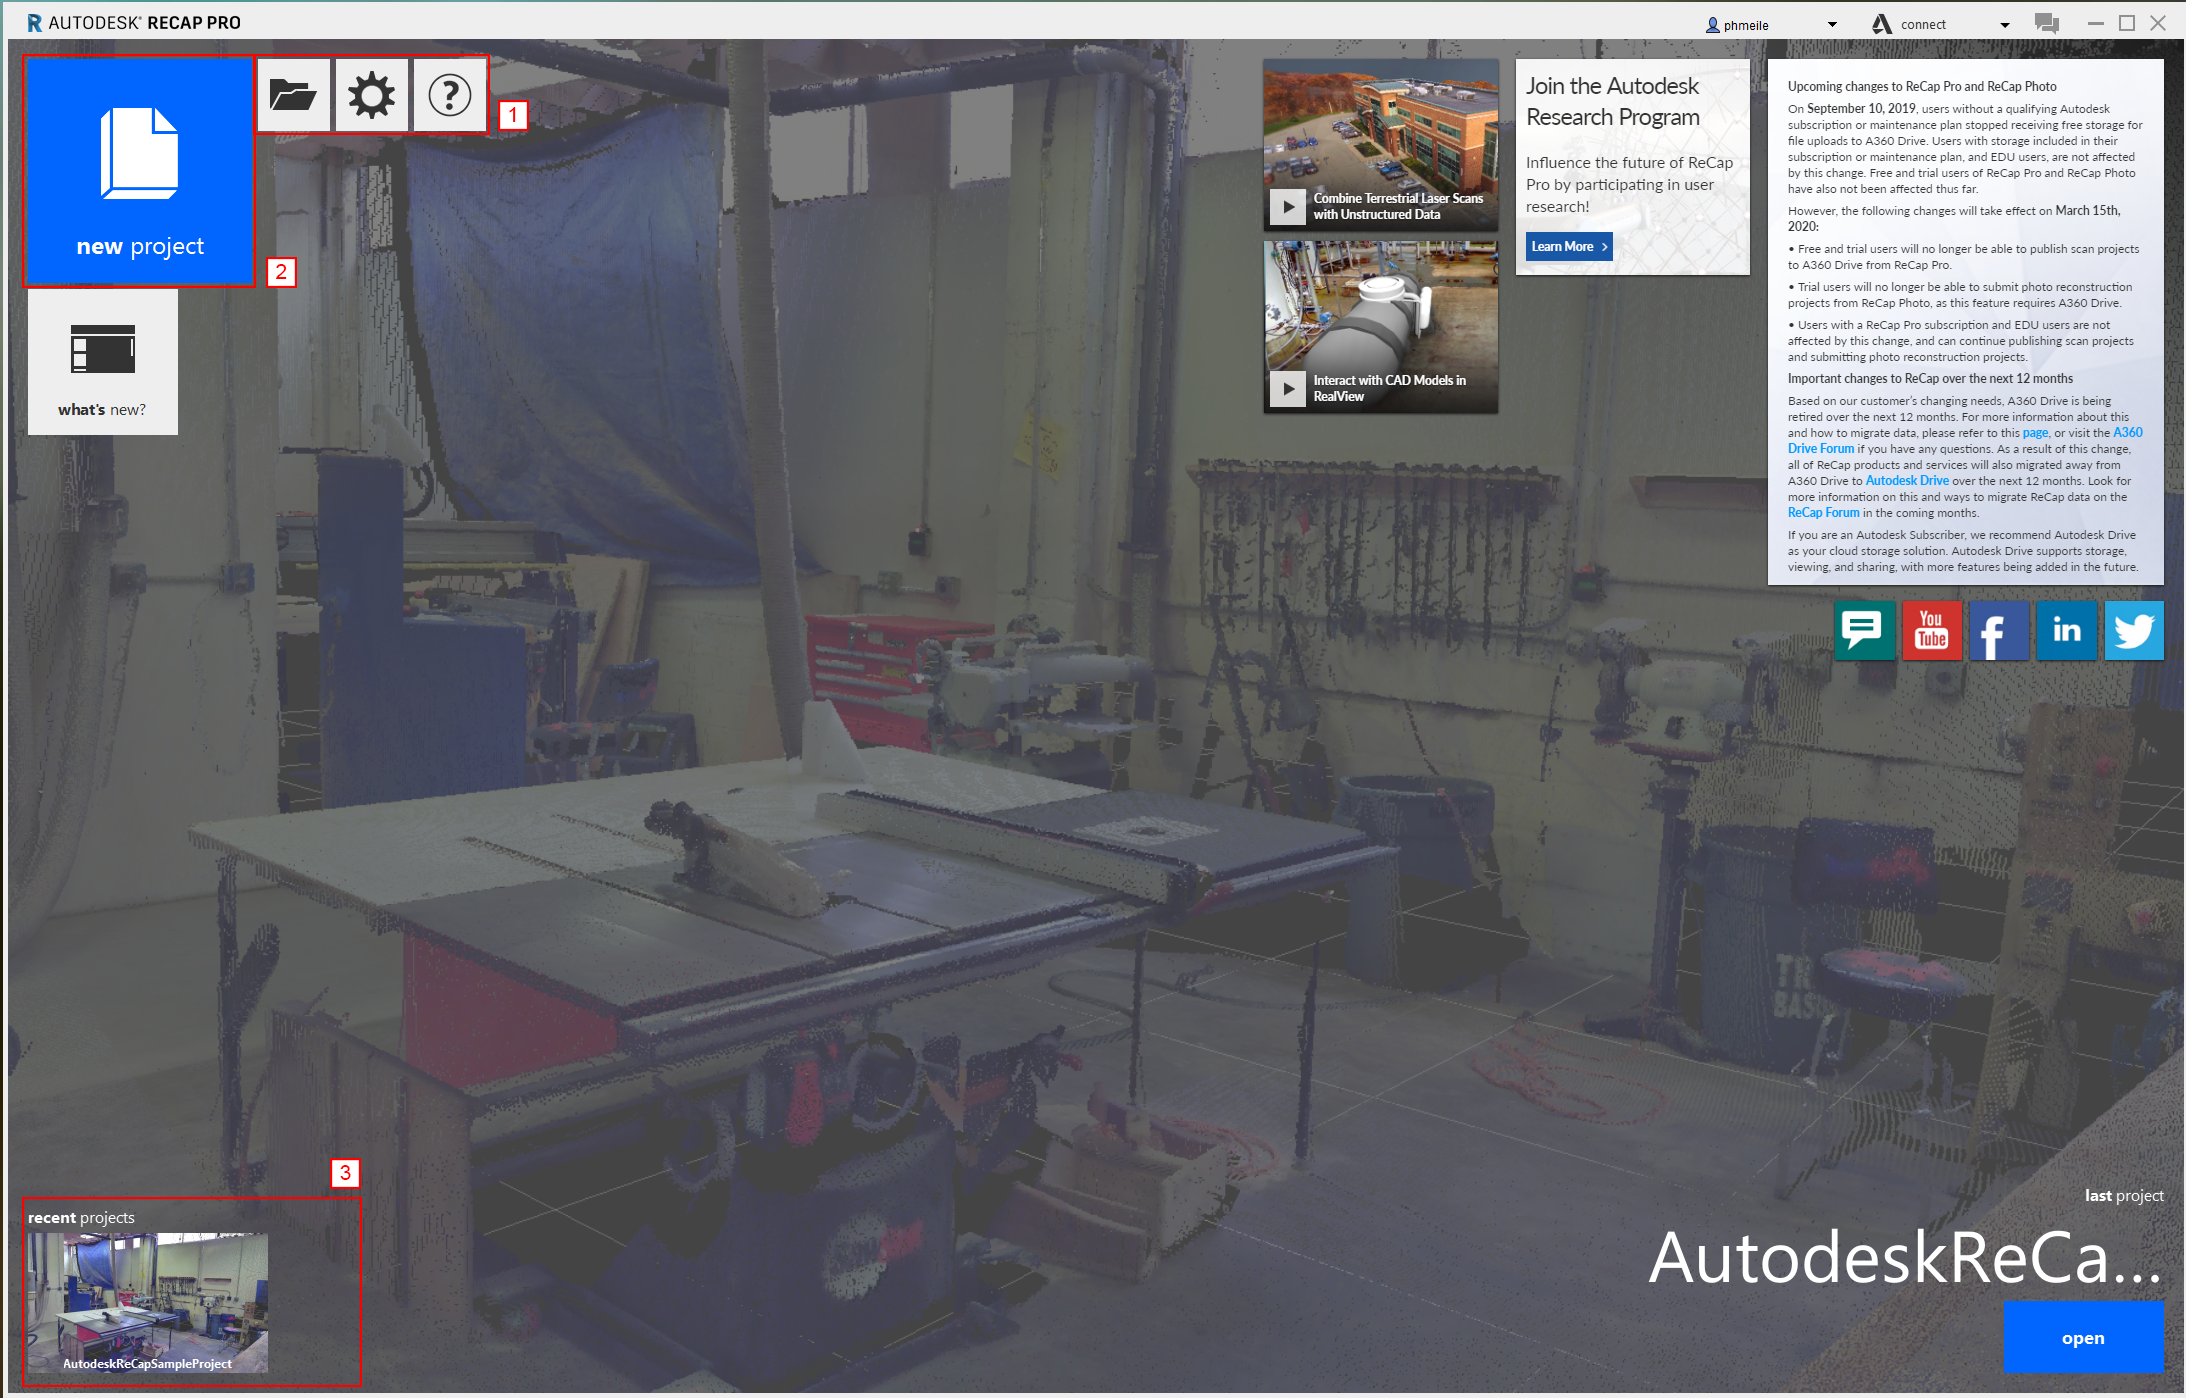
- From left to right: open a new project, settings, help
- creating a new - roject
- recent project (this area will appear when you have opened different projects)
Creating a new project
To start the import process you have to create a new project by clicking on the big blue button on the left top side. This will open up the following window:
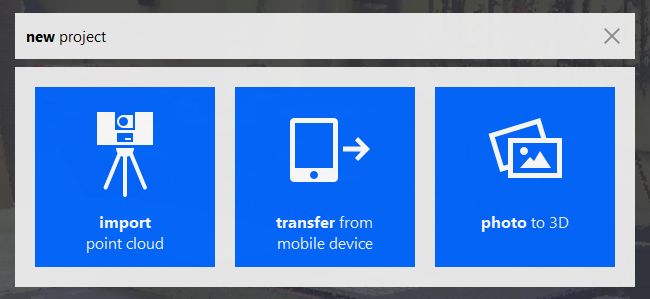
- import point cloud : with this option you can import data from the hard drive or a usb stick.
- transfer from mobile device : import pointcloud data directly from a tablet, smartphone etc.
- photo to 3d : Recap can create a 3d model from normal pictures (photogrammetry)
If you are working with a 3d laser scanner (for example the FARO 3d scanner) you can copy the data from the sd-card to your harddrive. By clicking on import point cloud you can navigate to this folder and select the first folder (in case of the Faro Scanner the folder is named … .fls ). Make sure to select the whole folder, not just its content. FARO scanners create such a folder for each separate scan. (We will import the other scans later)
Import settings
In the following window you have different options for your scan.
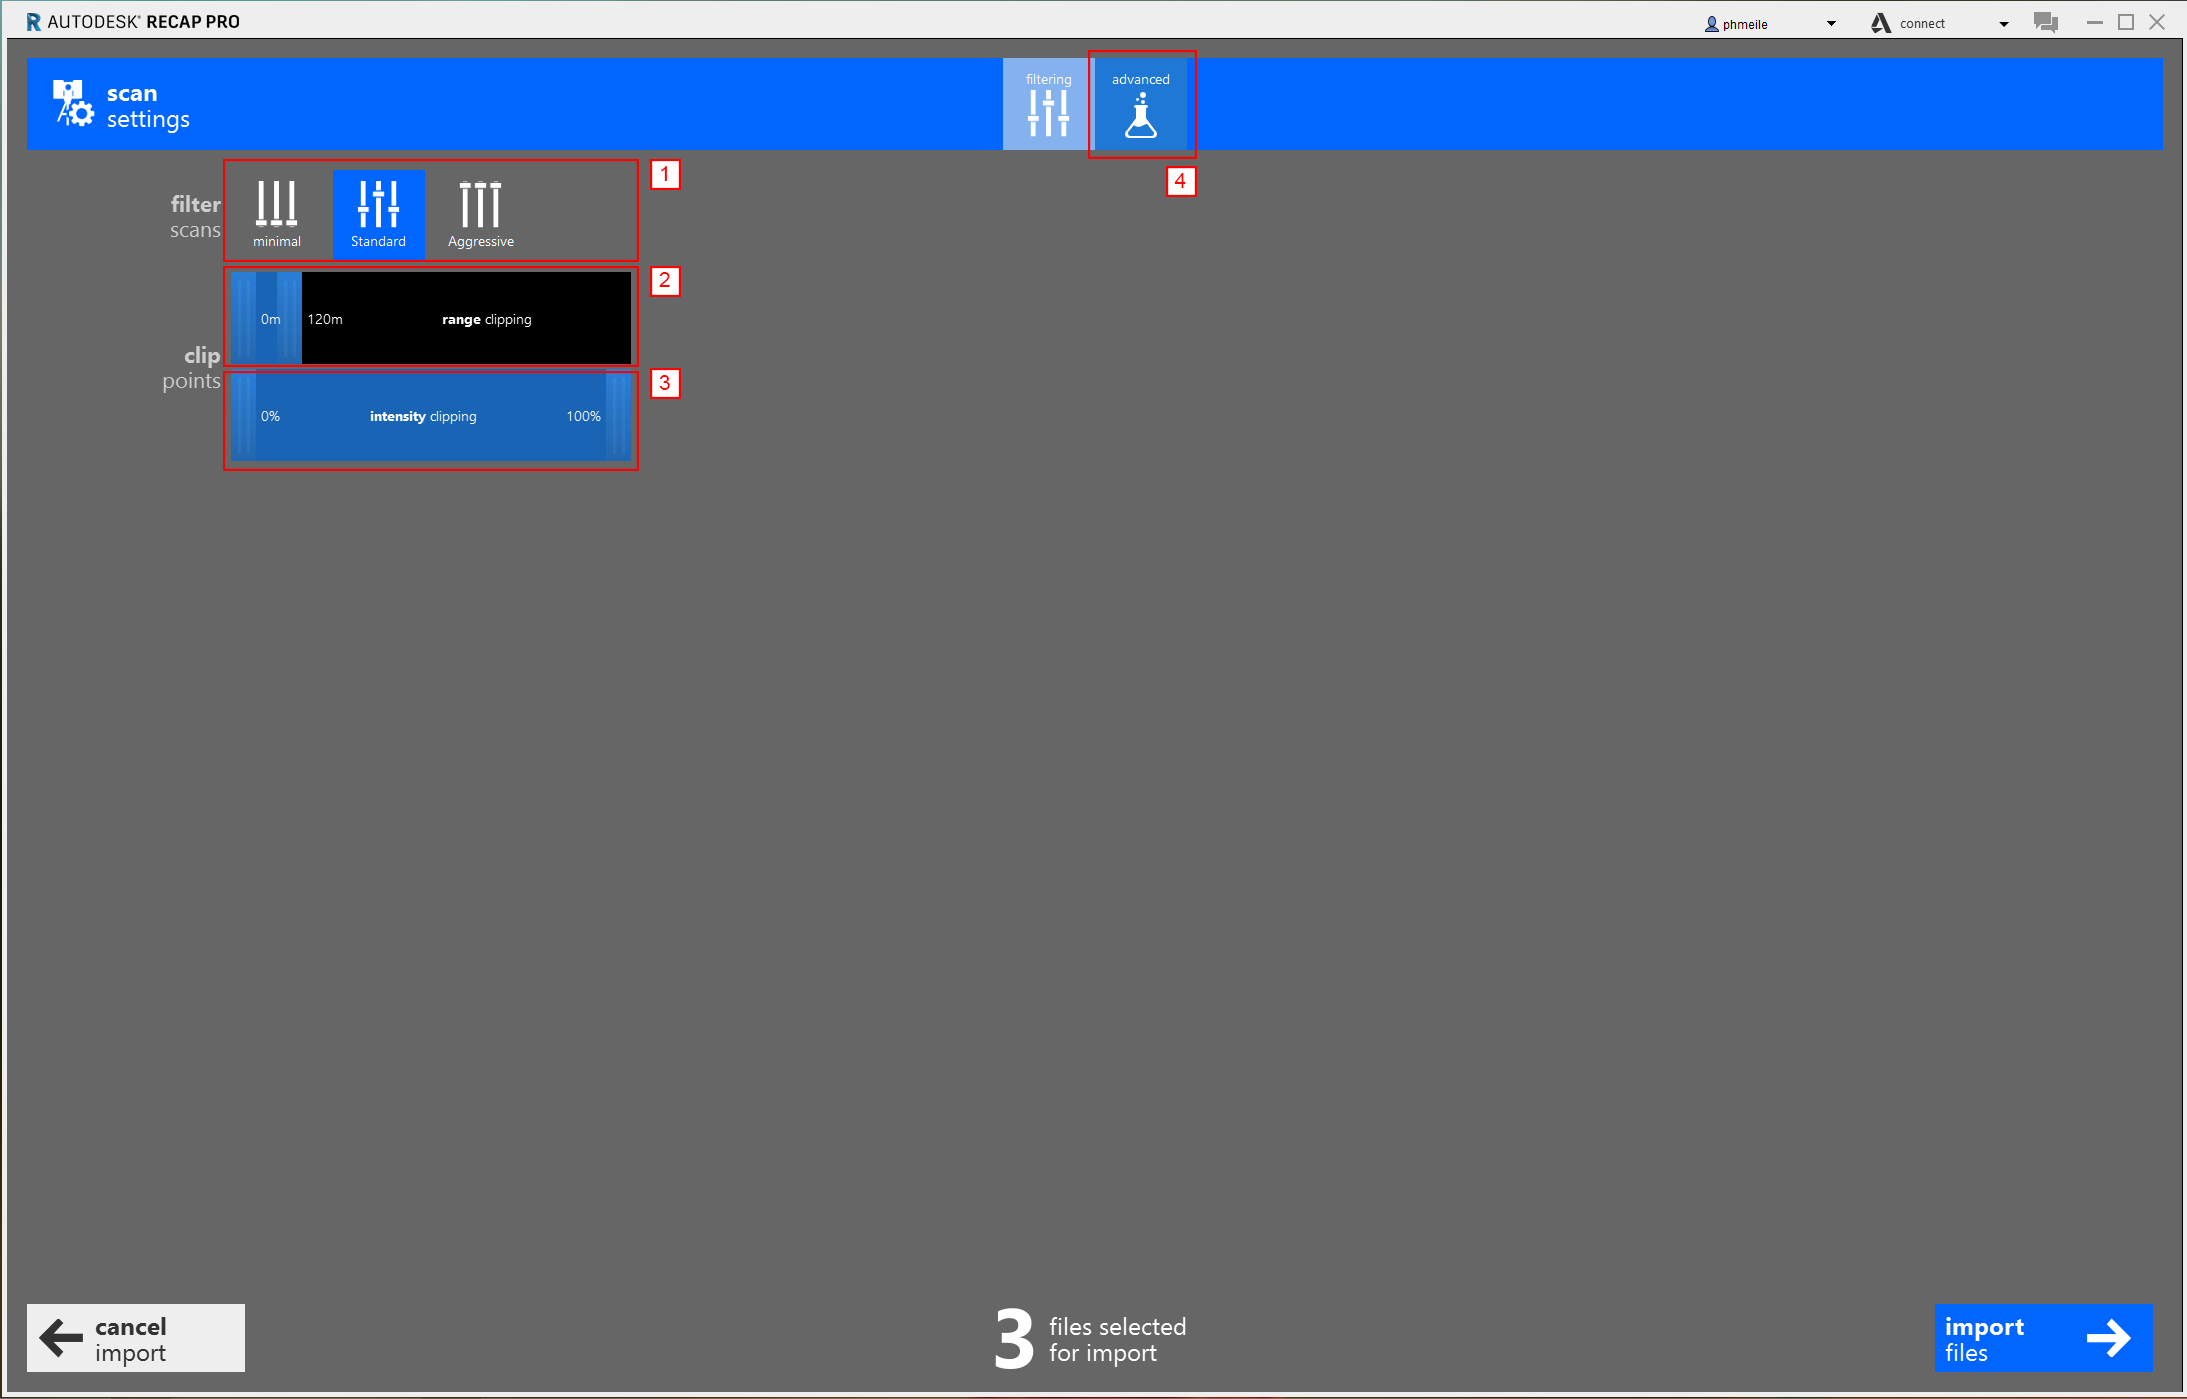
- filter scans: minimal (preserves virtually all points), standard ( preserves most points, filtering only isolated points that do not appear to be part of the surface or object), aggressive (preserves only points that are part of a surface or object)
- range clipping : determines the minimum and maximum distance in Meters from the scanner at which the points should be included.
- Intensity clipping : determines the range of intensity values to allow for included points.
- advanced settings
You can experiment with the import settings depending on the scan data. Good standard settings are: Filter scans to standard. Range clipping to 300m (depends on the range of your scanner) and intensity clippinging 100%.
Next - click on the advanced button at the top (number 4)
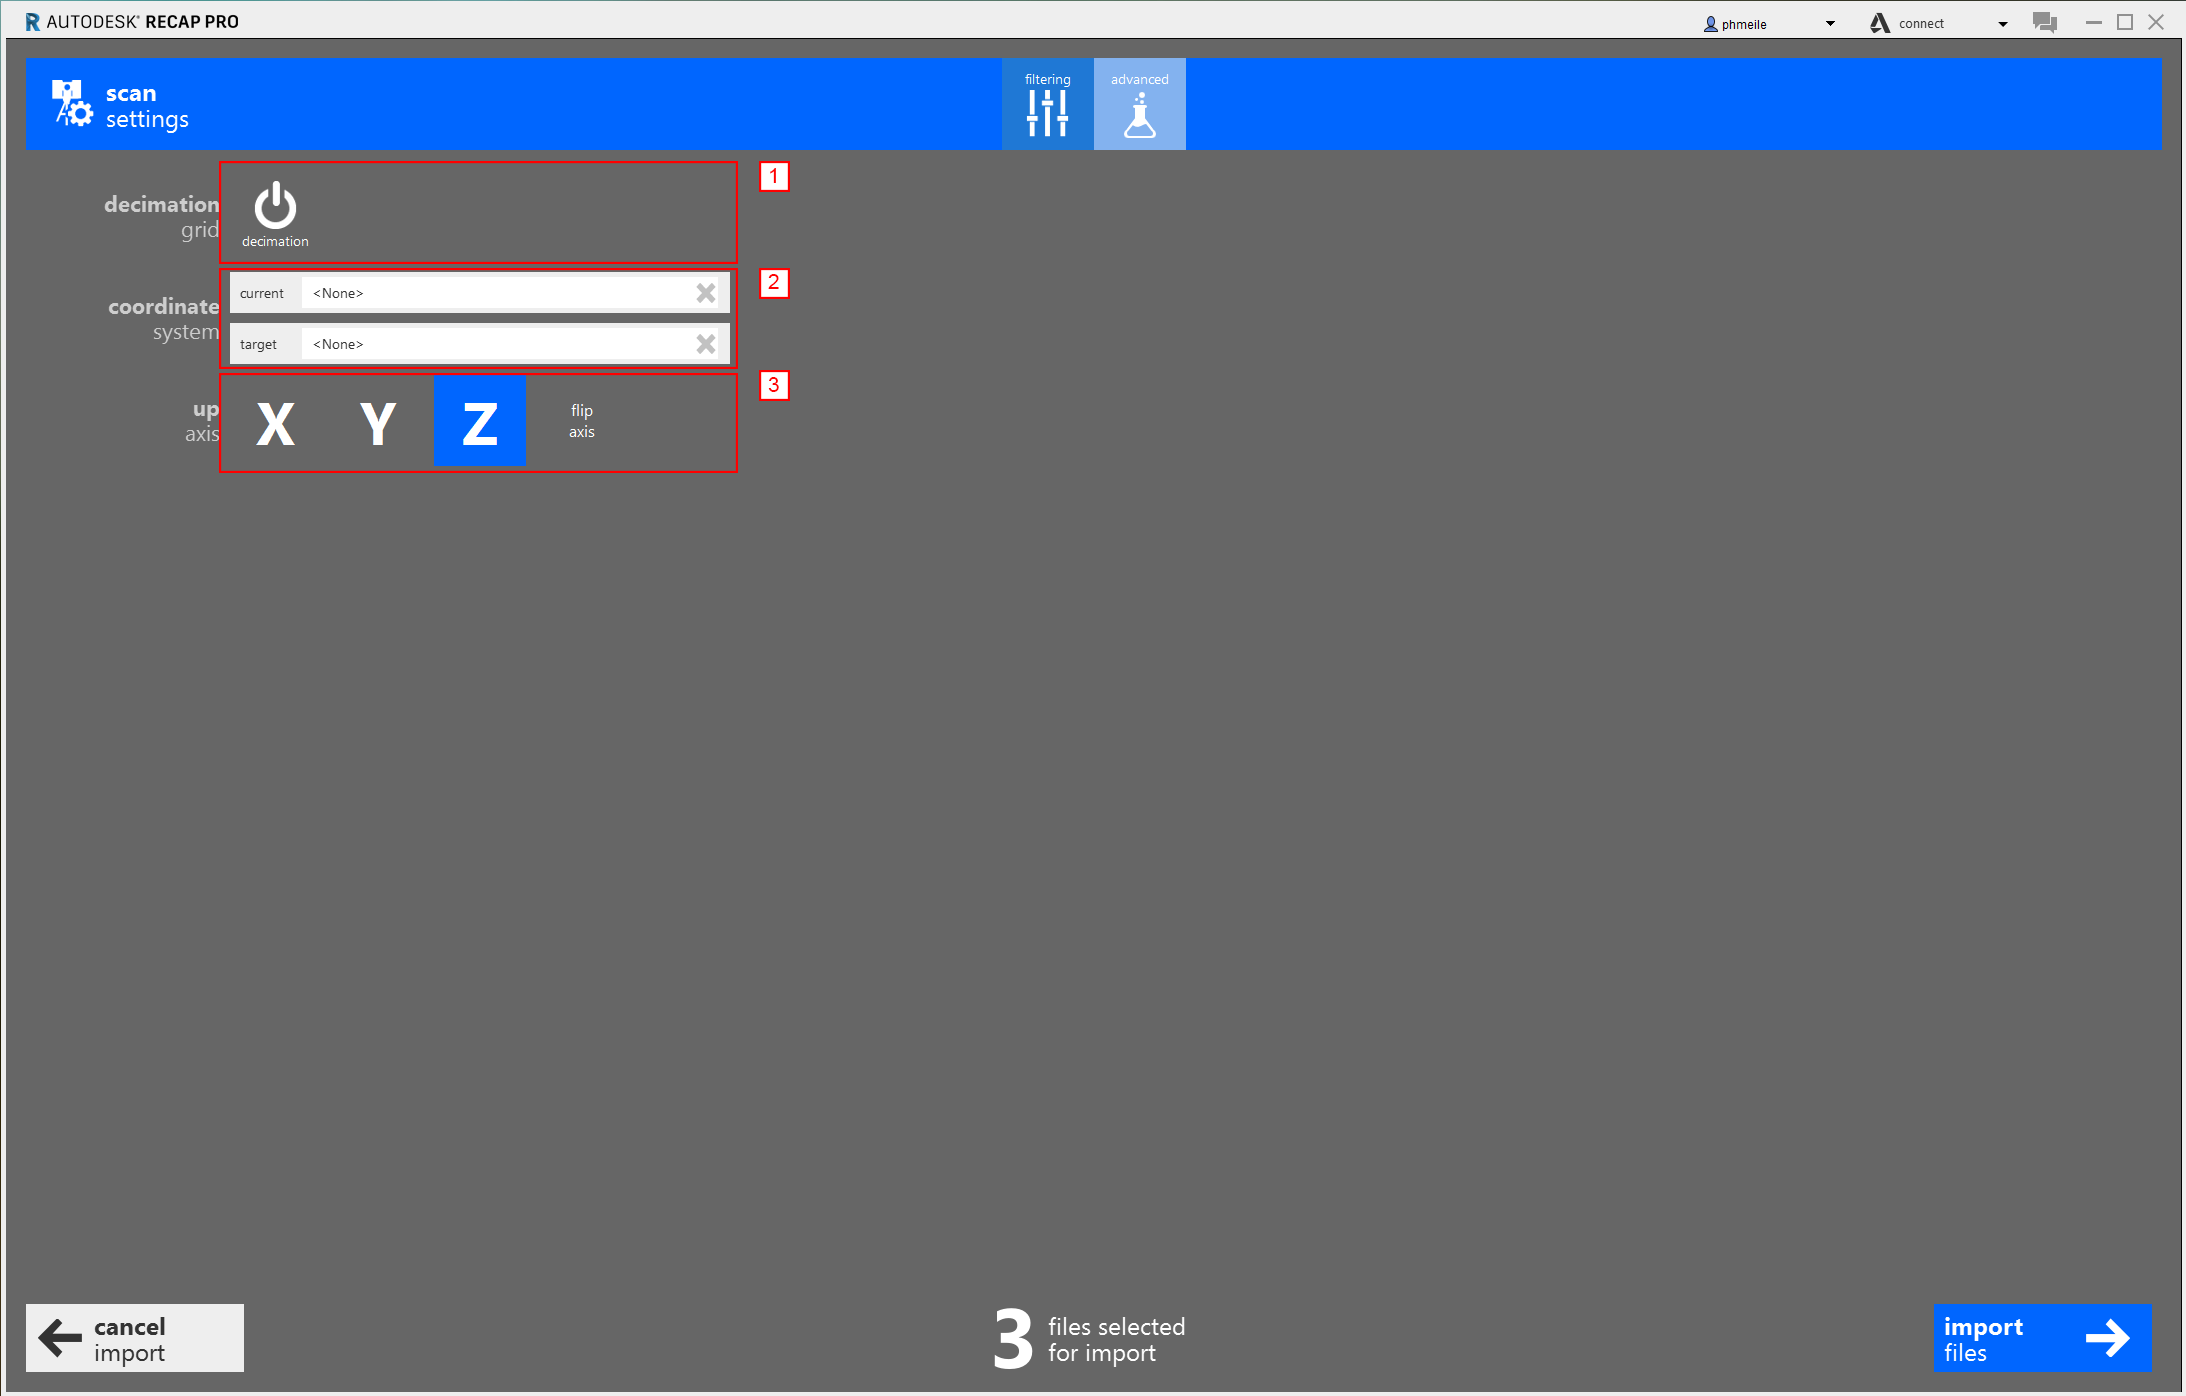
- decimation grid : Controls the number of points imported with the point cloud by specifying the smallest cubic volume that a single point can occupy.
- coordinate system : Aligns the point cloud with a specific EPSG coordinate reference system.
- up axis : Set the preferred “up” axis for your project.
Turn off the decimation grid and set the up axis to z. These are all settings that have to be set up and should be repeated with every new scan for later imports. When importing several files at once the settings apply to all scans which are imported together. Click on “import files”
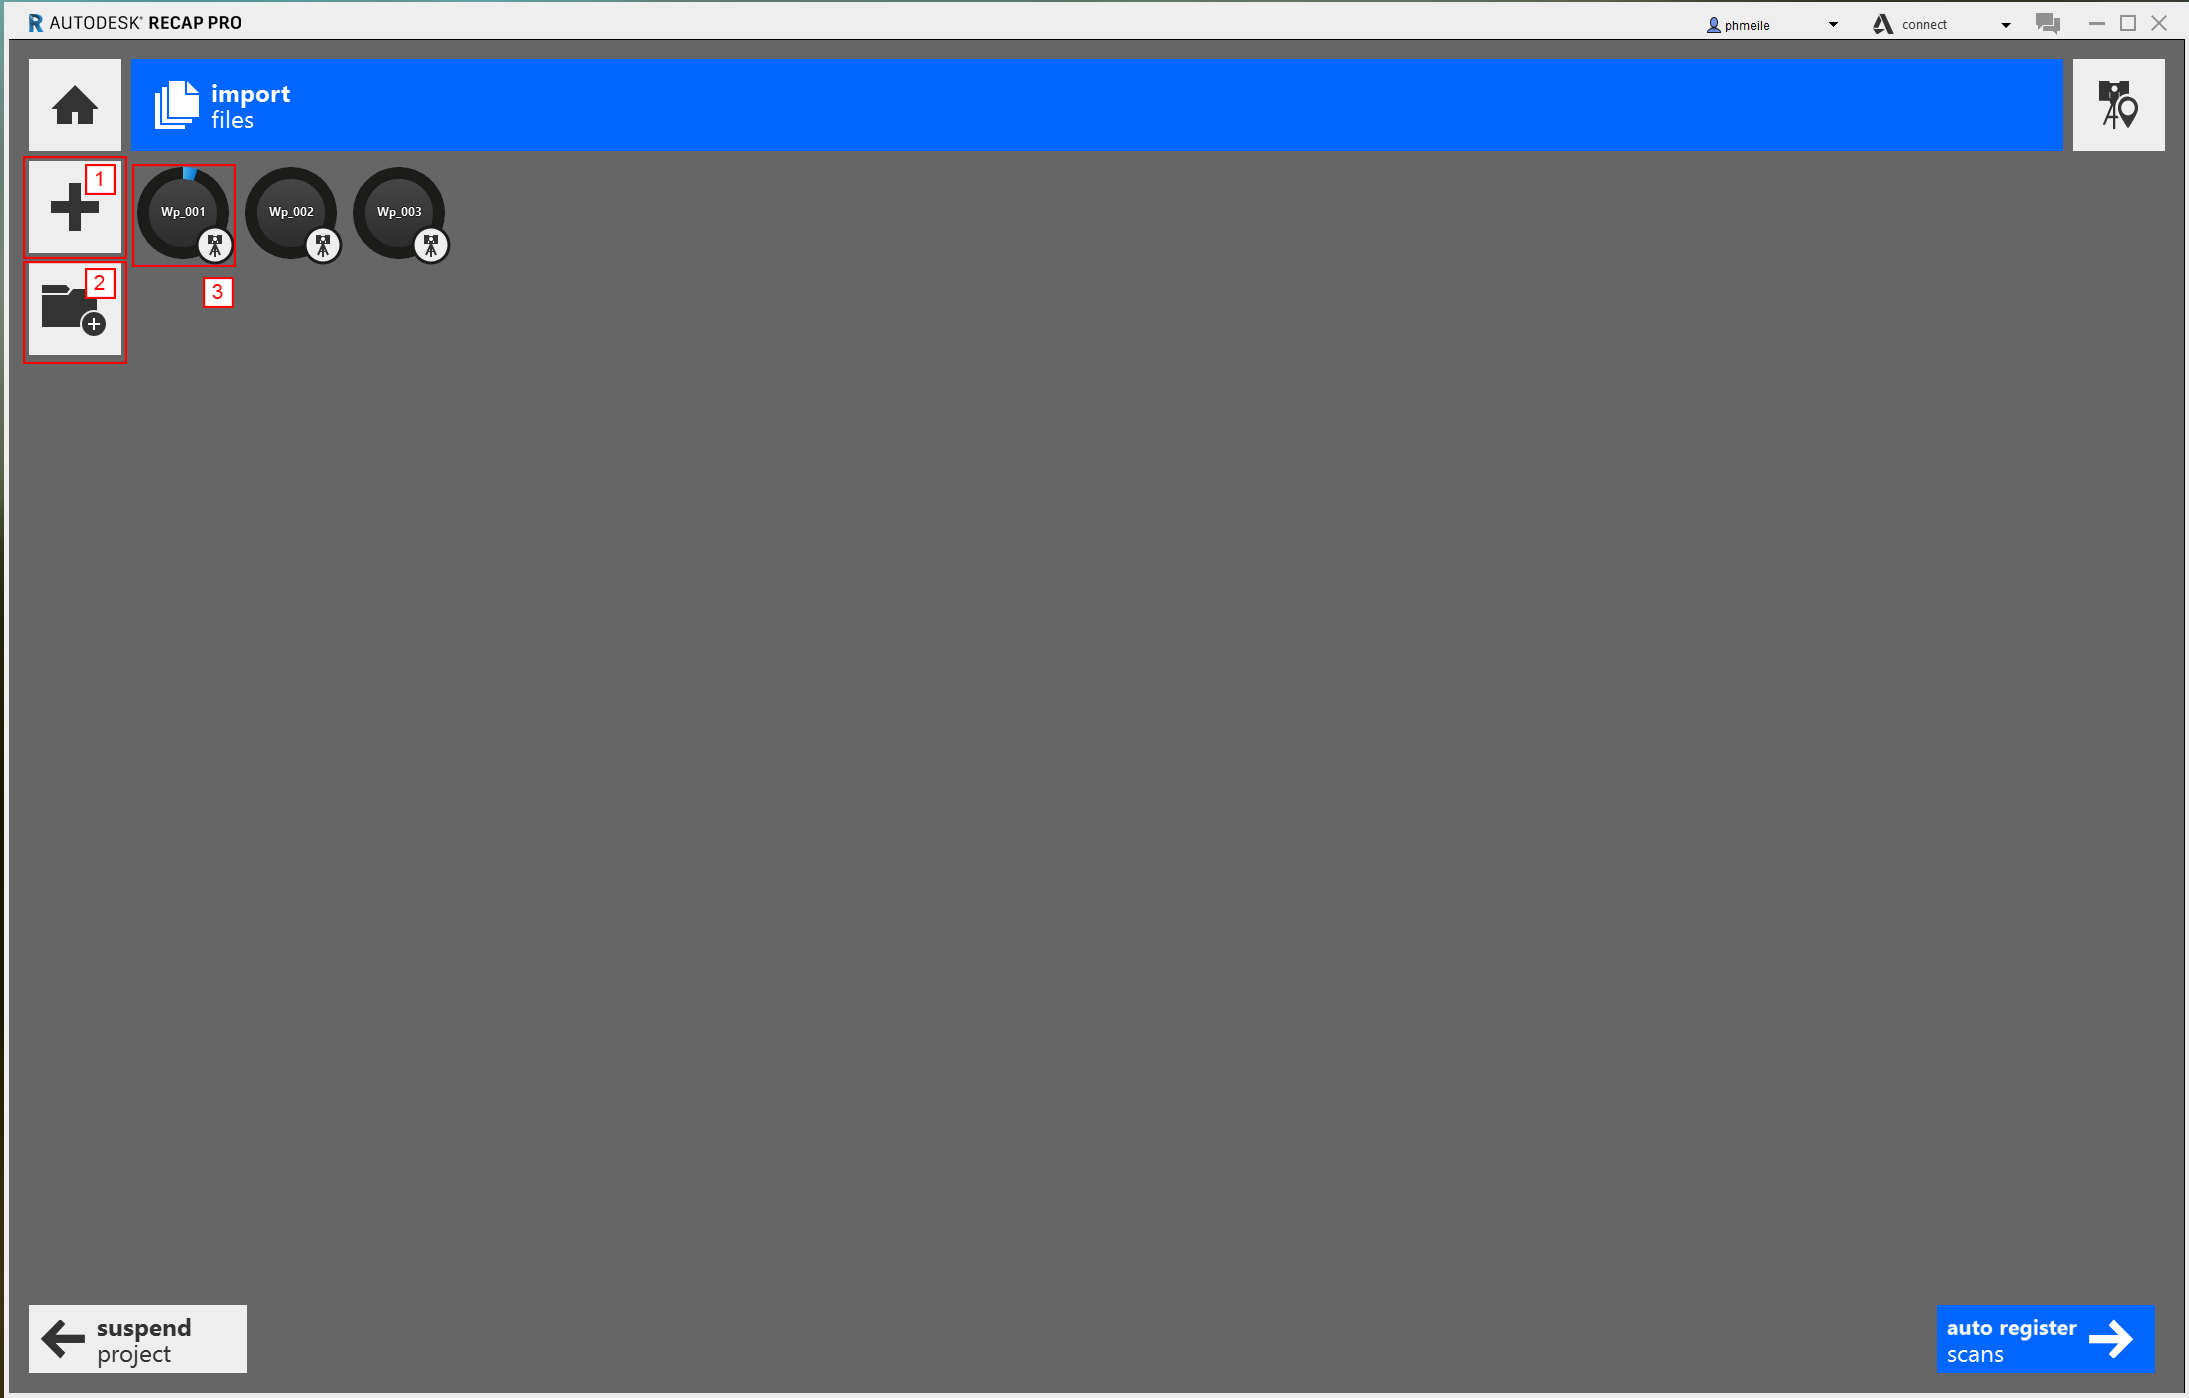
- With the “+” symbol you can import additional single files
- This option can be used to import a whole folder at once (with all sub-folders which are normaly created with the faro scanner)
- The blue circle around the file name indicates the import process. The indexing for each scan can range from a few minutes to a few hours, depending on the number and size of the the file.
Registering of scans
Registering is about stitching the seperate scan together to one big pointcloud model. ReCAP will try to automatically connect given scans via “auto-register”. Even though the program is quite advanced it might need some manual help lateron.
After importing multiple files, ReCap will process them one by one. When it has imported all scans the button auto register appears.
Note any pre-existing registration information will be lost when you click on auto register
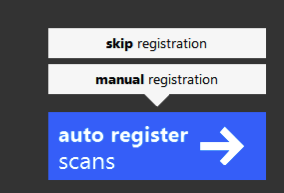
Especially in less urban settings with little to no large continous surfaces, ReCAP will not find a perfect match to align scans. In these case you can hover with the cursor over the auto register button and take the option “manual registration”
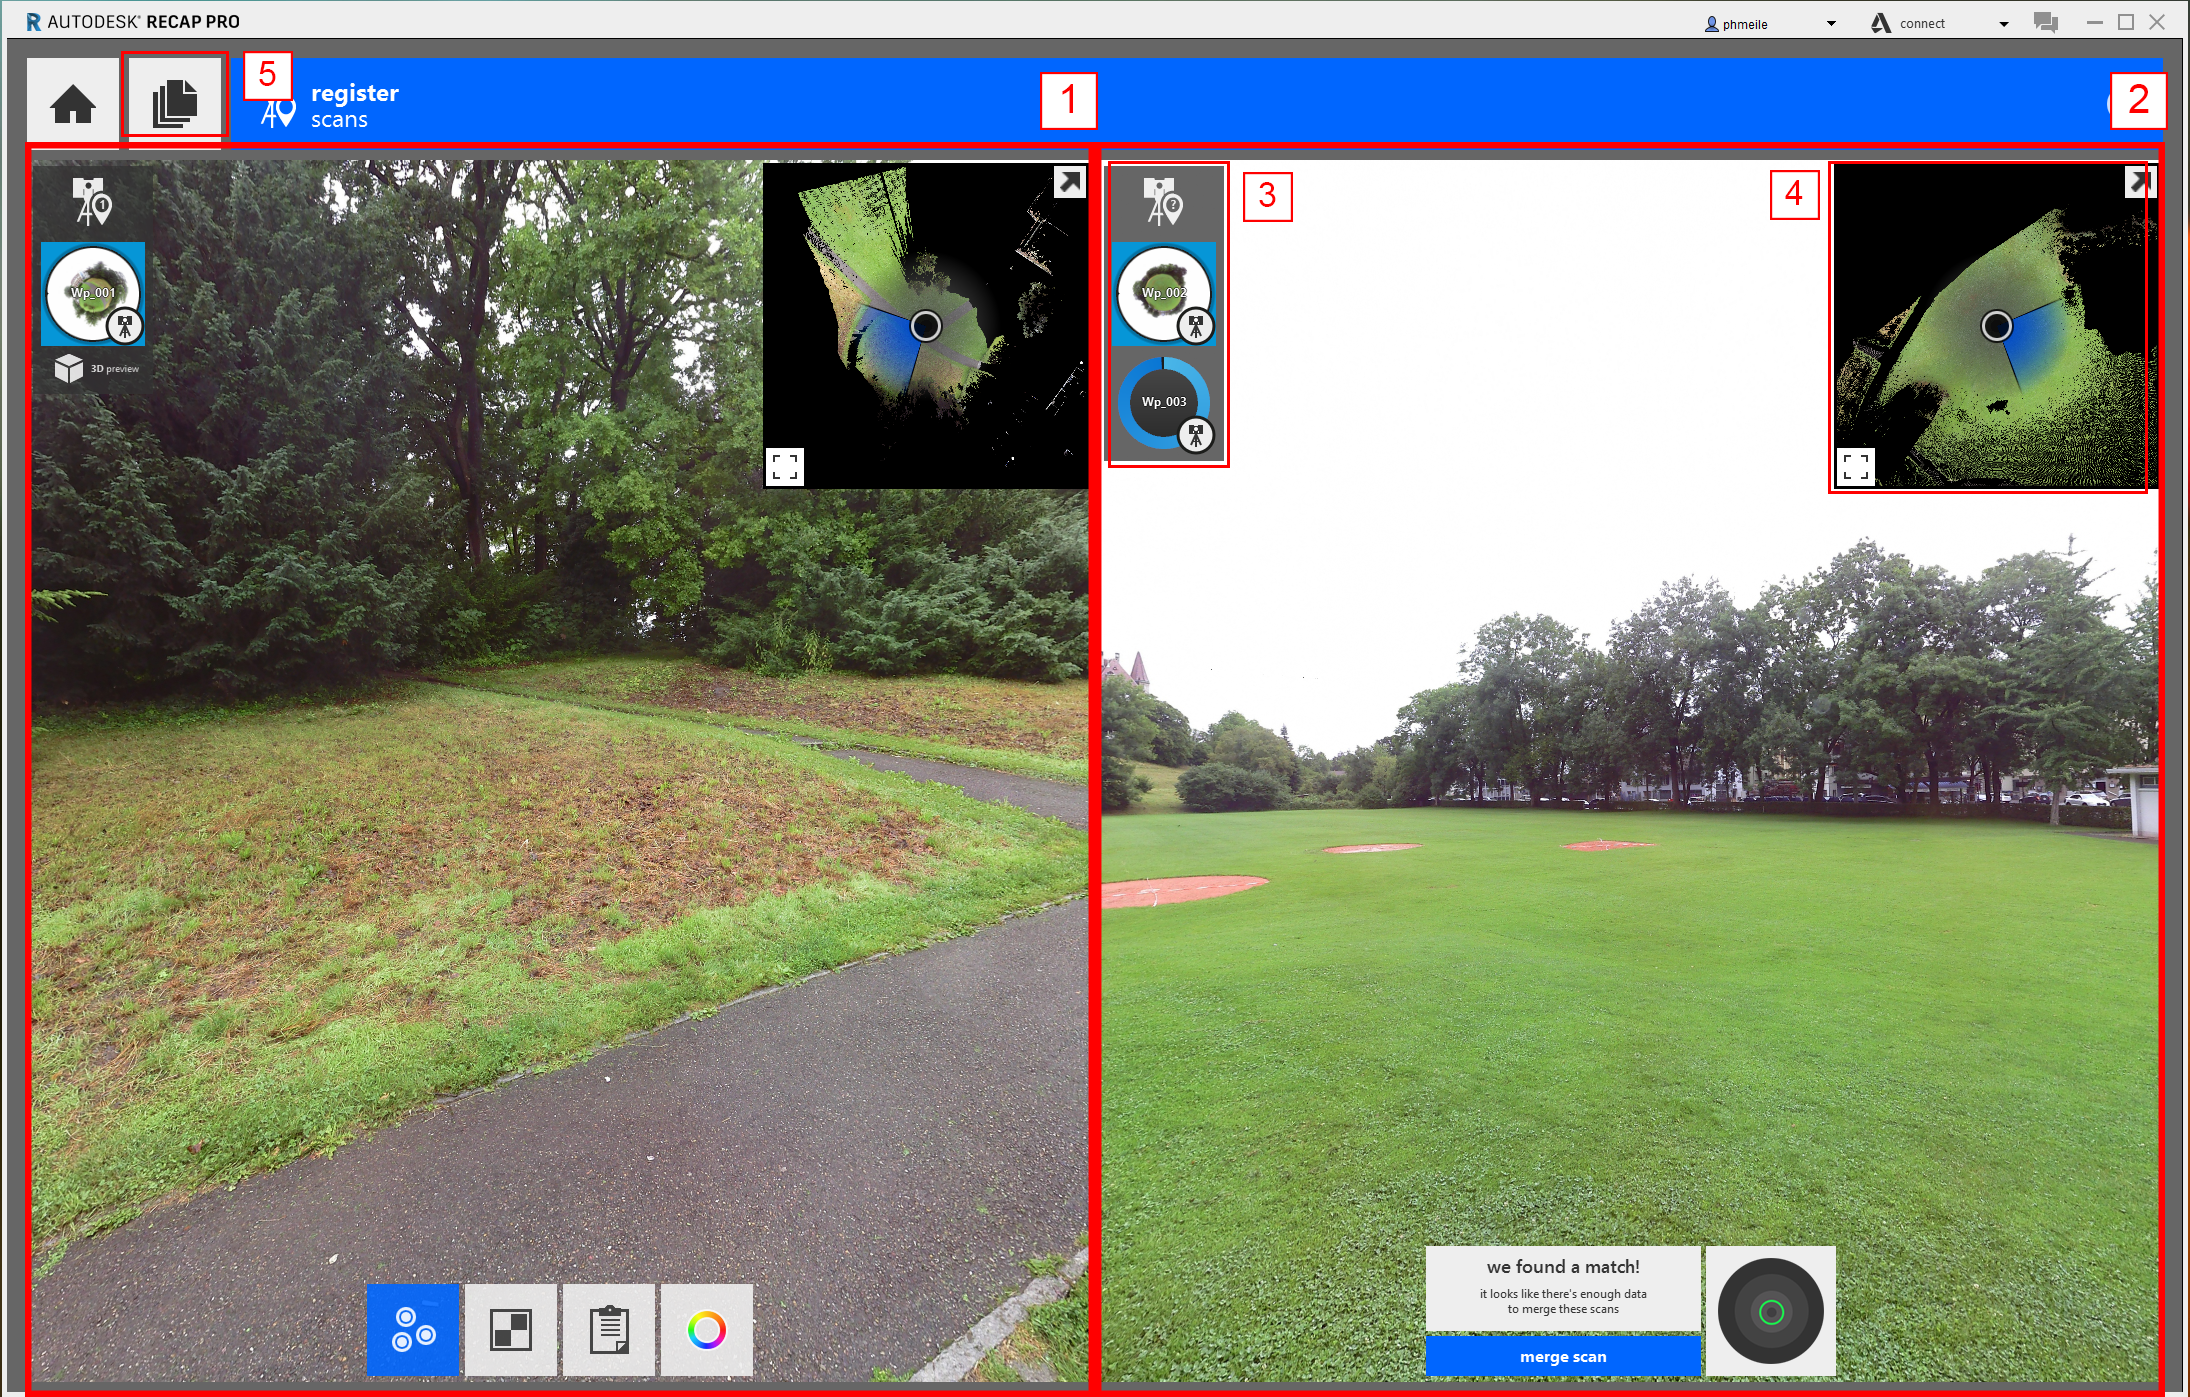
- The left side is your reference side. Here are the scans which are already registered/in the correct spot.
- On the right are the unregistered scans
- Here is an overview of all scans in the project (in the right window unregistered, in the left window registered)
- A small map which indicates the point of view and a top view over the whole scan.
- Here you can go back to the project overview where you can import aditional scans
ReCap automatically starts to compare the scan on the right side with the one on the left side. If it finds a match by itself it will indicated that by showing possible match found . A red sircle means a bad match, a green one a good one. You can then click on “merge scan”. It will start creating an preview, you can open it by clicking on the scan name.
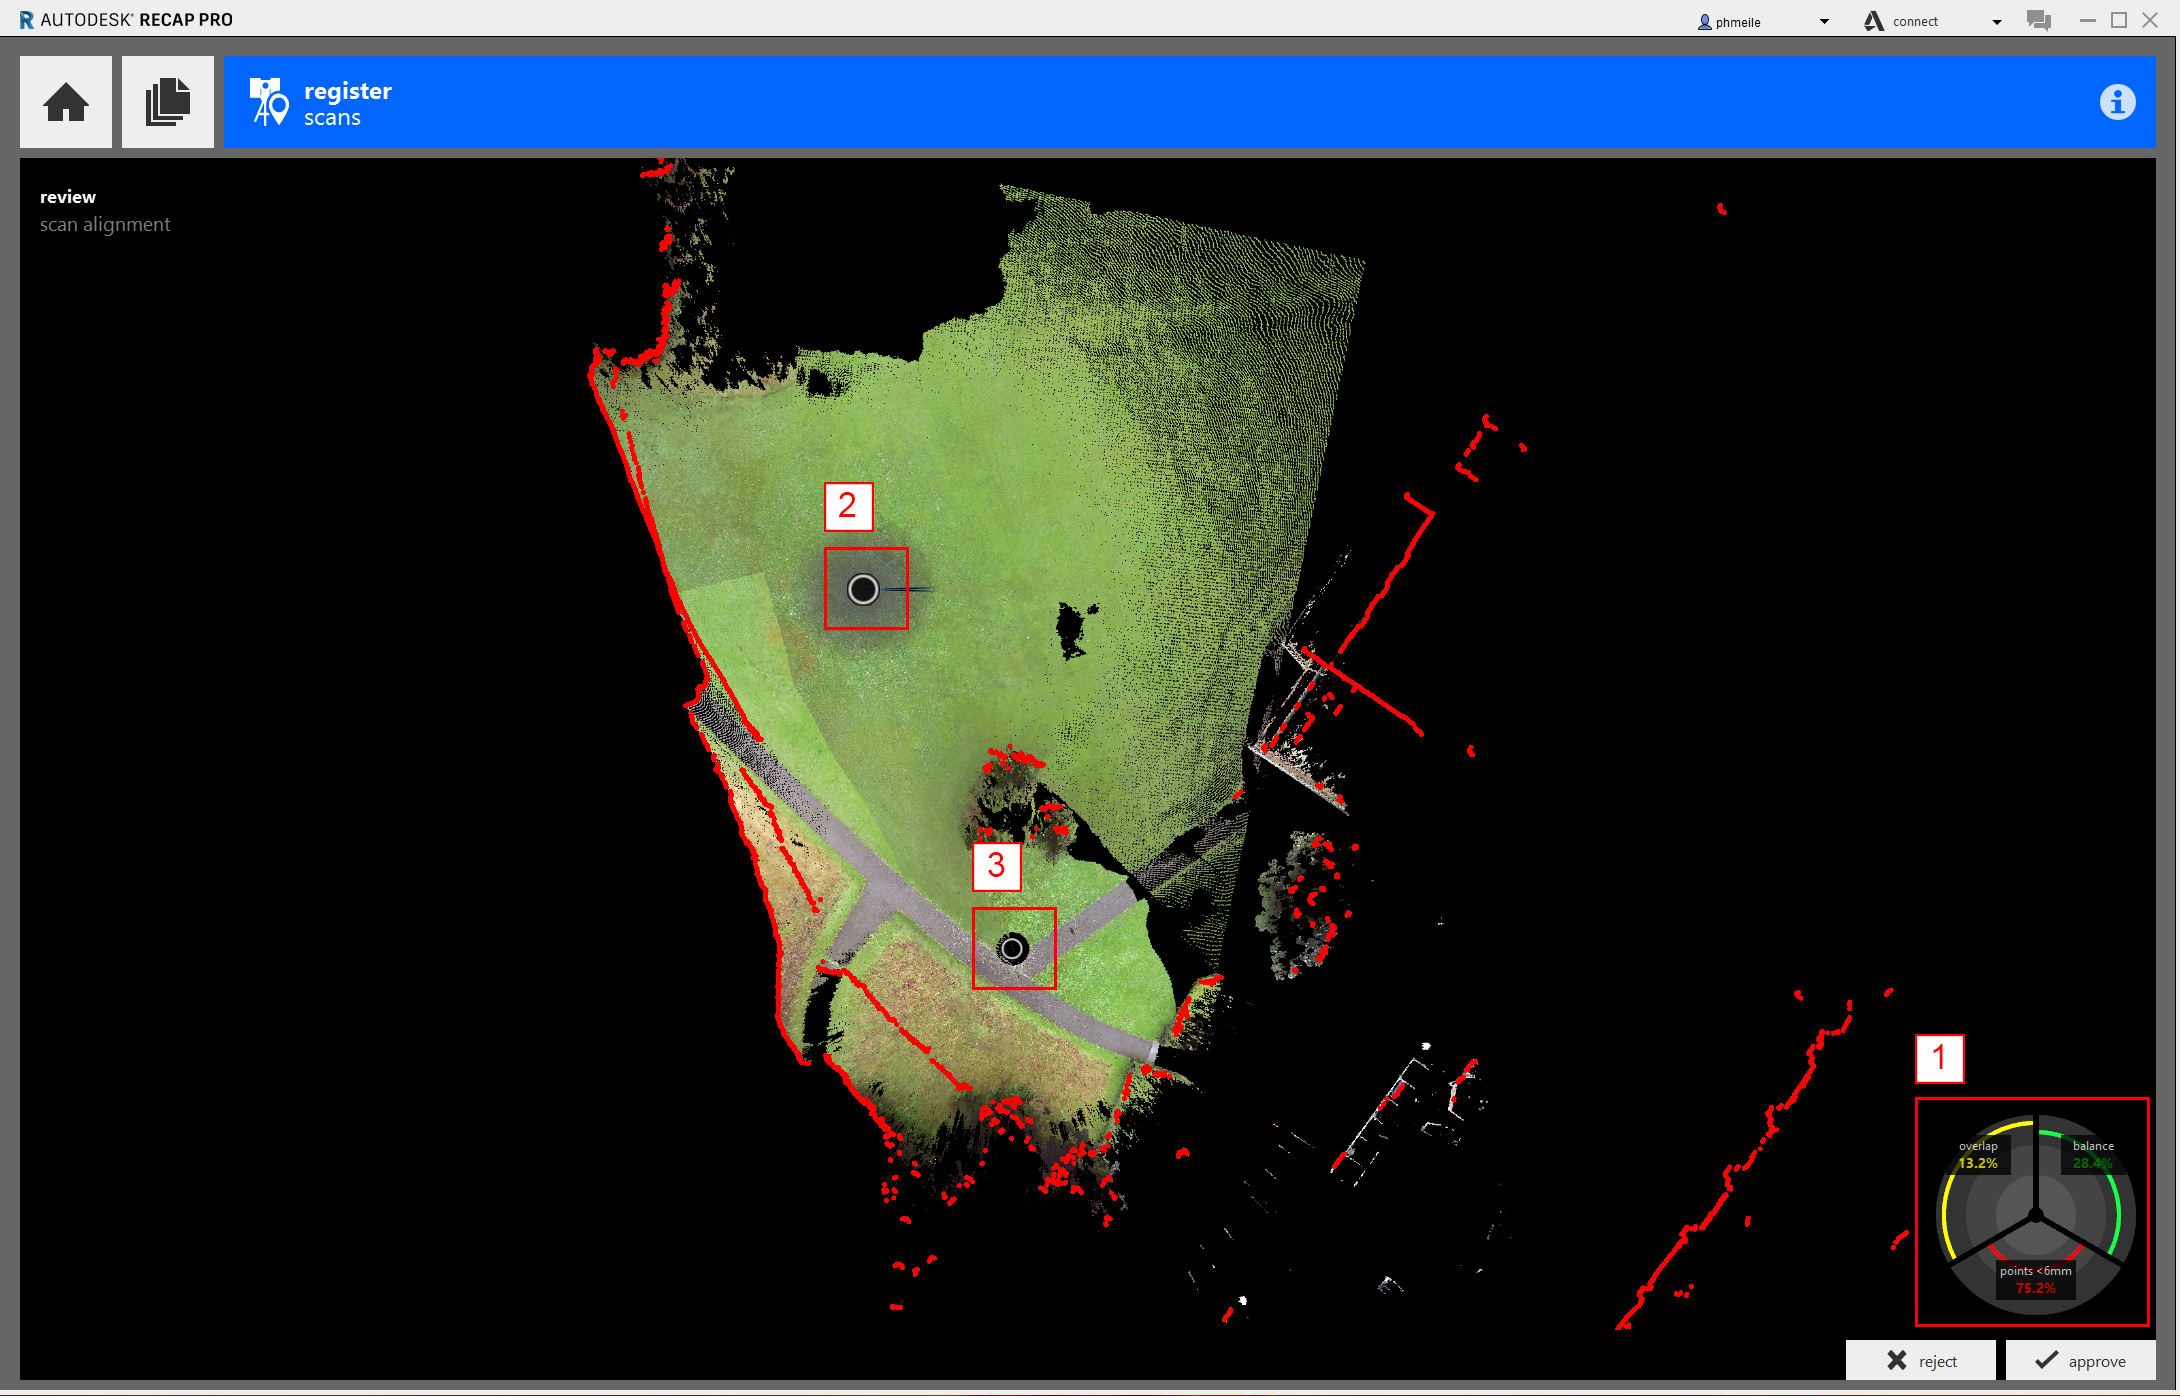
- Overview of how accurat the importet points align with the existing scans
- The scan that will be added to the registered scans
- Location of an already registered scans
By clicking on the approve button it will merge the scan together and it will from now on appear on the left window. You can only compare one uregistered scan with one registered one. Sometimes ReCAP only needs a little manual help to know which scan to compare to which to build the model by itself. If it still does not find a match, you can support ReCap with some additional information.
If the automatic registration merging worked you can skip step 4 and 5.
Additional registration information
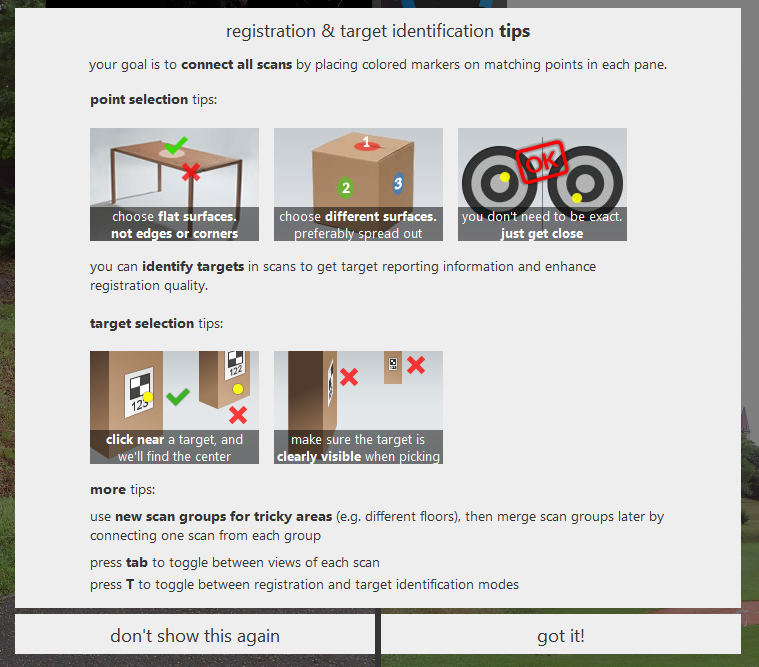
- Survey points - With these points you can identify the same position (e.g. a road sign) in both scans. You can place three points in total. Click on one position in one scan and then select the same position in the other scan with a decent accuracy. Survey points work best if placed on large to medium surfaces (walls, road signs, curb stones etc.). Avoid putting them on edges or surface with an extreme angle to the scanner location.
- Targets - these can be useful to improve registration in an enviroment without a lot of point features, like a wide open meadow. These are print-based targets which can be downloaded for example at FARO (https://faro.app.box.com/s/yy547o3p8lcpzdr2dra6phmjianvgukm). After all you can also use any object with clearly visible surfaces (e.g. a suitcase) as a target as long as you do not move it between scans.
- This is a report on how accurately your scans are registered considering the overlap and the amount of overlapping points and the distance between points in the same area.
- Switching from RGB to intensity mode. Switching to the intensity mode can be helpful to identify scanned surfaces that would have otherwise been invisible in RGB mode. As colour is not used at all to register scans the intensity mode is more reliable for identifying survey points.
You can support the merging process by placing some survey points. ReCAP itself already has a very good guide on how to place them at the launch of the registration-process (see picture below)
Target Groups
Sometimes it makes sense to split up your project into smaller parts (e.g. when working with multiple people at the same project at once). In this case you can index some scans in one project, save this project (.rcp file) and then import the saved project into another one by clicking on “import files” in your project overview. This will open up the project side by side; after aligning just one scan correctly and it will automatically move the whole project to the right place.
Launch project
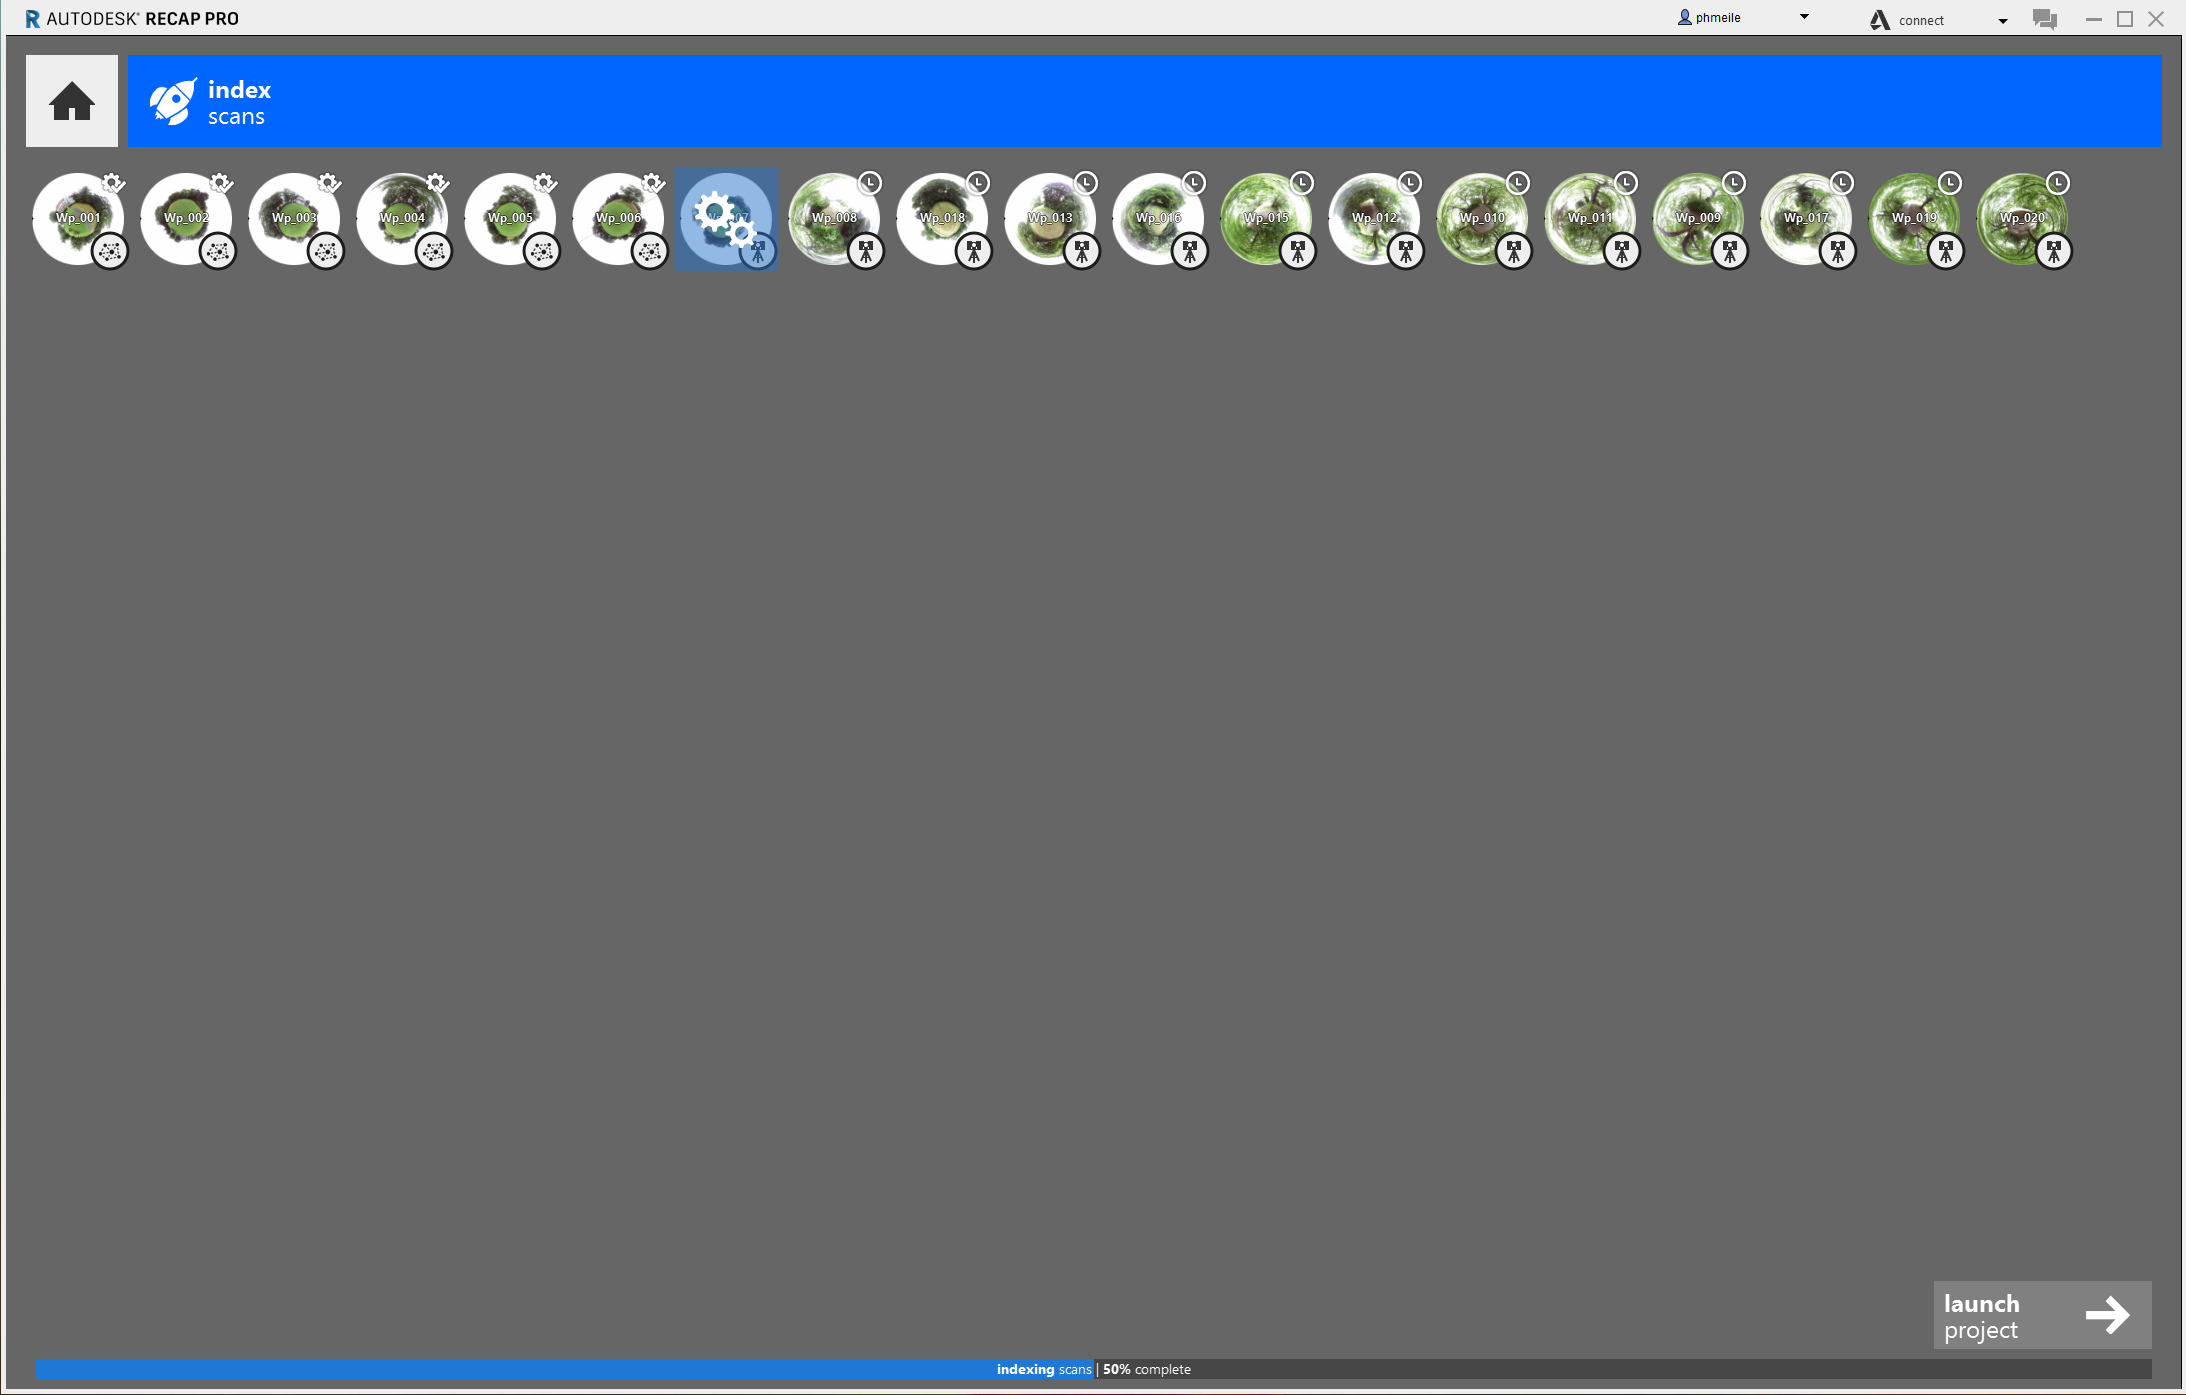
When you have registered all scans/projects you get back to the project overview where you now will find the button “launch project”. The indexing process can take a few minutes.
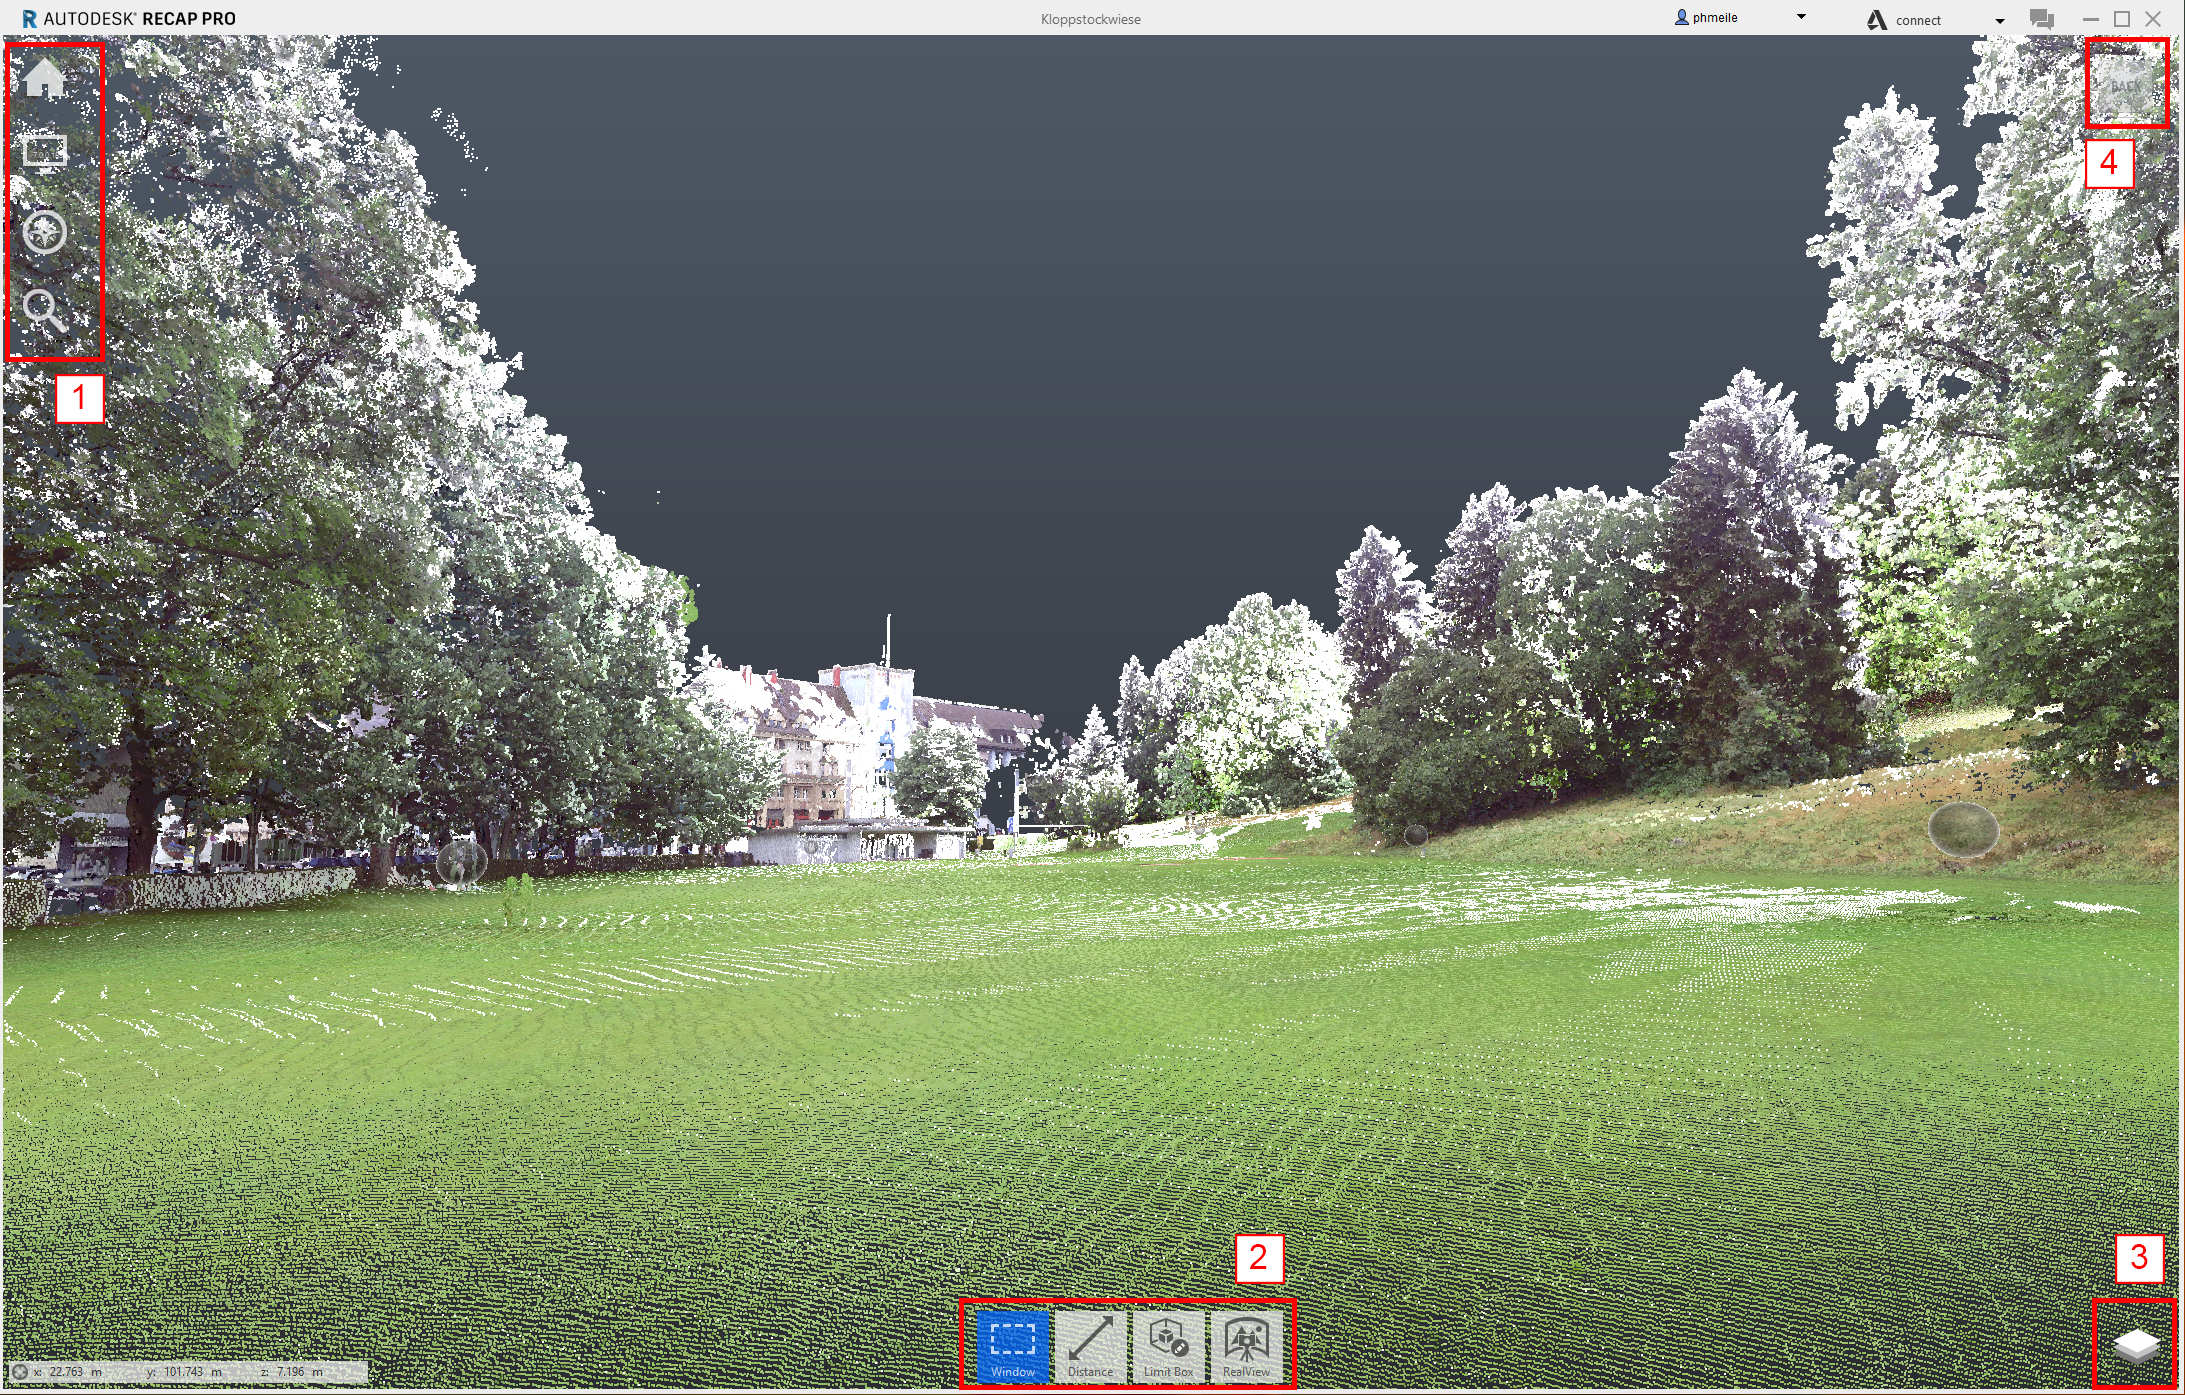
- Project Menu - this menu analyzes and organizes components of the project.
- Contextual Menu - selecting points, measuring, limit box and real preview.
- Project layers - here you can show/hide different scan and organize them into groups.
- View Cube - gives you an overview from which perspective you are looking at your model.
- Project menu
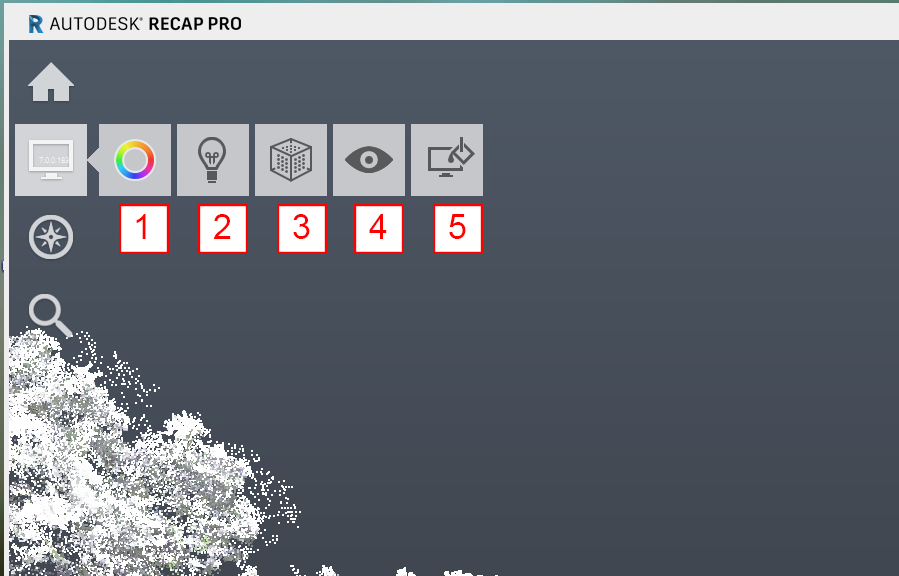
- Color Mode (different analytical display modes)
- Lighting settings
- Point toggles
- Visible objects
- Background color
- Color modes
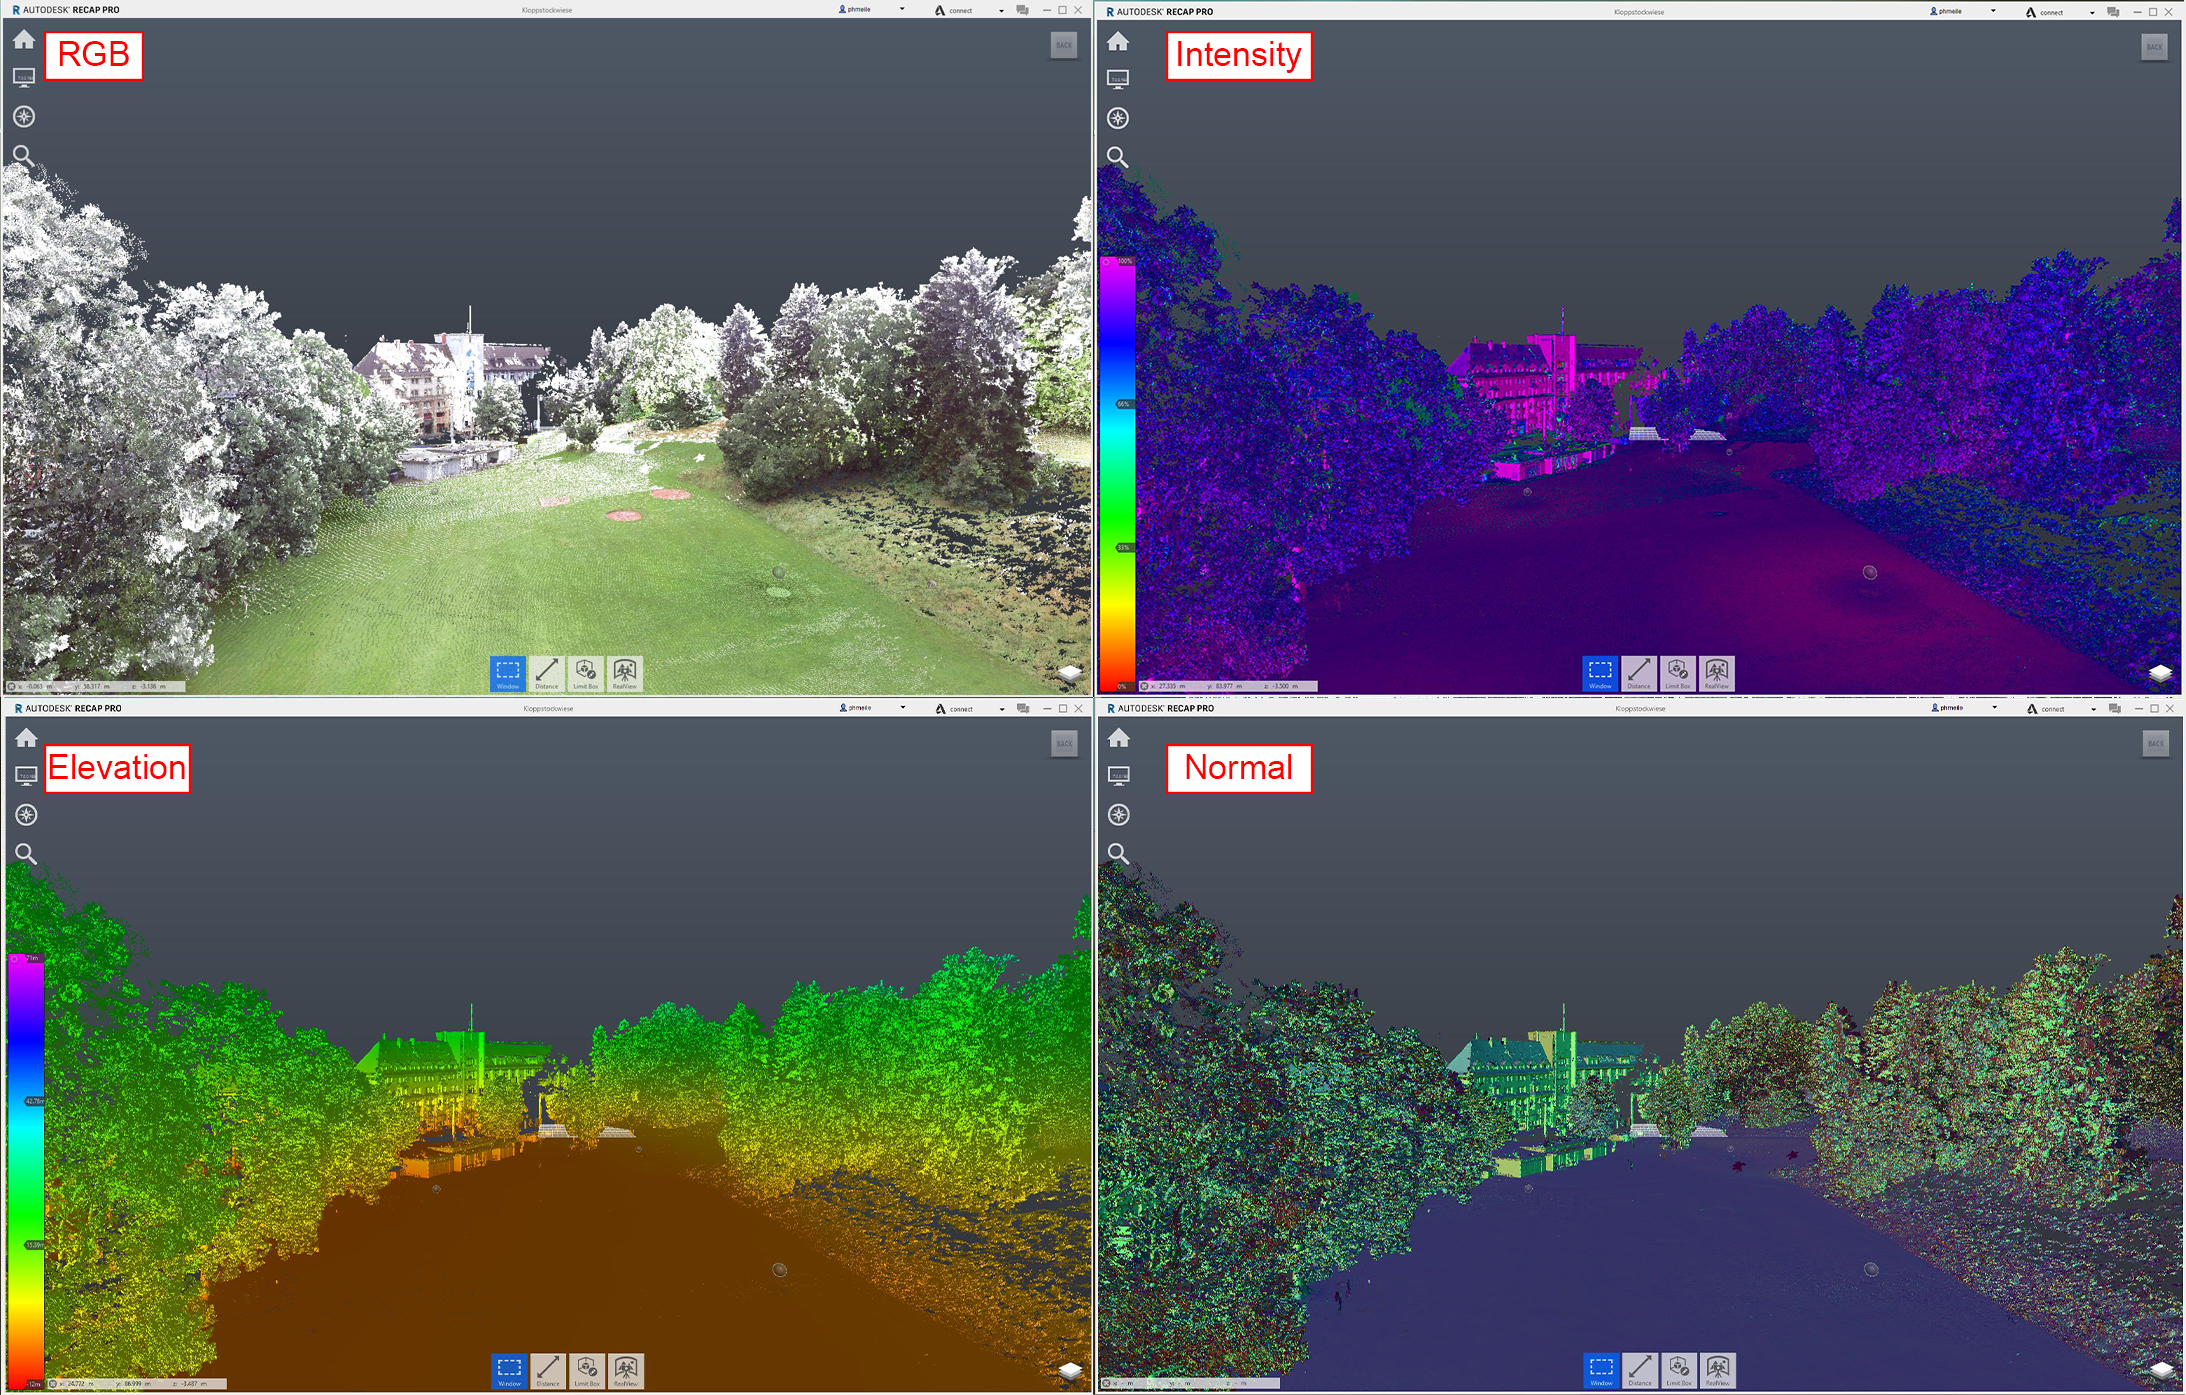
- RGB: Shows the pointcloud with the coloured dots “photorealistic”
- Intensity: Shows the density of the points. red is undense, purple perfect dense
- Elevation: this display mode will colour your points depending of the value of the z-axis.
- Normal: Display points with colours assigned to the X, Y, Z values associated with the direction of the normal for the point.
##### - Navigation
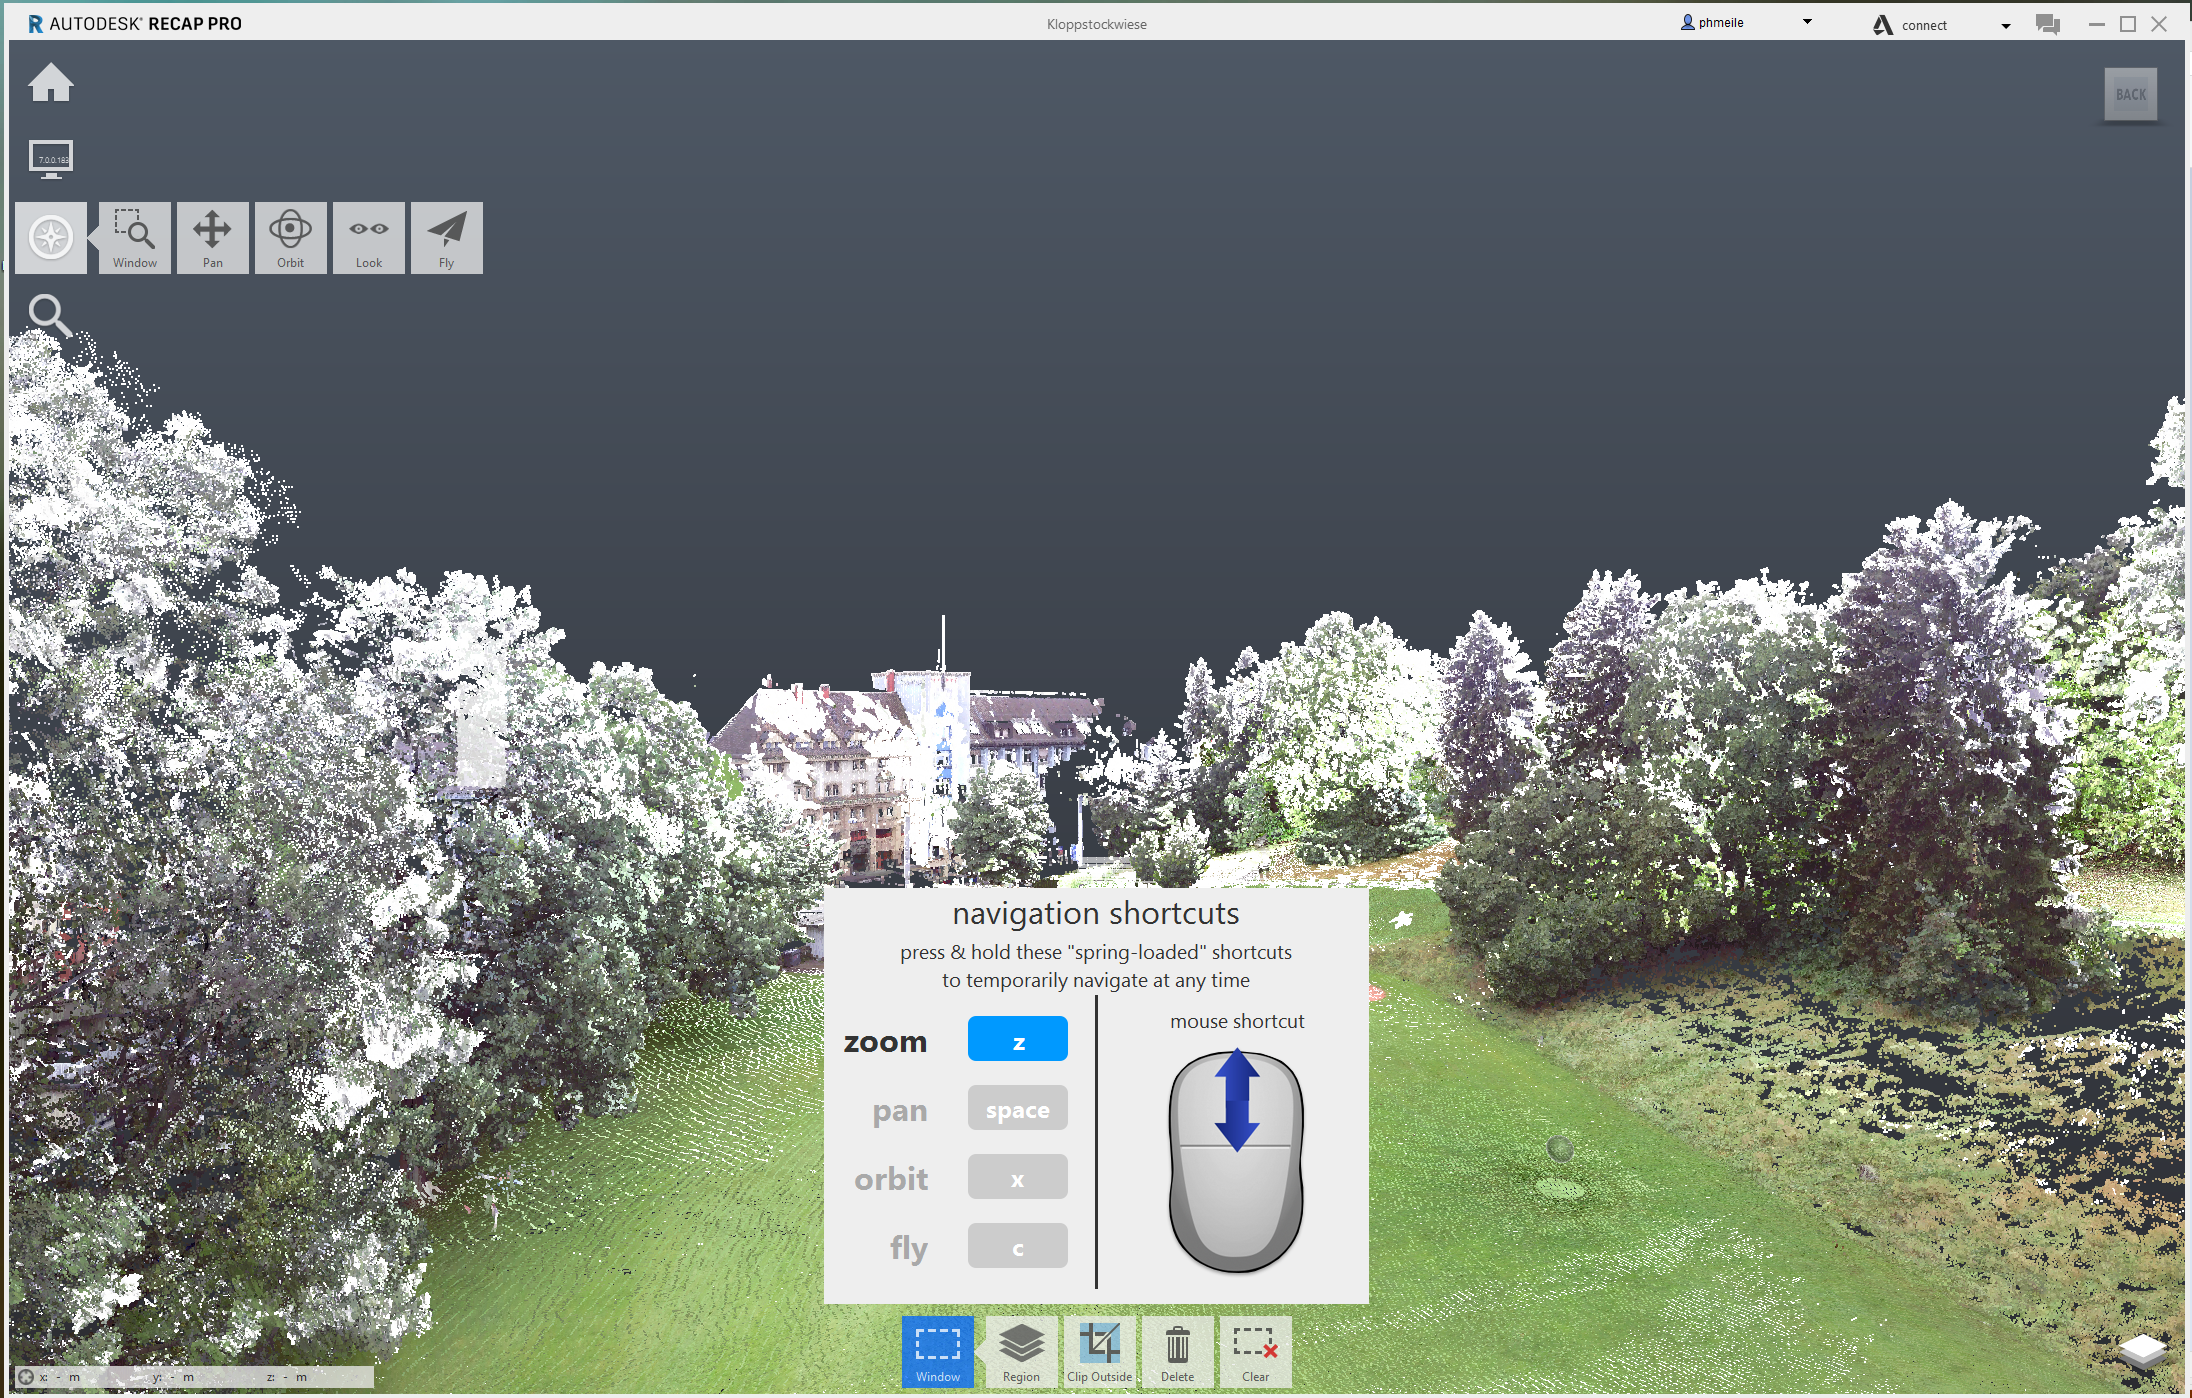
The navigation through your model works similar to CAD (Rhino).
- Pan (middle mouse button (scroll wheel))
- Zoom (scroll wheel)
- Orbit (right mouse button)
- Fly (Hold down shift+right mouse button. The scroll wheel controls the speed)
Edit your pointcloud model
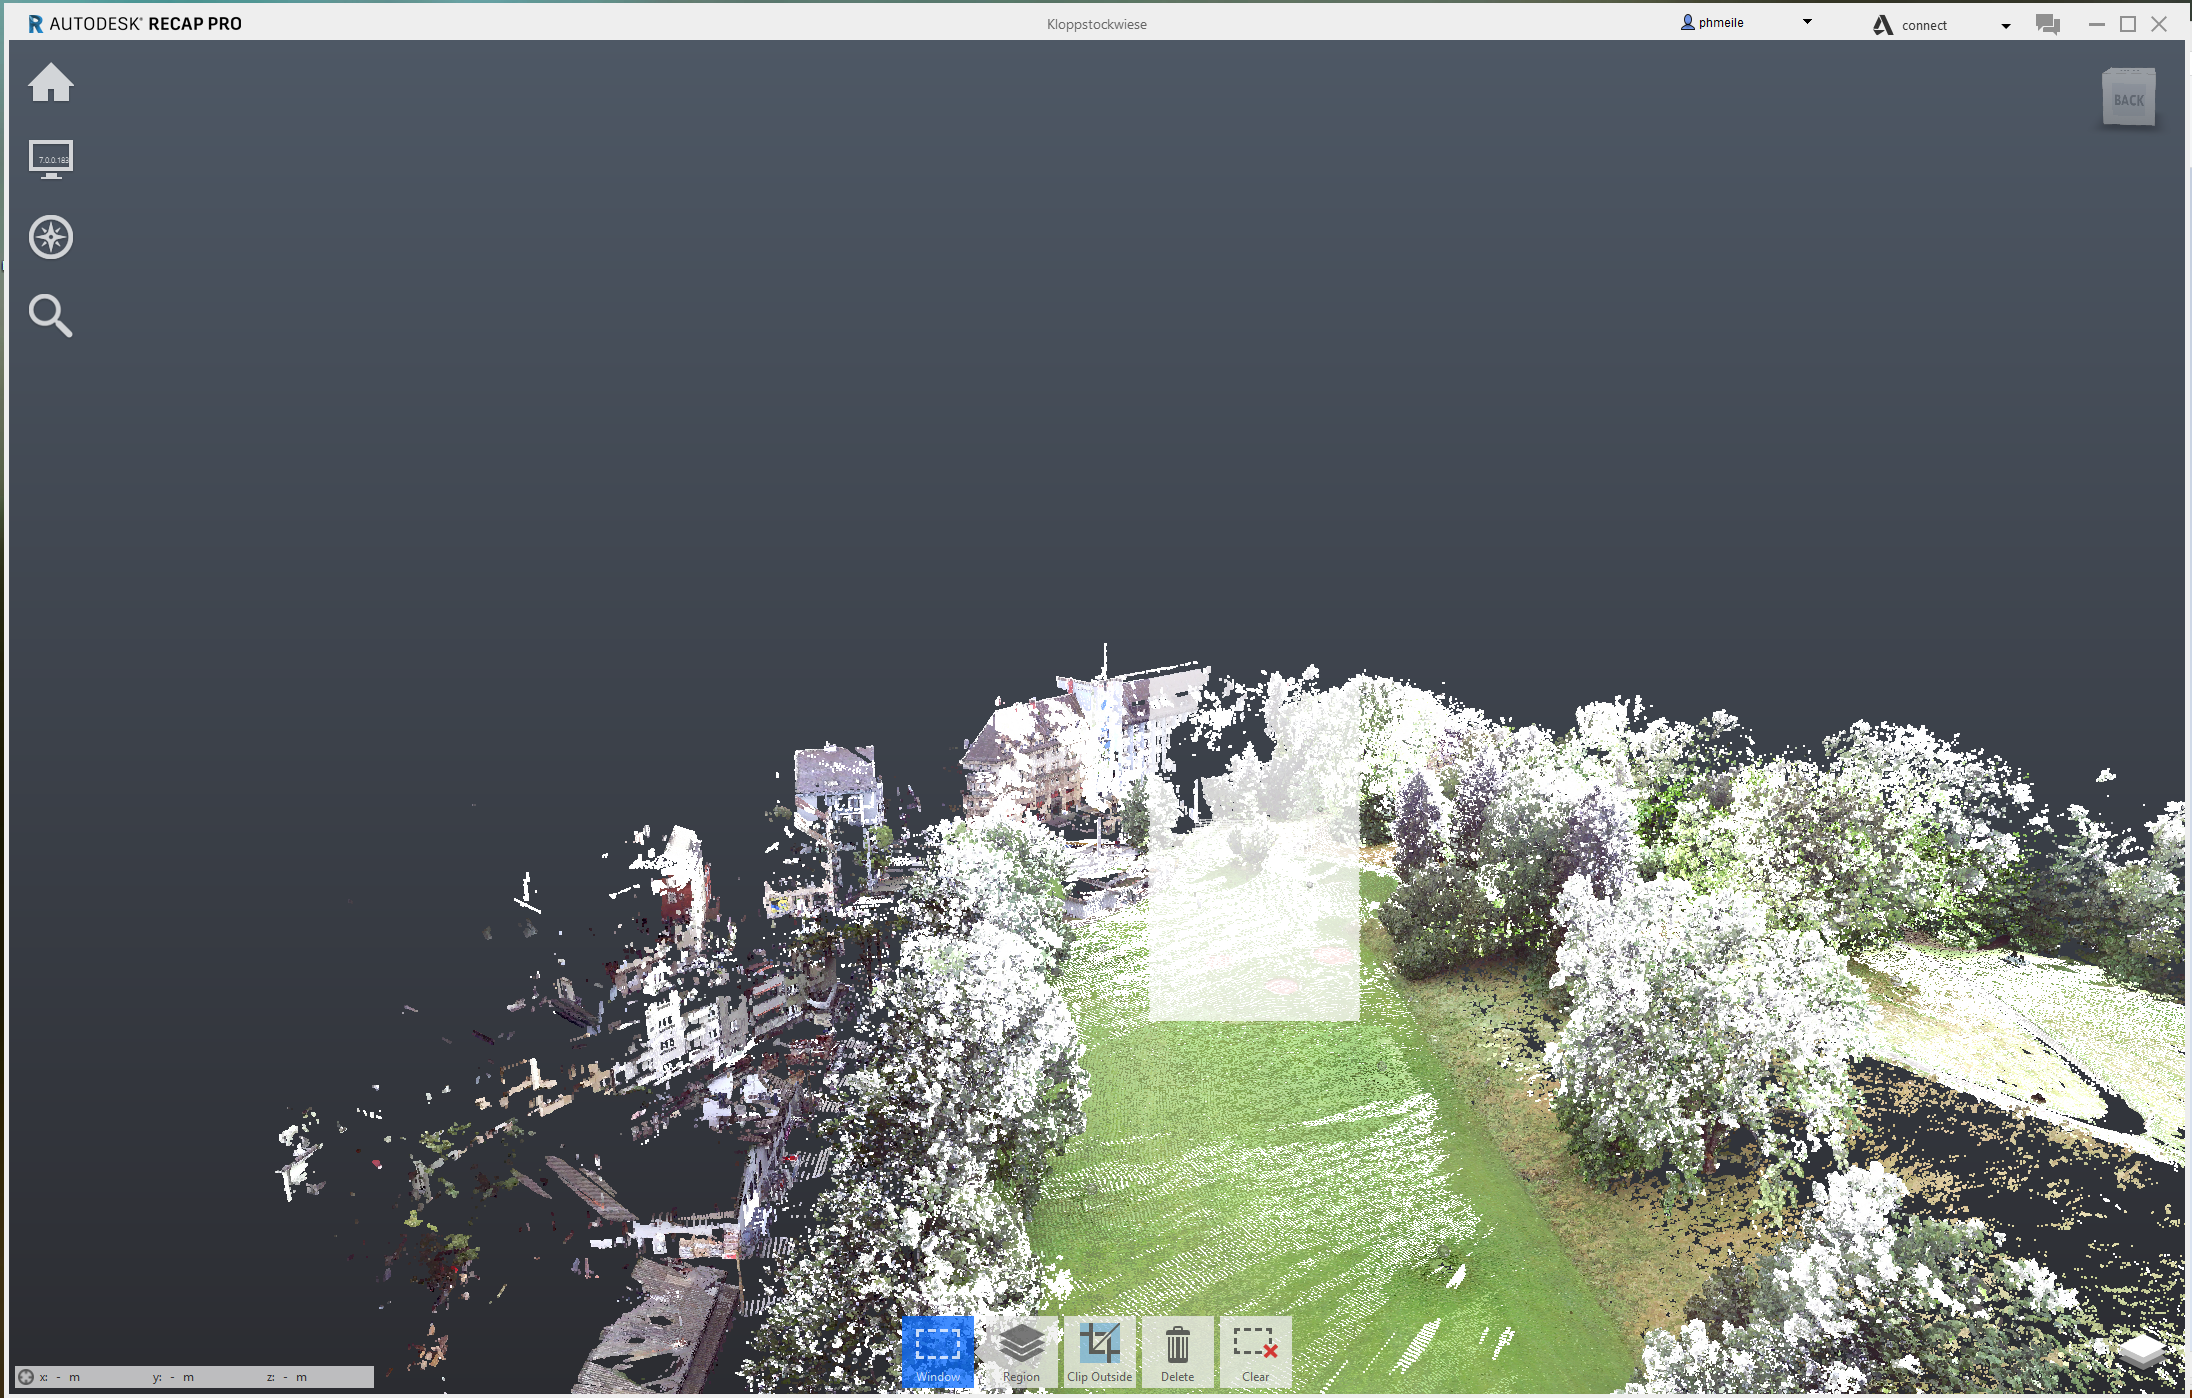
You can do certain edits (point deletion) of your model inside of ReCAP (much better than in CloudCompare, so do it here). Just select the points by dragging a frame around them and press the delete button. Make use of the Command “Limit Box”. It allows you to crop your model to a specific area inside of a box. In this way you have a better control over the points you want to select.
Export
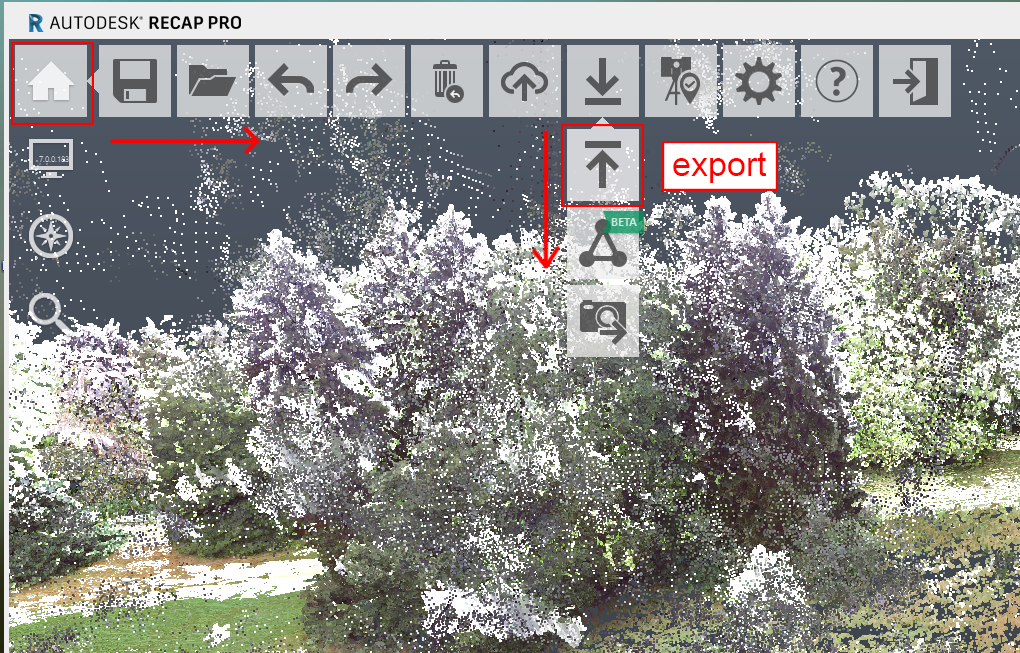
The final step is to export your model. (Shortcut: ctrl+e).
- .e57 or .laz: Very compact formats to store pointclouds.
- .pts, .pcg, .rcp, .rcs: Formats proprietary to Autodesk; not recommended if you use programs outside of the Autodesk software family (like CloudCompare).
- after exporting make sure if all desired information is preserved in the exported file. Some formats do not support storing RGB or intensity data.